


")


 Tokens Playing This P2E Game")

In our previous article (part one of this series), we have explained how you can install MetaMask, create and Import wallets, and provided details of the supported features. In this article, we will explain how you can connect your MetaMask wallet with Uniswap and perform a transaction.
Uniswap is a decentralized exchange that allows users to trade on any crypto pairs. Many new projects are now directly launching on Uniswap. Uniswap (paired with MetaMask) is a powerful decentralized exchange.
MetaMask wallet connection setup with Uniswap
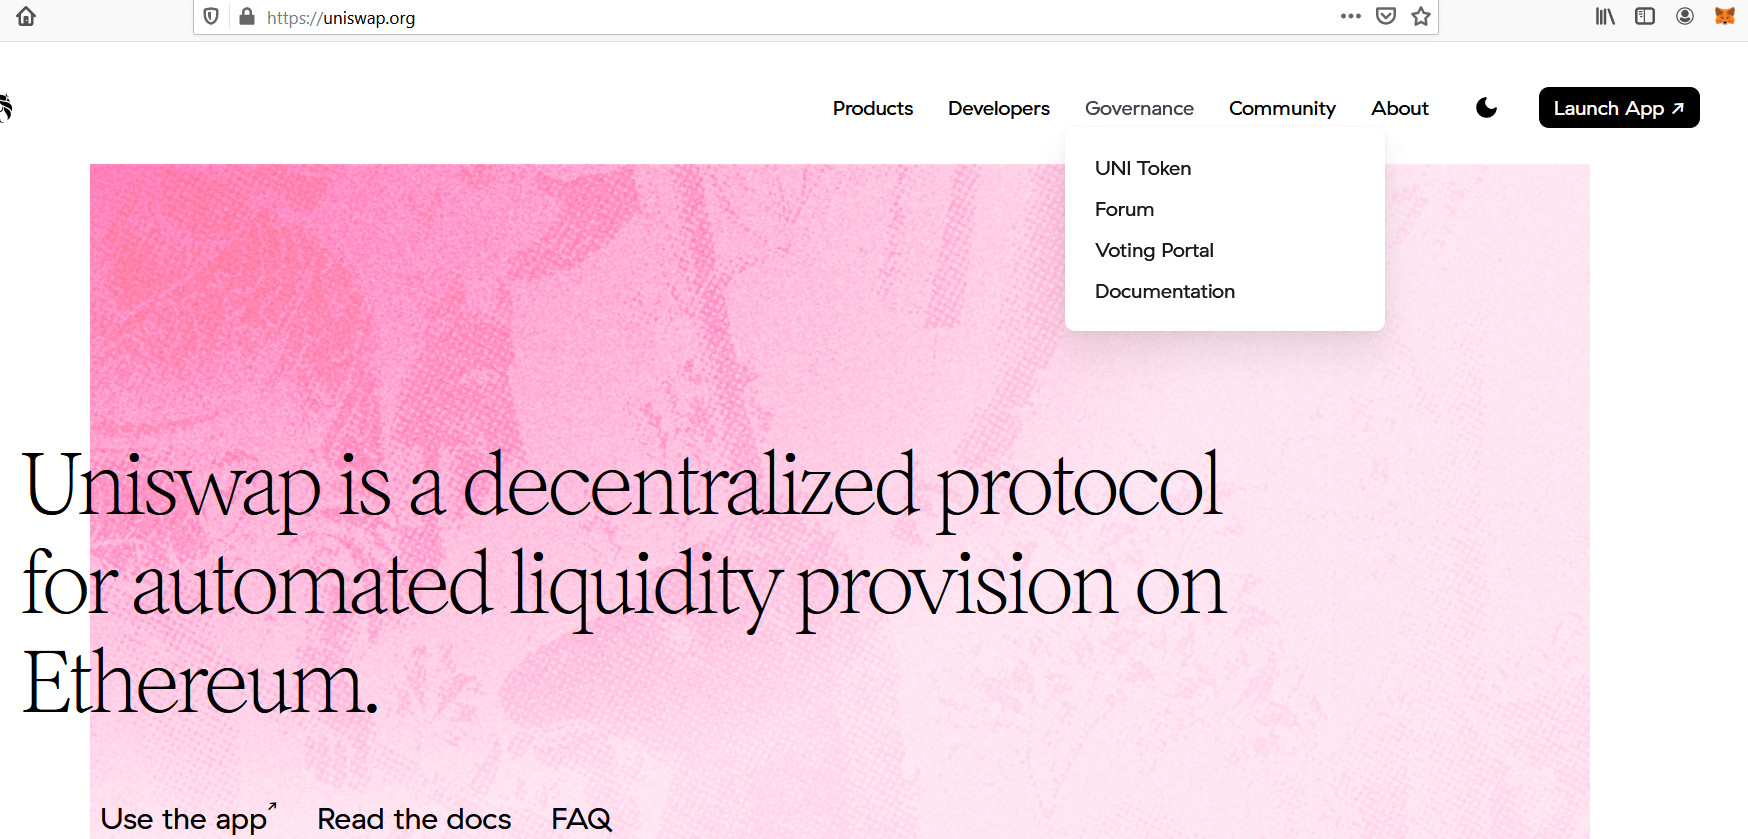
Visit the Uniswap site.
Click on the Launch App button. You will be re-directed to another page.
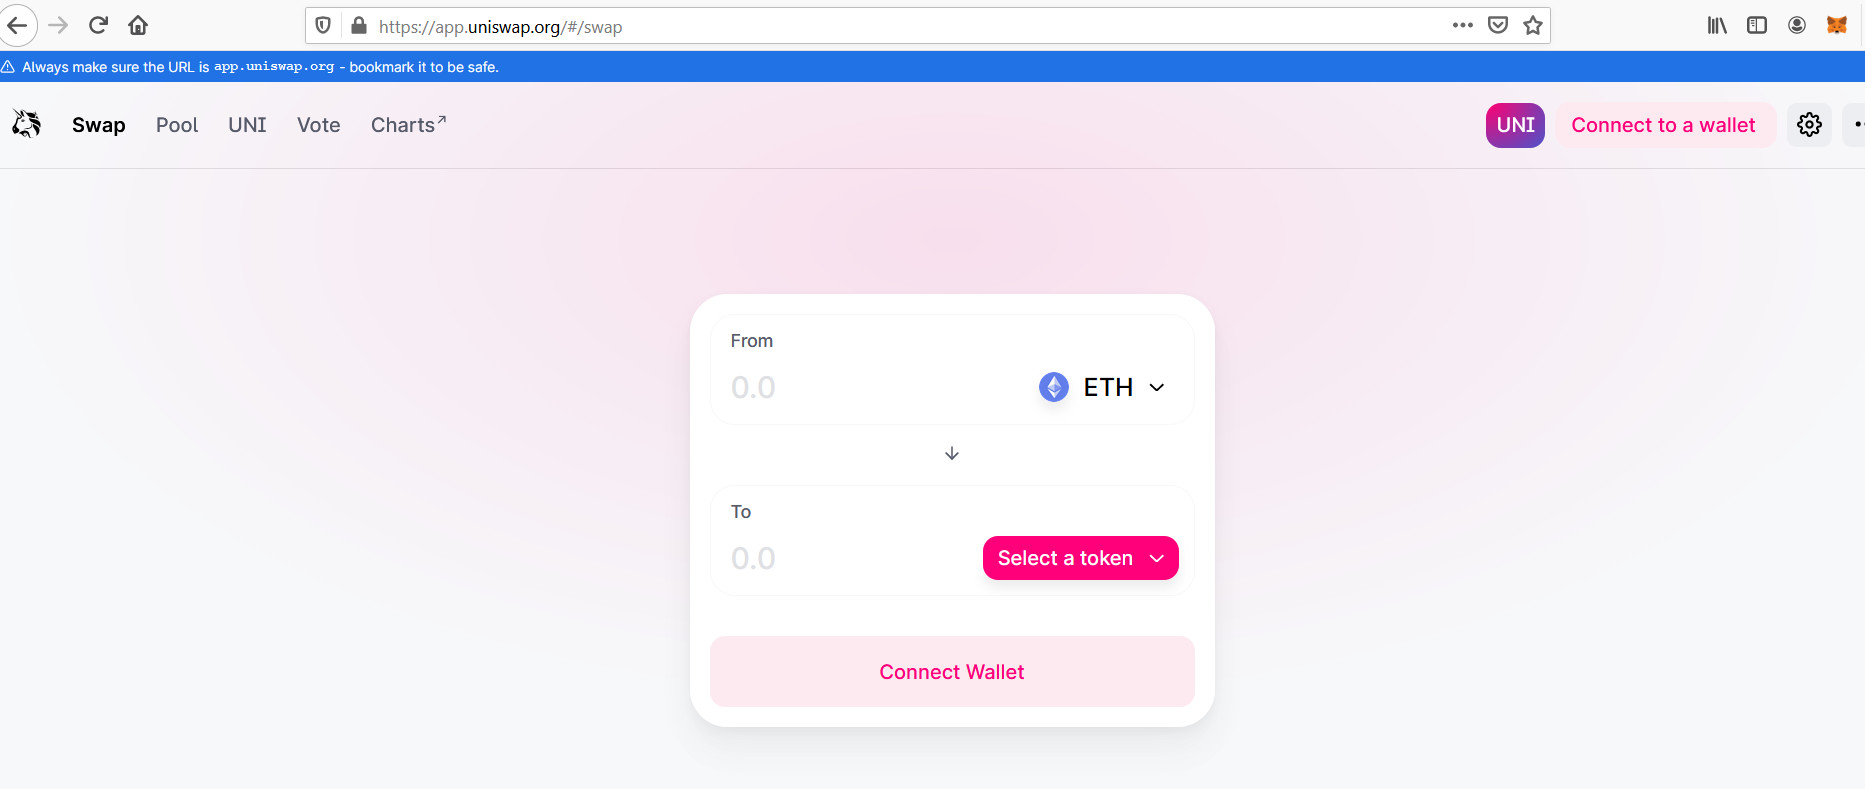
Before starting any process, you have to connect your wallet. Click the Connect to a wallet button.
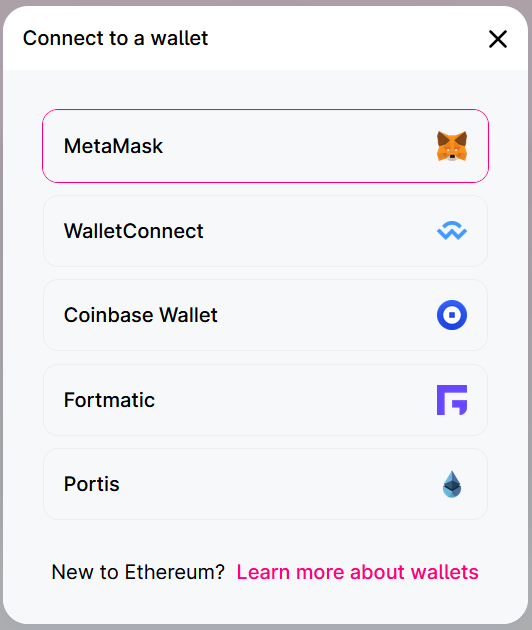
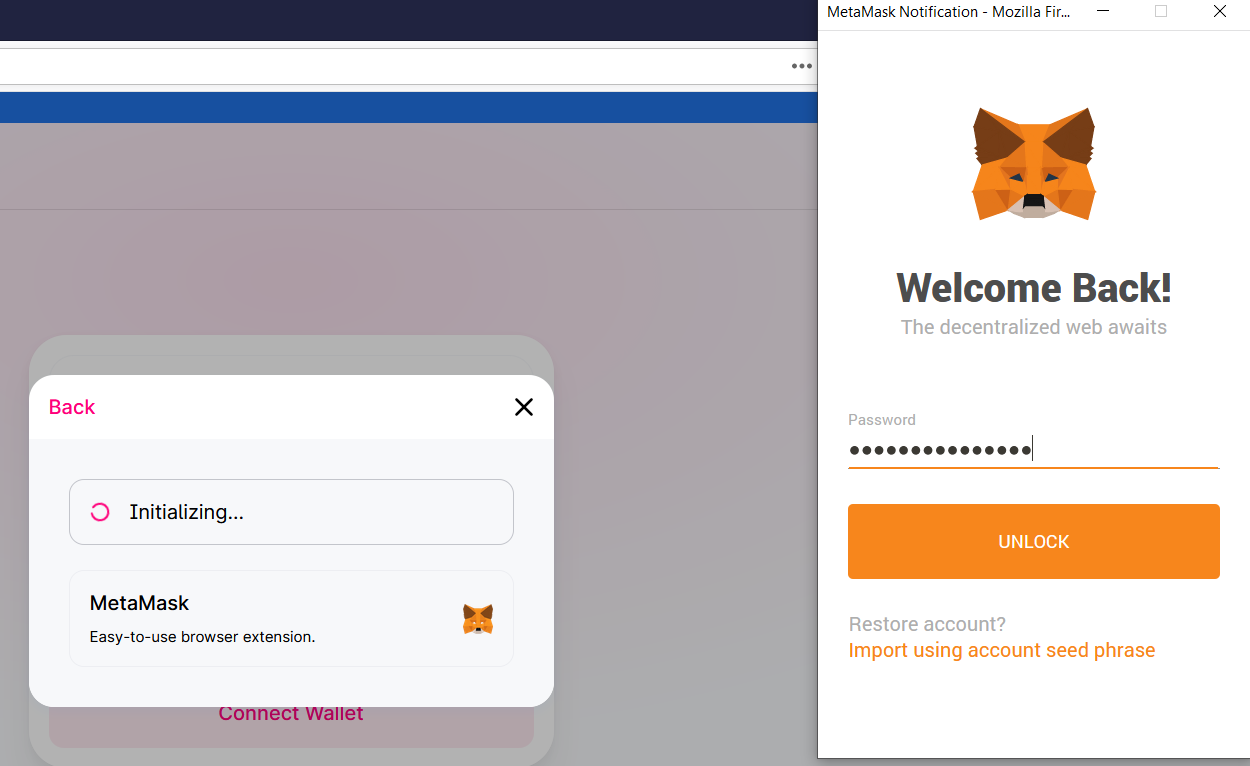
It will give you a list of wallet to connect. Choose MetaMask. The MetaMask app will appear and will ask you to provide your wallet credentials. Provide the correct details.
Note: We have already explained how you can set up the MetaMask wallet in our previous article. Refer to it if you have not yet set up a MetaMask wallet .
Once the connection is successful, you will be able to see your account details.
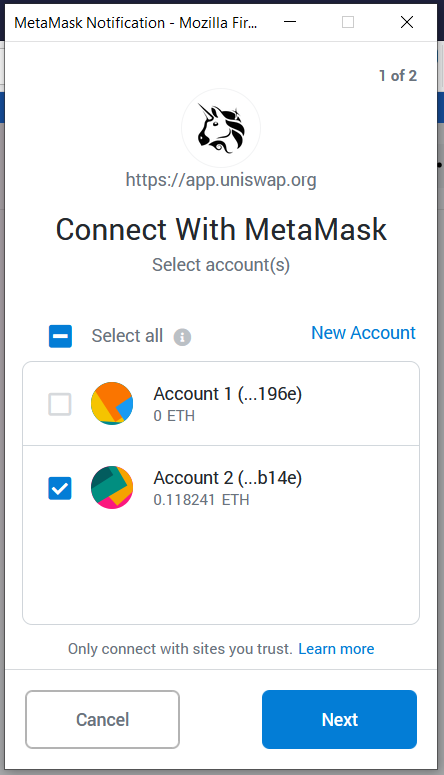
Now the app will ask for your permission to connect your account with the Uniswap site.
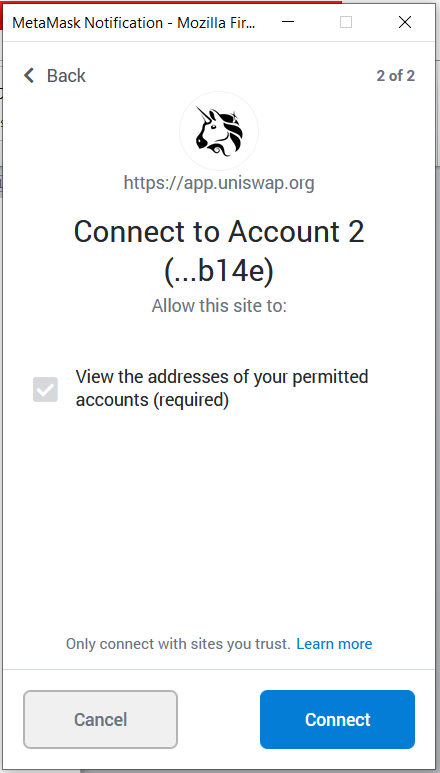
Click on Connect to establish the connection.
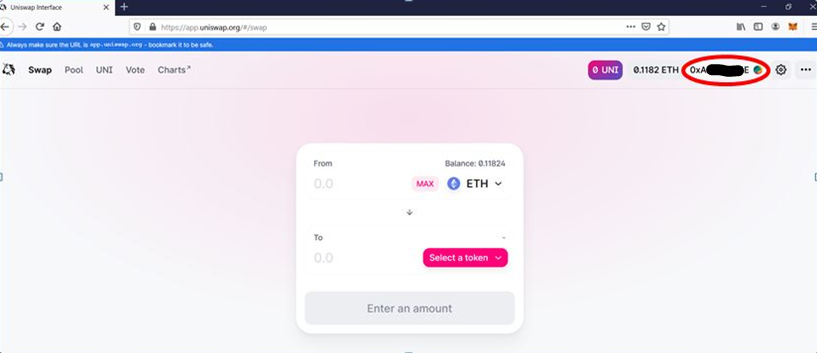
Your wallet will then connect to the Uniswap site.
Uniswap mainly supports two major features:
- Swap
- Pool
In this article, we will focus only on the Swap feature.
Swap
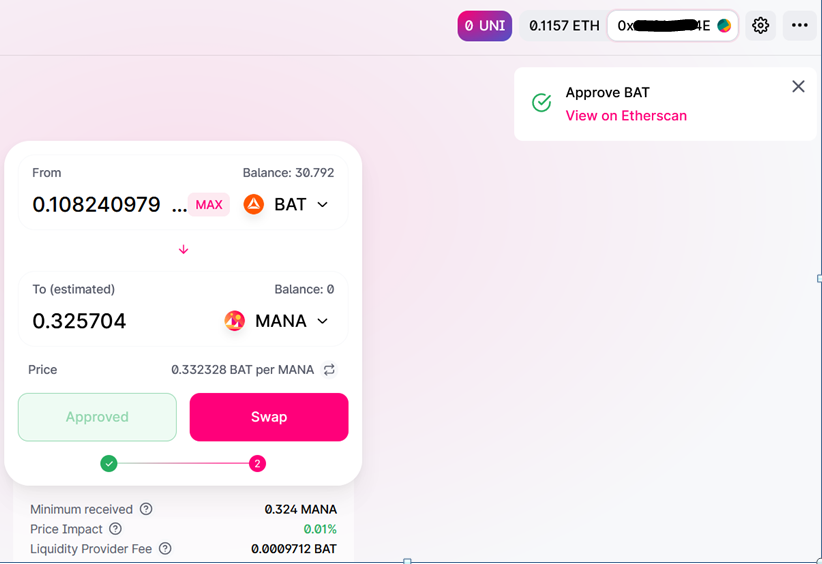
By default, you are on the Swap page. As the name implies, you can swap tokens here. Just select the input and the output token and input token value. The Max button allows you to swap your entire token value. The system will automatically calculate the resultant output token value.
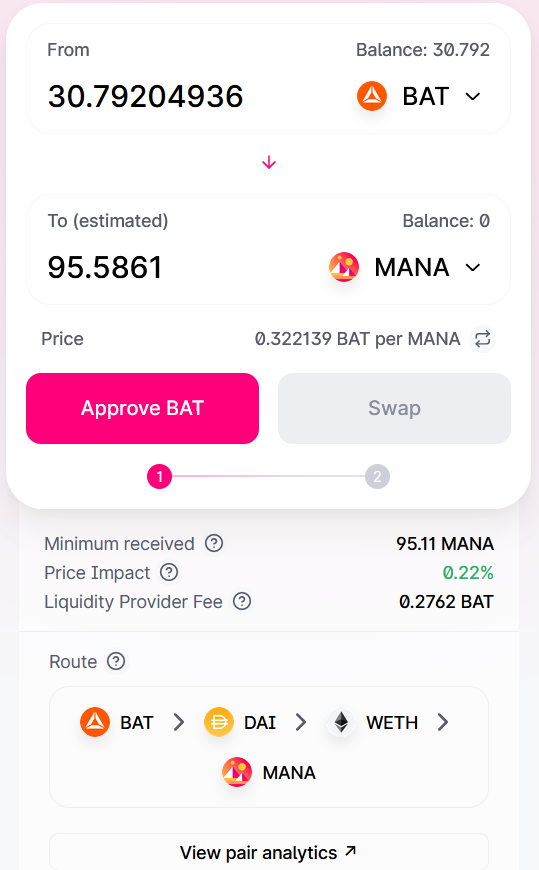
Note: If you are trading a new pair, the system will first approve the pair and then let you swap.
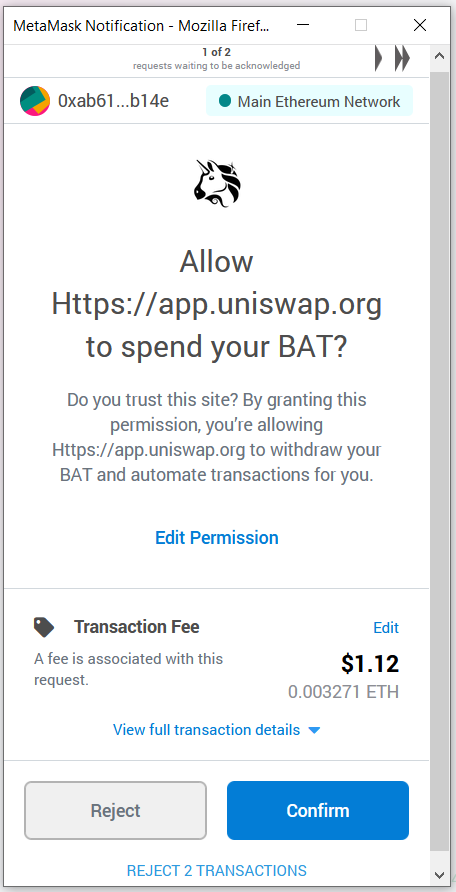
You can also customize the gas fee from the edit tab and speed up transaction processing.
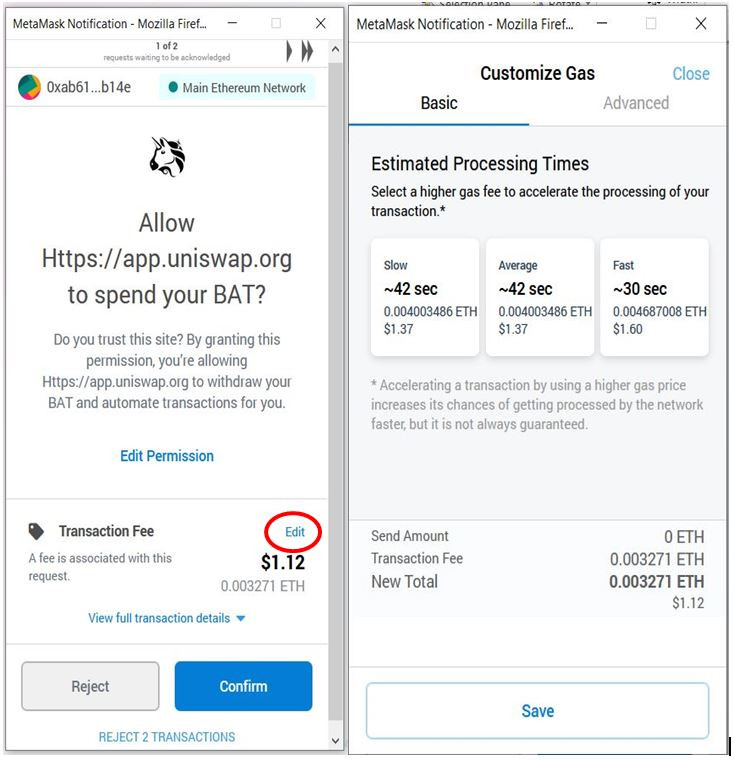
Select the Confirm button after adjusting your transaction parameters. The system has submitted your swapping pair for approval. You can see the Pending status icon and Approving button. See the below screenshot.
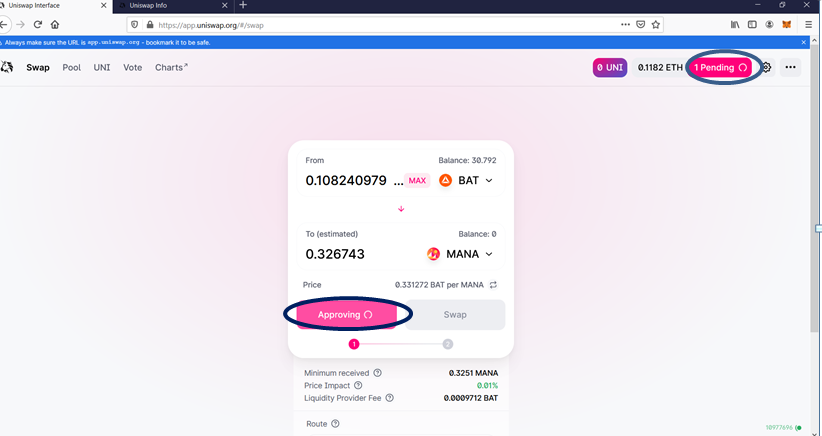
If you want to check the status of your swap action, just click on the Pending button and a window will appear containing your transaction.
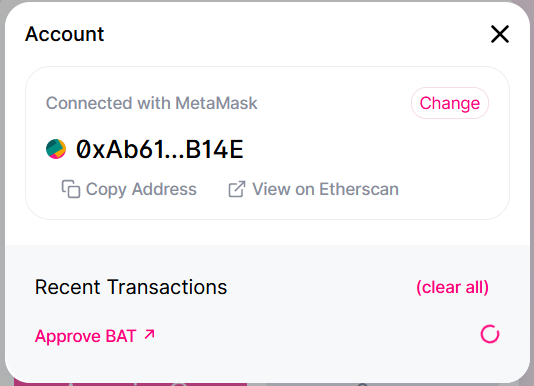
If you click on the transaction, i.e., on Approve BAT, you will be re-directed to etherscan where you can check your swap pair approval status.
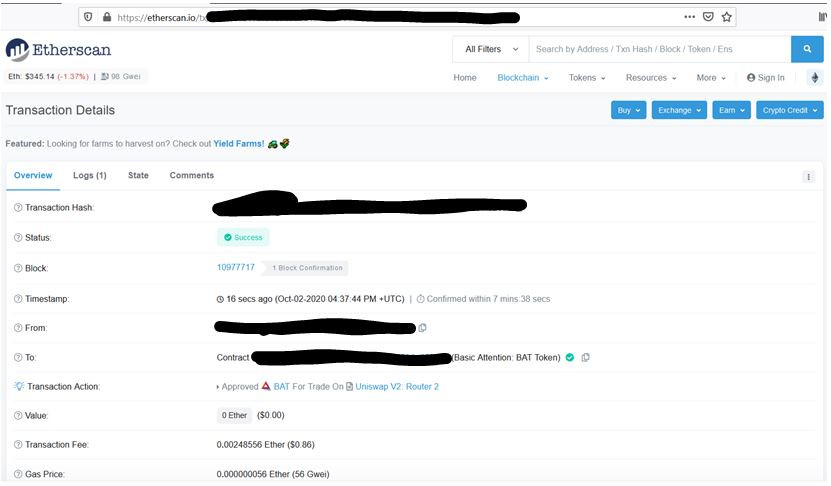
The system has approved the swap pair. You can now proceed with Swapping.
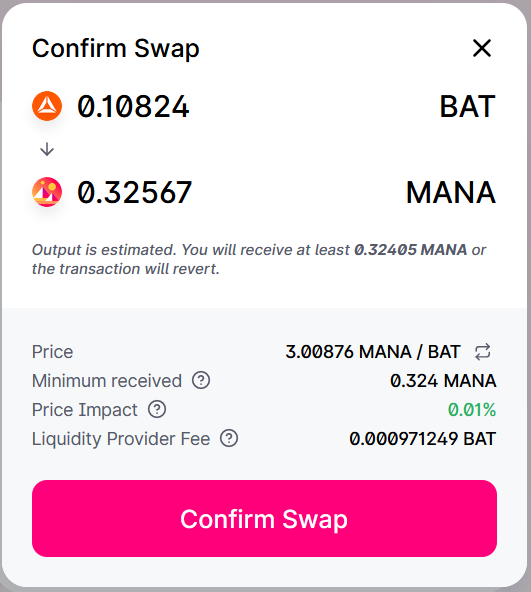
Click the Swap button, it will ask for your confirmation.
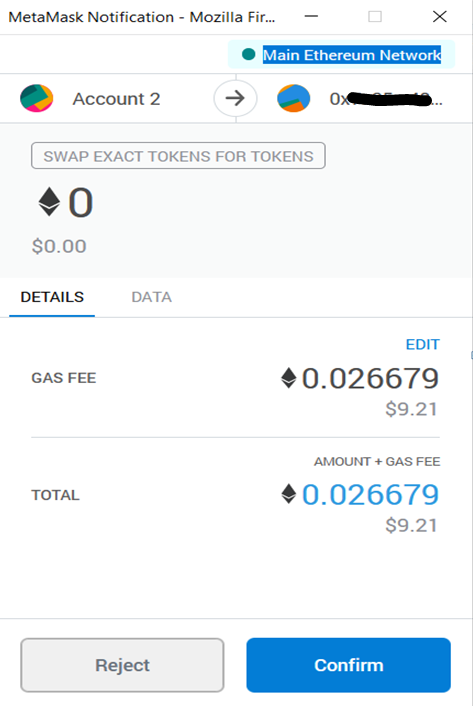
Once you click on the Confirm Swap button on Uniswap, the MetaMask app will open and display the gas fee required for the transaction. Click on Confirm and to submit your transaction.
Slippage tolerance
In case there is a change in price during the transaction, Uniswap gives users the power to pre-select what price fluctuation they can handle. This price fluctuation is called slippage tolerance. Uniswap expresses it as a percentage.
In part three of this series, we will cover the pool feature and the utility of the UNI token.


