


")


 Tokens Playing This P2E Game")

MultiChain, previously known as Anyswap, is an open-sourced, routing protocol that allows blockchain networks to inter-operate including Ethereum and other Layer 2 solutions. Users can currently access 26 chains and over 1,100 tokens through the platform interface. Also, the platform offers a bridge that supports both ERC721 and ERC1155 tokens.
The Multichain platform is supported by SMPC nodes that don’t depend on any blockchain but collectively sign all network transactions. These nodes are run by various organizations, institutions, and individuals and they receive rewards as an incentive.
Governance Token on MultiChain
The platform has a native token named MULTI. Therefore, token holders can participate in the platform’s governance activities like voting, decision-making, and the growth of Multichain Community and Ecosystem.
Since the platform was born as AnySwap. So, if you are holding ANY token, you can convert it into the same amount of MULTI token using the Multi dApp. Therefore, we will explain this later in the article.
Access The MultiChain Platform
To use the MultiChain platform, visit the link. To access the platform, users are required to first connect their wallets.
Source: Multichain
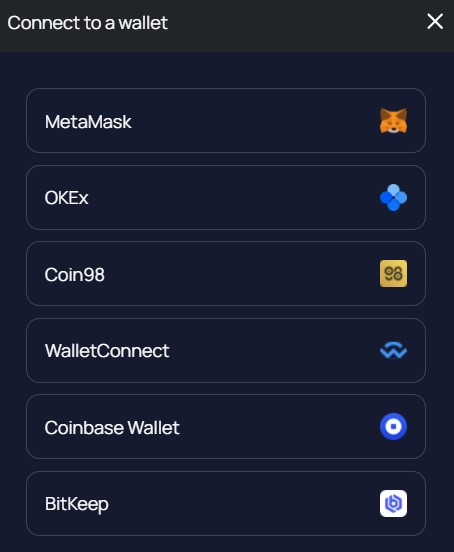
Step 1: Connect Wallet
The Multichain platform allows the users to connect with any of the below wallet types:
- Metamask
- Coin98
- OKEx
- Coinbase Wallet
- WalletConnect
- BitKeep
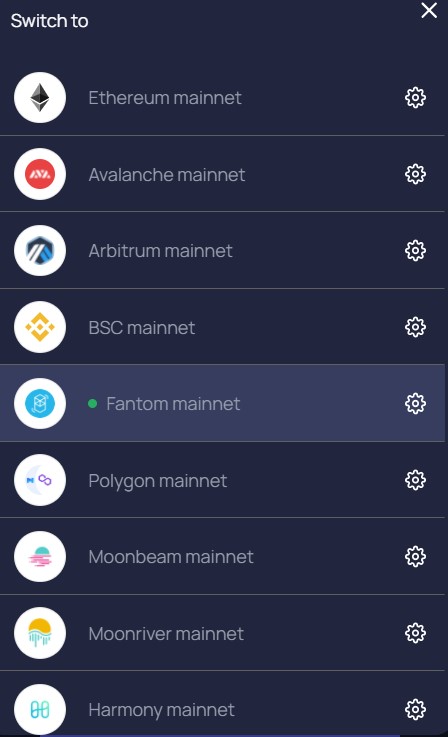
Step 2: Supported Network
The platform supports a huge number of networks including almost all major networks like Ethereum, Polygon, Binance Smart Chain, HECO, Fantom, Avalanche, etc. To see the list of all supporting networks, you just need to click on the Network field.
Step 3: Swap (MULTI)
The “MULTI” feature allows you to convert or swap ANY token into a MULTI token in a ratio of 1:1. The conversion is a one-way process that means you can only convert ANY token into MULTI but the reverse activity is not available. Also, the conversion is only available for BSC, Ethereum, and Fantom networks.
To convert, just enter the amount of ANY token that you wish to swap and confirm the process.
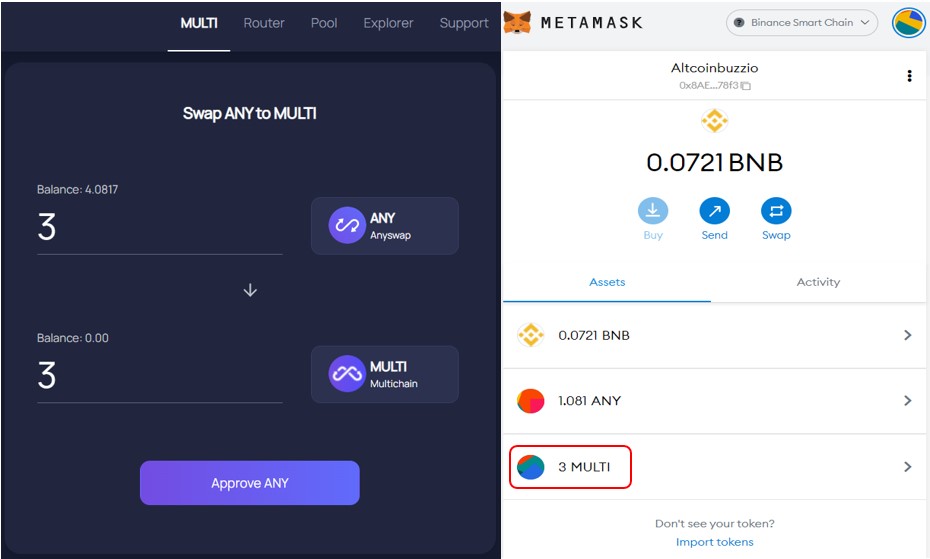
You can see an equivalent amount of MULTI token in your wallet.
Note: You have to manually add the contract address of the MULTI token to see the token balance. Read this link to get the token address of MULTI for different networks.
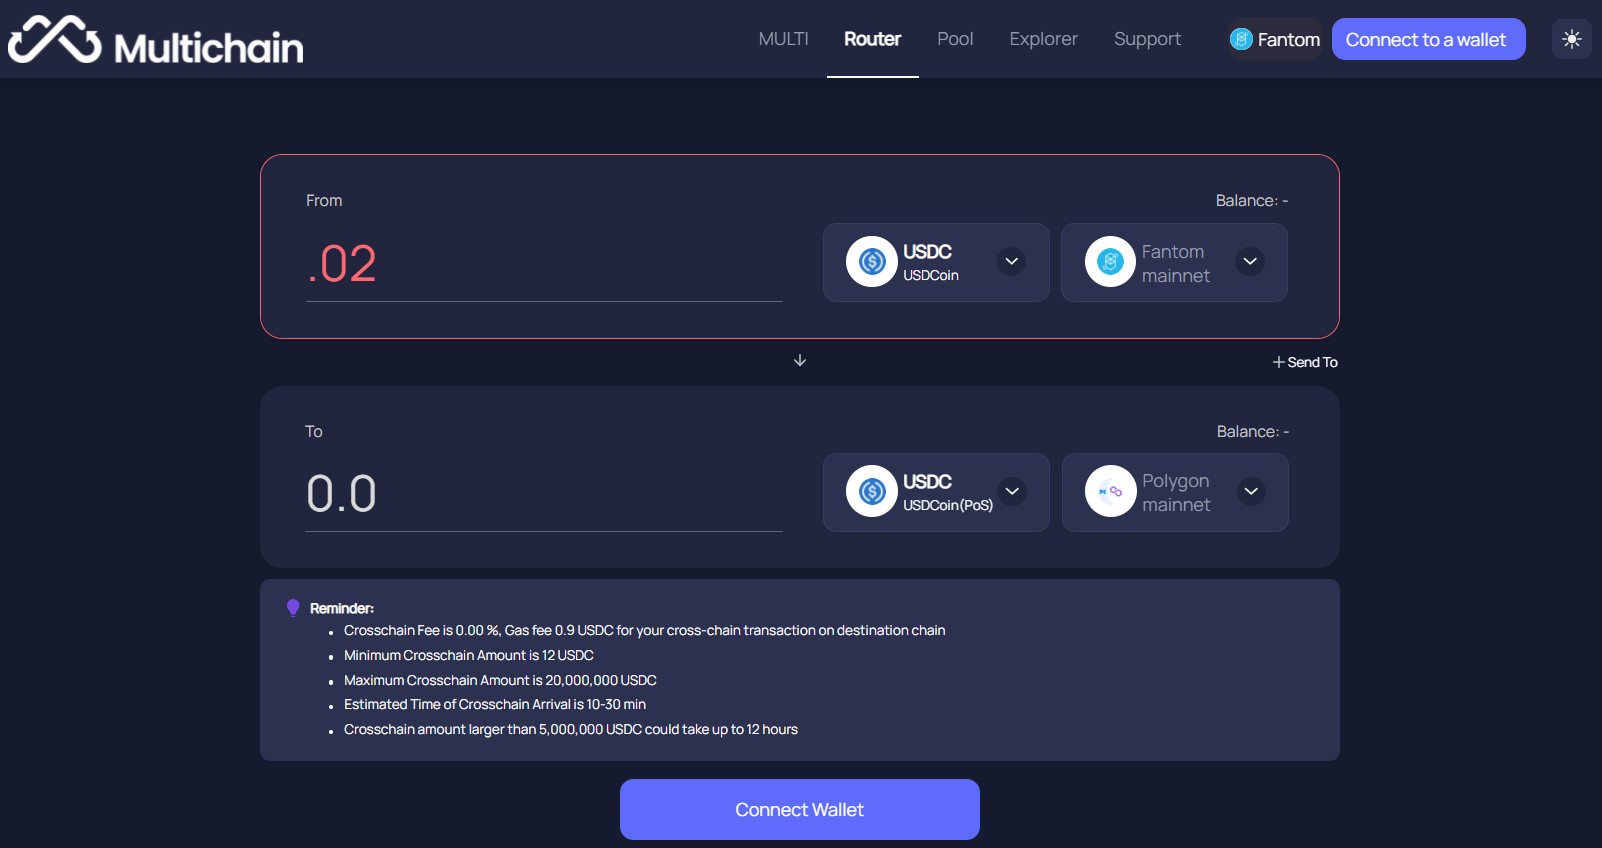
Step 4: Router
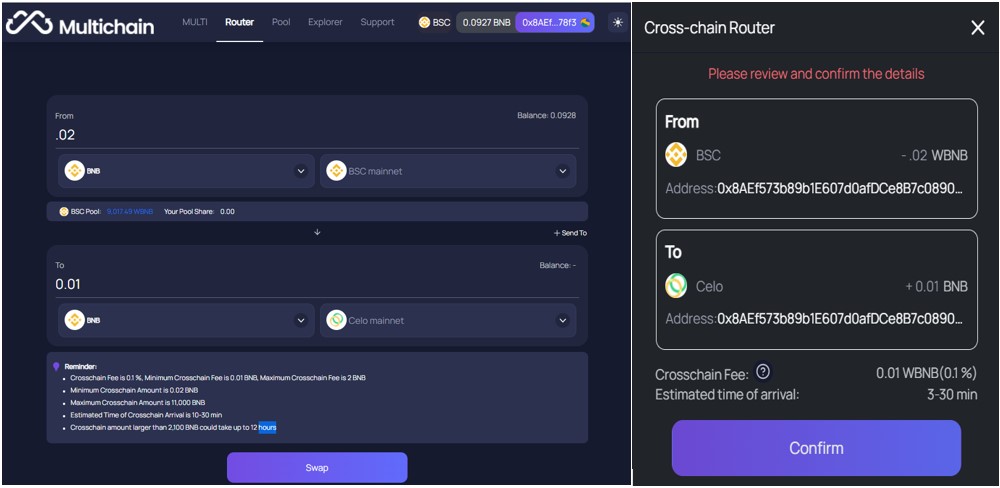
The “router” feature enables users with cross-chain assets to transfer between various supporting networks.
To transfer your token, first select the source and the destination network. Then, from the dropdown, select the token and fill it’s the amount that you wish to transfer. We wish to transfer some BNB tokens from the BSC network to the CELO network.
Note: You can check other details regarding using a router like the maximum and the minimum a user can send, the fee charged by the network, and the approximate time to receive the fund.
If you are satisfied, then confirm the process.
You can see the process status on your screen. Wait for the completion.
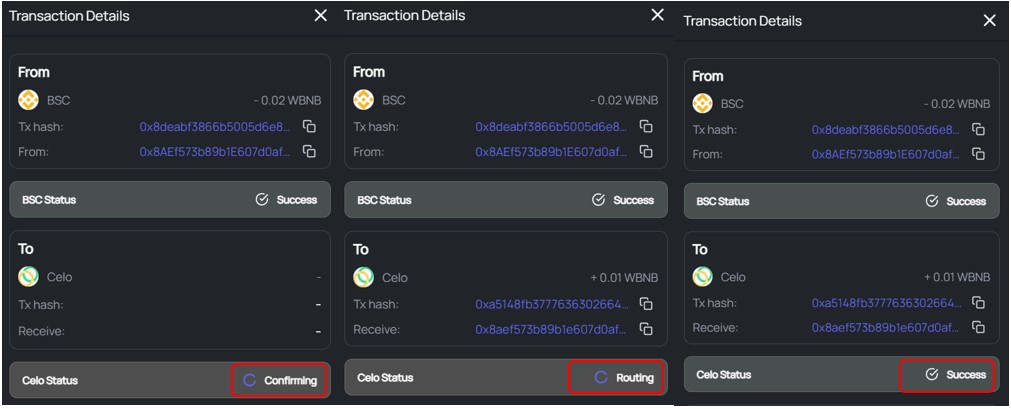
Once it is successful, you can check your token balance in the desired network and address.
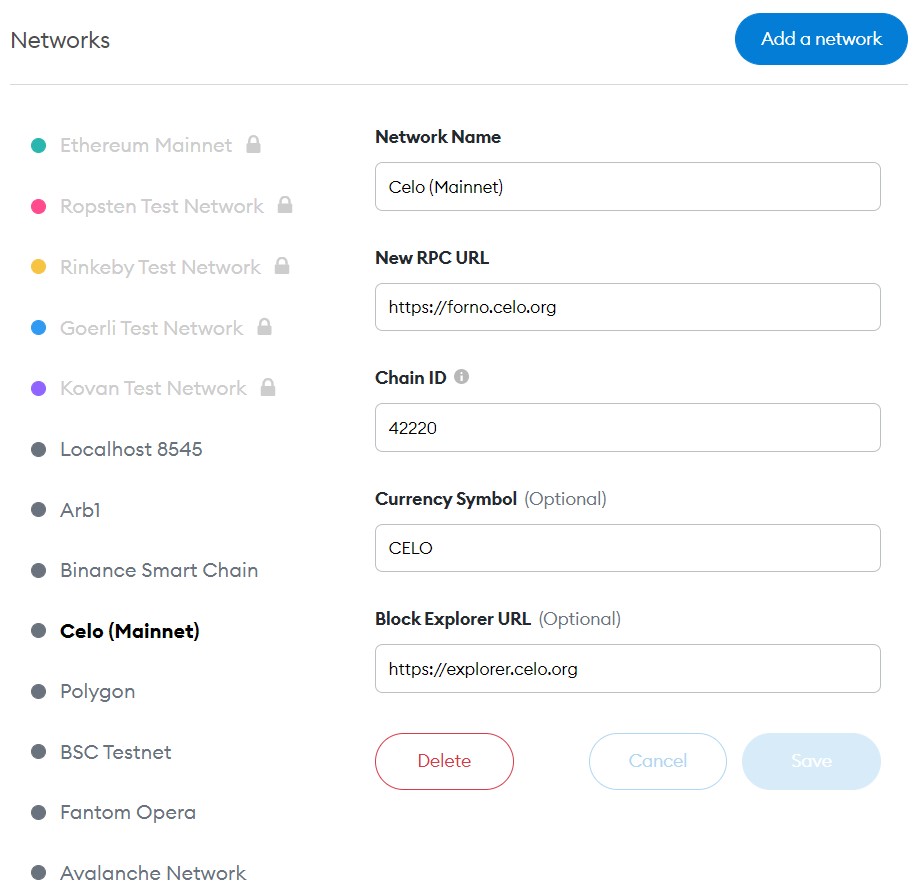
Step 5: Set Up CELO Network Details
Users are required to have the CELO network set up in their Metamask wallet. Therefore, if you are not having the network details, then use the below details to set it up.
- Network Name– Celo (Mainnet)
- New RPC URL- https://forno.celo.org
- Chain ID- 42220
- Currency Symbol- CELO
- Block Explorer URL- https://explorer.celo.org
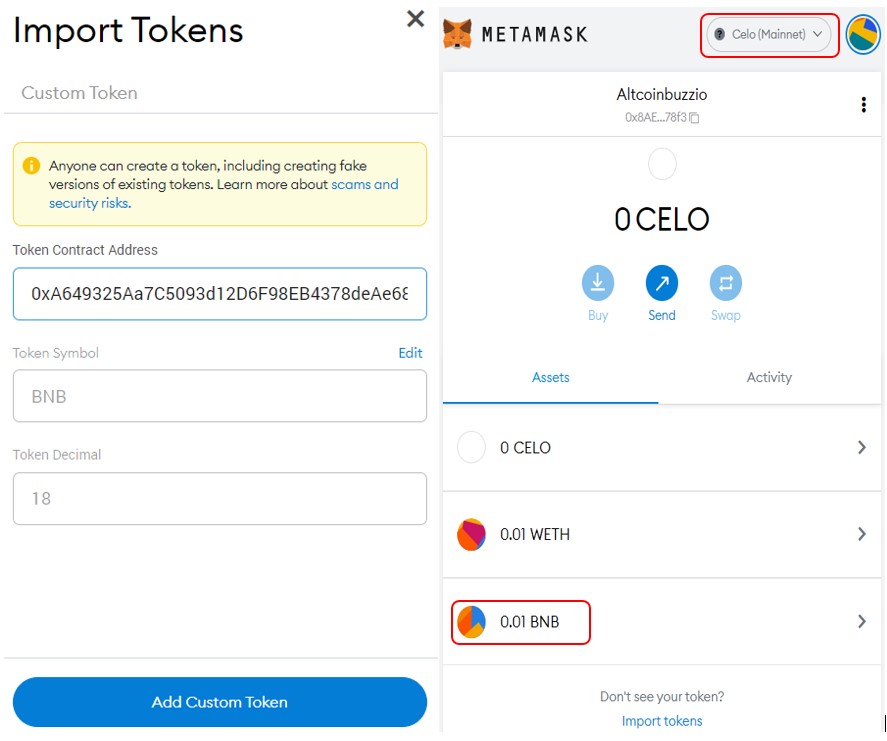
Step 6: Add BNB in Metamask
Users need to manually add the contract address of the BNB token to see the balance in the CELO network.
Then, you need to copy the token contract address from CoinGecko, and then import the token. You can now see the desired BNB token in the CELO network.
Step 7: Provide Liquidity in a Pool
The Pool tab lists the different tokens in various supporting networks where users can provide liquidity. To check the full list visit the link here
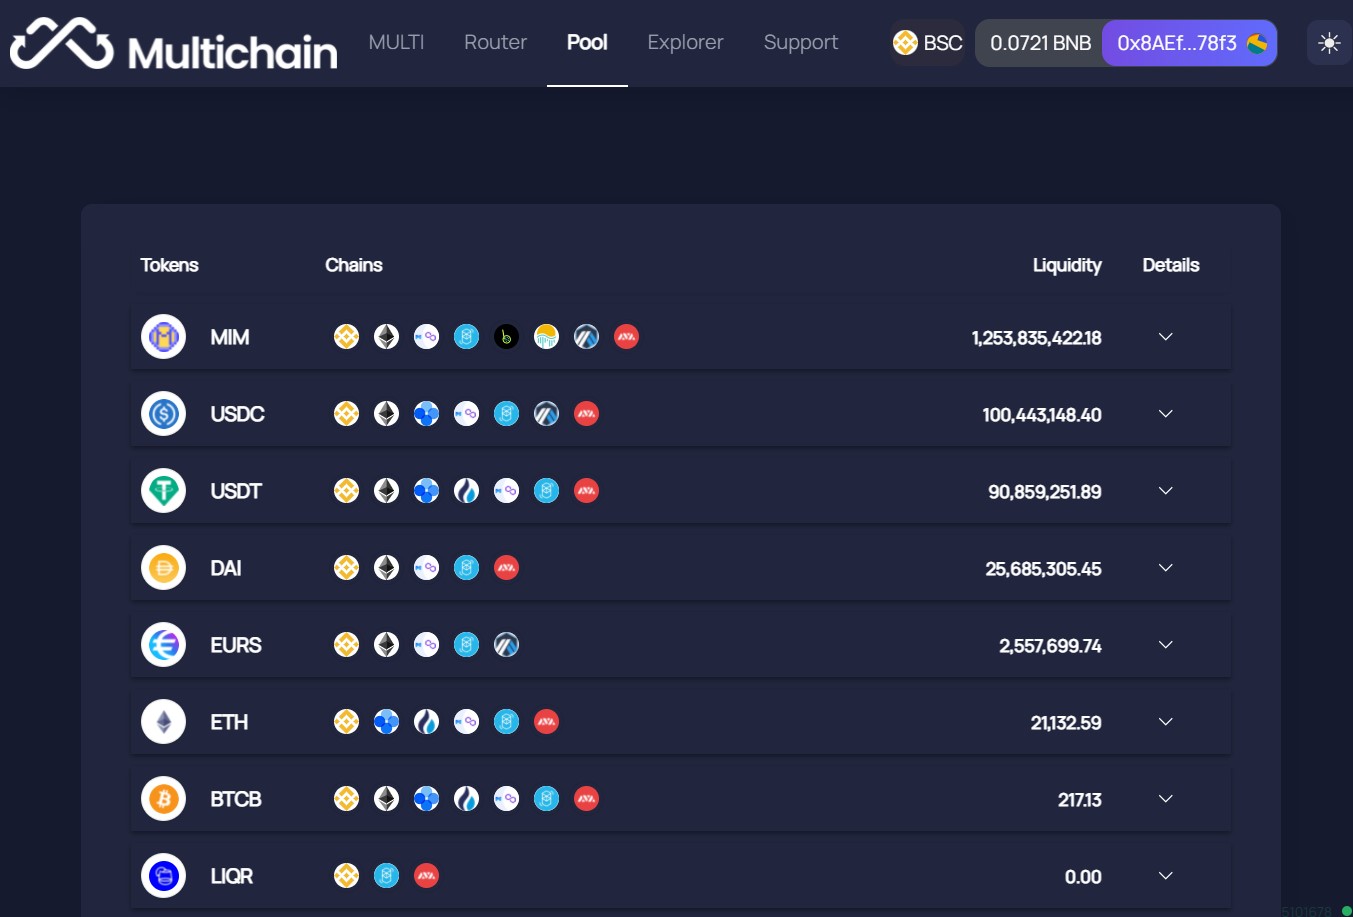
Note: You can see the total liquidity amount of various tokens of all the chains combined (see the above screenshot).
Therefore, to add liquidity, first select the token in your desired network. We have some MATIC tokens in the Metamask wallet (Polygon network) that we will use to provide liquidity into the Matic pool.
Then, you have to change the network setting in your wallet, and the Add/ Remove button will become visible.
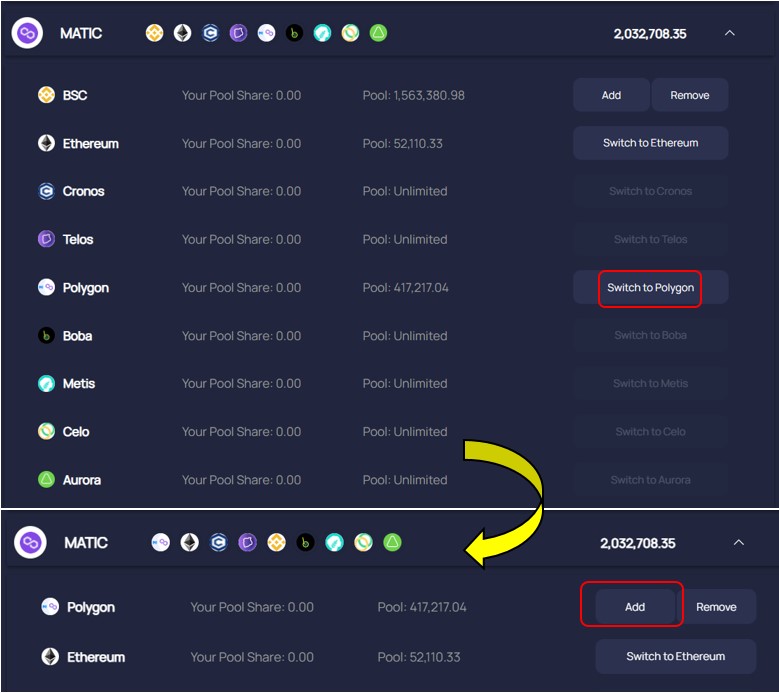
Now, click on the Add button. Then, a window will appear where you can enter the amount of MATIC token that you wish to deposit into the pool. Next, confirm the process by clicking on the Add Liquidity button.

Then, a Metamask transaction is generated that you need to confirm. Therefore, once confirmed you can see your pool share (see screenshot above). Note that your pool share is shown in anyMATIC token.
Step 8: How to Remove Liquidity
You can remove your liquidity from the pool at any time. To do it, you need to go to the Remove tab. Now, enter the amount of MATIC token that you wish to withdraw from the pool, and confirm the process.
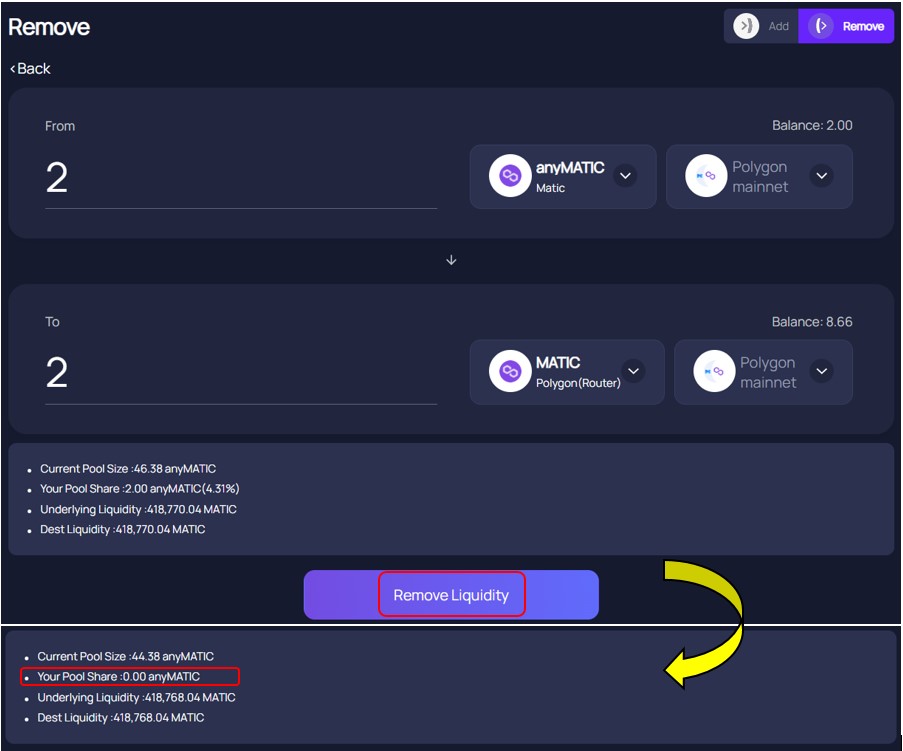
Moreover, once the process is successful, you can see your pool share becomes zero.
Finally, join us on Telegram to receive free trading signals.
Above all, For more cryptocurrency news, check out the Altcoin Buzz YouTube channel.


