


")


 Tokens Playing This P2E Game")
")
The popularity of NFTs has surged beyond the “right-click and save” notion, and now different blockchains are striving to dethrone Ethereum as the number one choice for NFTs.
ERC-721, the creation standard for nearly all NFTs, was made possible by the Ethereum blockchain, which has served as a crucial turning point for many NFT projects. Even blockchains that are EVM-compatible support the standard. But, a paradigm shift is now happening. NFTs have become available in diverse blockchain ecosystems. And one such ecosystem that has massive potential is Cosmos.
What Is Cosmos?
Unlike Ethereum and other well-known alternative “Layer 1” (L1) blockchains like Tezos or Solana, Cosmos is not a single chain. Instead, it is an internet of blockchains.
IBC will become the standard for Cross Chain interoperability
Every chain is a @cosmos chain – only an #IBC integration away https://t.co/EH5ORBTMXd
— Brent Xu (@bond_dog_51) January 15, 2023
Cosmo is, in essence, a decentralized network of independent and interoperable blockchains. The project utilizes the Inter-Blockchain Communication Protocol (IBC) for transferring tokens and data across various blockchains.
Why Cosmos for NFTs?
Older blockchains, including Ethereum and Bitcoin, are often criticized for lacking interoperability. These blockchains were created in isolation, obviating the requirement for interaction with new blockchain networks. It significantly impacted the widespread acceptance of financial products in decentralized finance (DeFi) and non-fungible tokens.
So, the Cosmos network uses cutting-edge tools that developers can use to create autonomous blockchains, addressing issues with scalability, usability, and governance in addition to interoperability given the independent yet connected blockchains it comprises.
Along with several other advantages provided by the “internet of blockchains,” NFTs can profit from the interoperability features for use cases like gaming to speed up widespread adoption. The quick finality of transactions in Cosmos is one of its other crucial characteristics.
High gas prices, brought on by most blockchains’ incapacity to execute more transactions in a short amount of time, like Ethereum, are a significant barrier to the use and acceptance of NFTs.
1/#NFTs shouldn’t be limited to the chain they’re created on or be difficult to transfer between different chains and apps. Interchain NFTs change this.
Let's see how the #IBC protocol has made NFTs multi-chain 👇 pic.twitter.com/s1zQWyChut
— Interchain Foundation (@interchain_io) January 20, 2023
It acts as a barrier to entry for potential retail collectors, providing the perception that only collectors with substantial financial resources can purchase NFTs.
Advantages of Using Cosmos
The entry obstacles inherent in other networks will be absent when purchasing NFTs within the Cosmos ecosystem. Every blockchain in Cosmos uses an affordable system to approve mint, buy, and burn assets. That way, NFTs can benefit from the speed with which transactions transpire on the parent blockchain, Cosmos Hub, and other zones (blockchains), which will help them gain more acceptability.
Tendermint proof-of-stake consensus, a consensus algorithm that uses less energy than PoW, powers each blockchain in the Cosmos ecosystem. It is a considerable shift from the PoW consensus. As a result, artists and creators can now consider producing NFTs that are more environmentally friendly.
Now that we’ve explored the potential of Cosmos NFTs, let’s look at how to mint them. We will be using the Stargaze NFT marketplace for this. For example, Stargaze is a fully decentralized NFT marketplace in the Cosmos ecosystem.
How Do You Mint NFTs in Cosmos?
The two primary processes in creating (minting) an NFT collection are storing assets and customizing collection details and settings. So, with the help of the Stargaze Studio, you can manage each stage on a single page without writing any code.
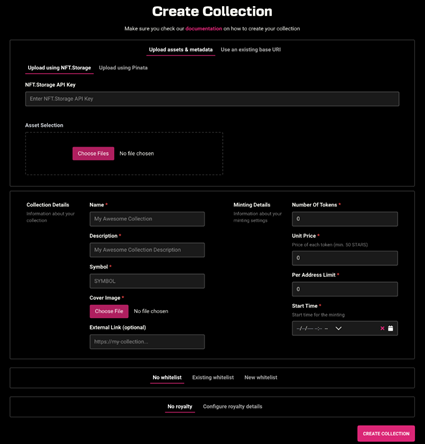
There are two ways to provide Stargaze Studio with your collection files. You can provide an API key through Stargaze Studio to upload assets and metadata or use an existing base URI and manually upload your files. We’ll use the first method as the platform recommends it. You must adhere to the following naming guidelines:
- Asset and metadata names must only contain digits and be in numerical order, beginning with 1.
- No letters or symbols are permitted.
The metadata (JSON) files must likewise abide by this criterion. Each asset must have a corresponding JSON file uploaded with its associated metadata, and both files’ names must be identical.
Creating an API Key to Mint Cosmos NFTs
First, an API key to saving your collection is required to submit assets and metadata. NFT Storage and Pinata are the two services that Stargaze Studio presently supports. So, you have to paste the API key once you have it and move on to the asset selection stage.
Next, you can drag and drop your assets into the asset selection window or upload them using the Choose Files option. Then, a metadata selection window similar to the one in the image above will show up when you upload the assets. You can upload your collection’s metadata there in JSON format.
Note: You can update the metadata in Stargaze Studio via the interface. Click one of your assets once the metadata files have been uploaded.
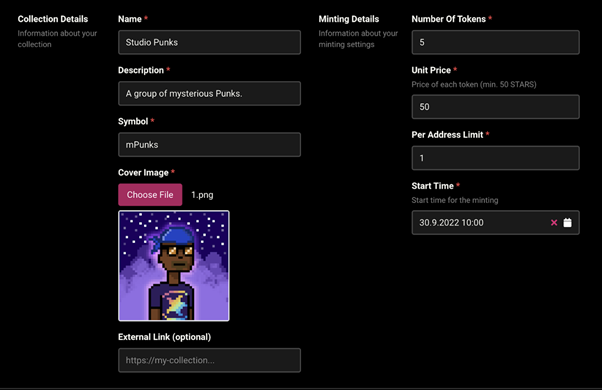
Then, there will be a pop-up where you can edit the metadata. After completing the assets and information, you must input the collection and minting details.
Click the Create Collection button, then sign the pop-up transaction. An information box will appear at the top of the page as soon as the transaction is approved. And that’s it! You have minted your first Cosmos collection. You can find the NFTs on the My Collections page.
How Do You Buy NFTs in Cosmos?
Now that you know how to mint NFTs on the Cosmos, let’s learn how to buy them.
First, you need to have a Keplr wallet installed. Next, visit Osmosis, a decentralized exchange built on the Cosmos ecosystem.
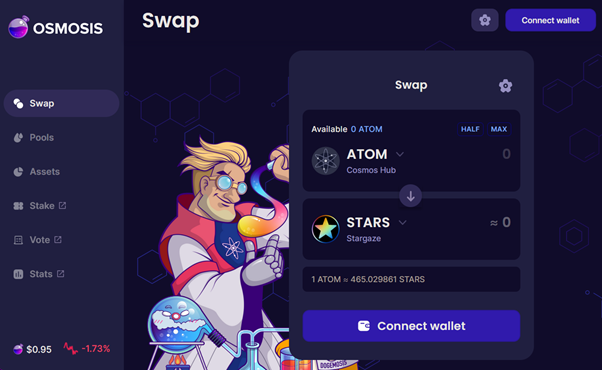
From there, you can swap tokens in your wallet to $STARS, the native currency of Stargaze. Because Stargaze is interoperable, you can send $ATOM straight to your Keplr wallet from a CEX like Binance and swap it for $STARS on Osmosis.
Note: Remember to exchange a tiny amount of $ATOM for $OSMO to pay for gas. Then, replace the remaining $ATOM with $STARS. Finally, click the “Withdraw STARS” button on Osmosis to transmit your $STARS from Osmosis to Stargaze.
The complicated part is now over. Now you can connect your Keplr wallet to the platform and search for NFTs. Once you find a desired collection, hit “Buy now” and proceed to checkout.
Your Kepler wallet will open with a pop-up. It will display all the information about your purchase, including anticipated gas fees and processing times. Once you are ready to buy, hit approve and wait until the purchase is processed. You have now bought your first Cosmos NFT!
How Do You Sell NFTs in Cosmos?
Selling NFTs in Cosmos is not as complicated as buying one. To sell an NFT in your collection, head to the Stargaze website and connect your wallet. Now go to your profile by clicking the top right corner.
You can see all your NFTs in the gallery that opens after clicking your profile. Select the NFT you want to sell. Scroll down and click “Sell on Marketplace.” You can set a fixed price or sell the NFT as an auction.
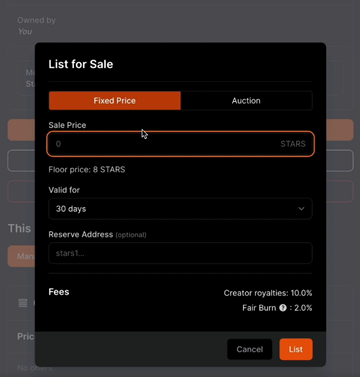
Fill in the details and click “List.” Next, Keplr will pop up, and you need to click “Approve.” Now your NFT is listed for sale!
We have covered how to mint, sell, and buy NFTs in Cosmos. But what about top NFT projects in Cosmos? Or the best NFT marketplaces? Stay tuned for part two of this article series! Read the second part here.
⬆️ For more cryptocurrency news, check out the Altcoin Buzz YouTube channel.
⬆️ Check out our most up-to-date research, NFT and Metaverse buy, and how to protect your portfolio in this market by checking out our Altcoin Buzz Access group, which for a limited time, is FREE. Try it today.


