


")


 Tokens Playing This P2E Game")

The crypto space has came a long way since its early days. Back then, many crypto tokens were speculative without any use cases. Fast forward till today, innovation and technology thrive in the crypto space. One OG project that has fostered such innovation and growth is Chainlink.
In short, Chainlink is a Web3 services platform. It aims to connect decentralized applications (dApps) to the external world. Simply put, it provides data from the outside world to these dApps. In turn, this enables said dApps to provide reliable results. Now, this may sound simple. But, Chainlink is, in fact, enabling many projects in the crypto space! In part 1 of this Chainlink beginner’s guide series, we explore the utility of its native $LINK token. Also, we look at how to buy and bridge $LINK. Lastly, we give you a brief run-through on how to run a node on Chainlink.
$LINK Use Cases
The native $LINK token follows the ERC677 token standard. This allows transactions to contain data payloads. All while being fully compatible with the ERC20 token standard. That means you can store $LINK in any wallet that supports ERC20 tokens.
$LINK has many use cases within the Chainlink ecosystem. It is used for:
- Payments to node operators to retrieve external data.
- Deposits by node operators as needed by smart contract developers.
- Staking to secure the Chainlink ecosystem. In return, you can earn a healthy 4.75% annual return too.
5/ Before participating in Chainlink Staking, it is important that you as a staker understand the design of the v0.1 beta including the lock-up, alerting, staking rewards, and other features.
To learn more about Staking v0.1, check out the following blog:https://t.co/M0wQVcTV2M
— Chainlink (@chainlink) December 1, 2022
How Do You Buy $LINK?
It is clear that $LINK tokens are important within the Chainlink ecosystem. As of March 31, 2023, 1736 projects are using its oracle service. With this, we can be sure that $LINK tokens are in demand. Furthermore, as the ecosystem grows, this demand will increase.
If you’re bullish on $LINK, then stay tuned! We’re going to explain to you how to buy $LINK tokens on Binance below:
- First, you’ve got to set up a Binance account. If you’ve not done so, you can start here.
- Next, fund your Binance account with $USDT.
- Then, sell your $USDT for $LINK. You can do this from Binance’s spot trading page here.
- Last, but not least, send your $LINK tokens to a non-custodial wallet. We recommend MetaMask or Trust Wallet for storing $LINK.
Now, if you do not have any crypto to begin with, you can refer to Binance’s guide here. It’ll teach you how to get crypto via bank deposits, as well as credit and debit cards.
How to Be a Node in Chainlink?
“Hey! I’ve been in crypto for awhile! I’m already owning and staking $LINK. What else can I do?”
If that sounds like you, then you could consider running a node on Chainlink! You’ll be joining entire companies, like STC Bahrain, that are doing the same. By running a node, you’ll be able to provide external data to smart contracts. In turn, you’ll receive $LINK as payment.
stc Bahrain (@STC_BHR), a leading Middle Eastern telco, is now running its own official Chainlink node on mainnet.
World-class infrastructure providers continue to adopt Chainlink to deliver secure off-chain data & computation to the blockchain ecosystem. https://t.co/mgArmW3Vtt pic.twitter.com/711hVrqCmv
— Chainlink (@chainlink) February 28, 2022
To run a Chainlink node, you’ll first have to ensure your device meets the requirements here. Then, you need to install Docker Desktop. Lastly, you need to ensure your device can connect to an Ethereum client.
As the following steps to setup a node are highly technical, we will not cover them in this article. For a step-by-step guide to run a Chainlink node, you can follow the guide here.
How to Bridge $LINK?
$LINK tokens exist on multiple chains. Apart from Ethereum, it also exists on:
- OKX chain.
- Wanchain.
- Polygon.
- Binance Chain.
- Avalanche, amongst many others.
If you’re looking for an easy way to bridge your $LINK, we’ve got you covered. Wan Bridge provides an easy way to move your $LINK between Ethereum, Wanchain, and OKX chain.
To use the bridge, follow the steps below:
- First, connect your wallet. Wan Bridge supports MetaMask, Wallet Connect, WanMask, WanWallet and OKX Wallet.
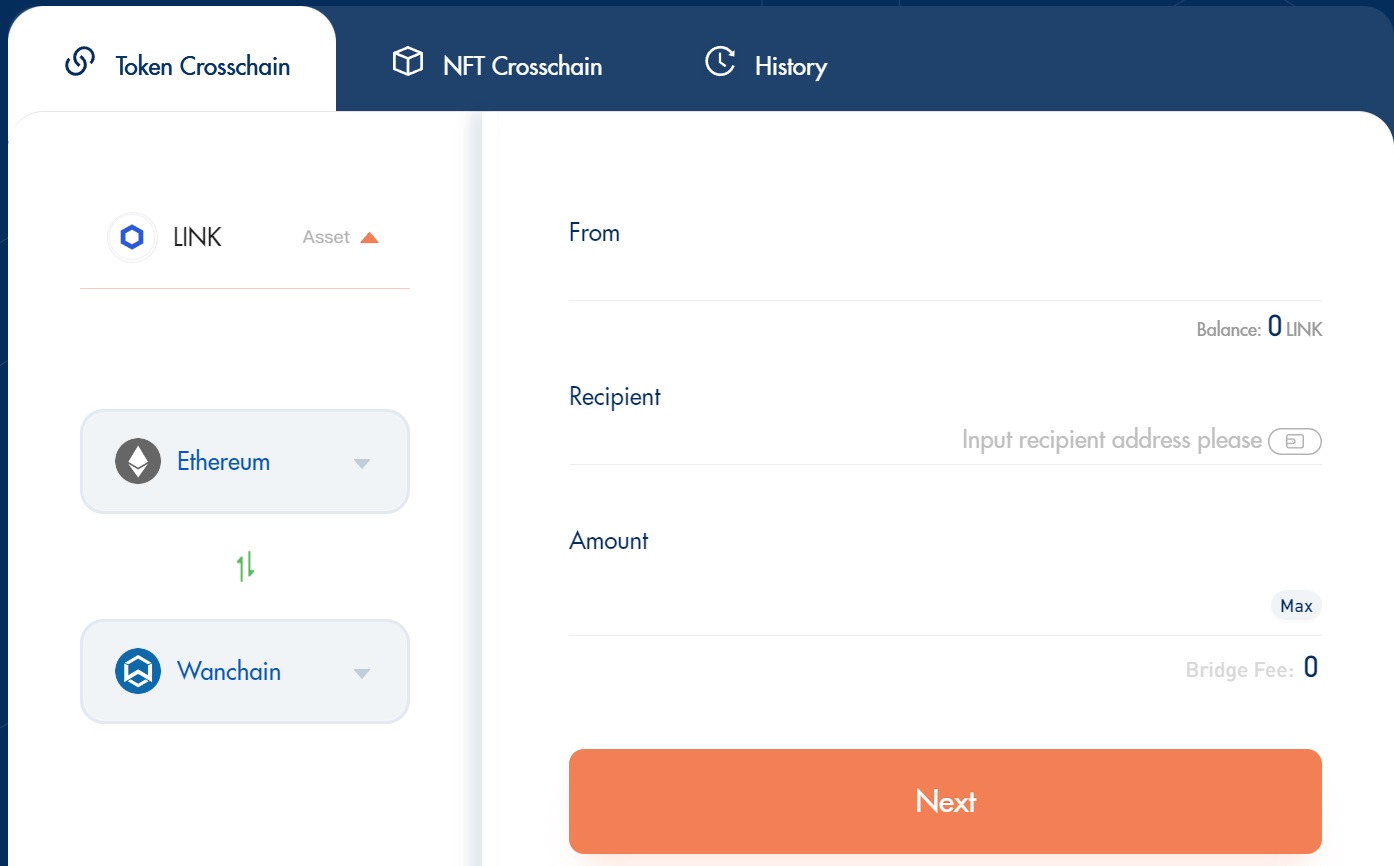
- Next, choose $LINK as the bridge asset. You can find this at the top left hand side of the screen, shown below.
- Then, choose the “From” and “To” chains for bridging. You can find this at the left hand side of the screen, shown below.
- Lastly, input the recipient address and amount of $LINK to bridge. Click the “Next” button and follow the steps to approve the transaction on your wallet.
Voila! Your $LINK will magically transport itself to your destination chain.
Conclusion
As one of the oldest utility-based projects, Chainlink has proven worthy to sit amongst the blue-chip giants of crypto. Its oracle services remain highly relevant to this day, despite having many competitors.
As of time of writing, the $LINK token price is $7.28. Its market cap ranks at #21, and its total supply of tokens is 1 billion. Out of these, 517 million $LINK tokens circulate.
In part two of our Chainlink Beginner’s guide, we’ll run through how to stake $LINK and how to use Chainlink’s explorer.
⬆️ For more cryptocurrency news, check out the Altcoin Buzz YouTube channel.
⬆️ Check out our most up-to-date research, NFT and Metaverse buy, and how to protect your portfolio in this market by checking out our Altcoin Buzz Access group, which for a limited time, is FREE. Try it today.


 Popularity Growing Rapidly")