Nami is a non-custodial, open-source, browser extension wallet for the Cardano blockchain. The application allows the users to manage assets, delegations to stake pools, minting, multi sigs, etc. It is planning to embed the support of smart contracts after the Alonzo hard fork. It is developed by Berry.
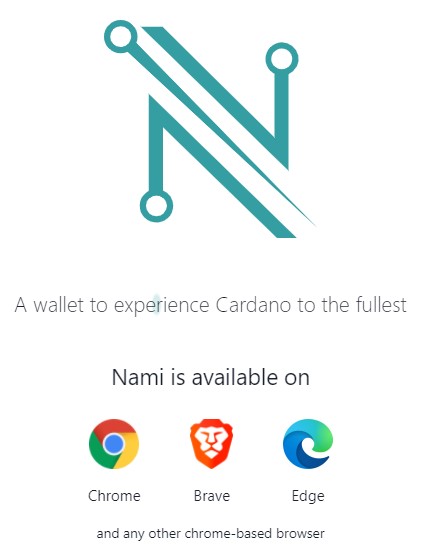
The wallet application is currently available for Google Chrome, Brave, and Edge browsers. Users can install and set up the application in their browser and access it.
Nami uses a single address concept as opposed to Daedalus/Yoroi that allows multiple addresses per wallet. Users can create sub-accounts and can access them separately. If a user wishes to transfer funds from a Daedalus/Yoroi wallet, then he should send it to the master account.
So, in this article, we will explain how you can install and set up the Nami wallet, and use it for the Chrome browser.
Table of Contents
Install Nami
To install the application for your Chrome browser, visit the page.
Important: To avoid any scam, we recommend you to visit their official page and then select the desired browser type to install the application.
Click on the Chrome icon appearing on the homepage. It will redirect you to the page
Click on the Add to Chrome button. It will ask for your permission to add the wallet application to your browser extension.
Once permitted, the application install and you can see the below icon in your browser.
Wallet Setup
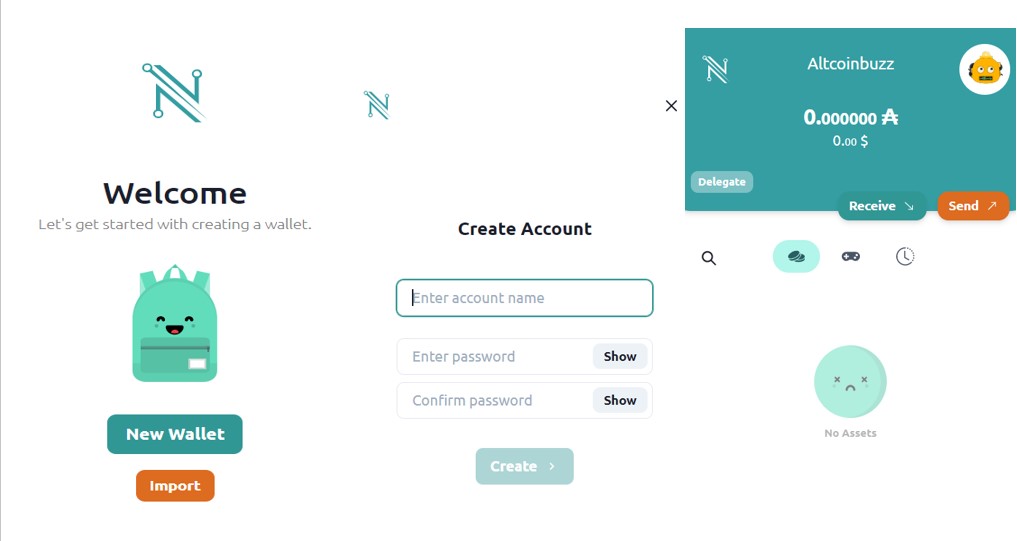
To set up your wallet, click on the Nami icon. The application offers two options to set up your wallet:
- New Wallet
- Import
Select New Wallet if you are a new user and want to create a new wallet account.
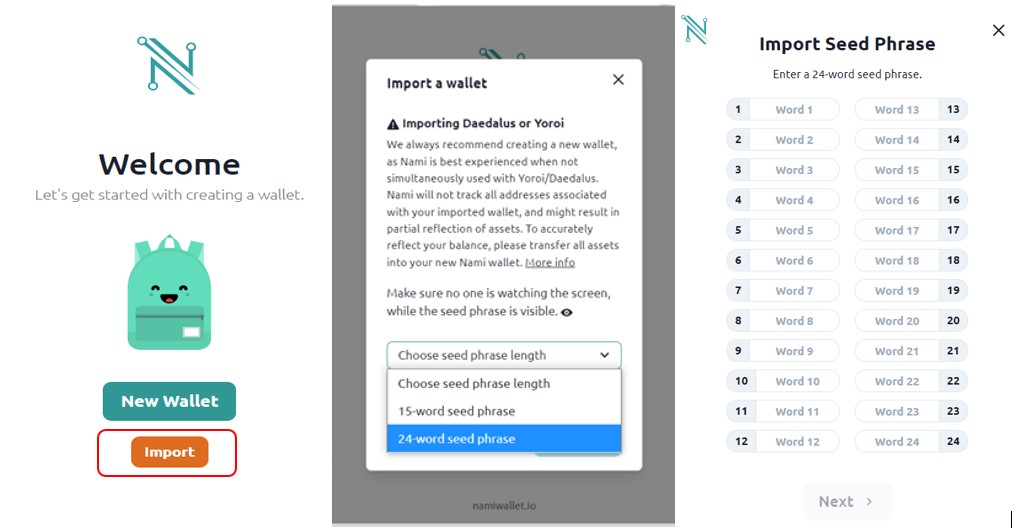
The Import option allows an existing user to import his asset on a new device.
New Wallet
To create a new Nami wallet, click on the New Wallet button. The application will show you the 24- word backup phrase, store it safely. Next, it will ask you to verify your seed phrase. Once verified, it will ask you to provide your account name and password. After that, your account setup is done. You can use your wallet to send/receive funds.
Import Wallet
The Import Wallet option allows the users to import an existing wallet in some new device. As we have explained earlier, each wallet account has only one seed phrase. You can create multiple sub-accounts but you cannot import another account using seed phrase.
If you wish to import an existing account in a new device, you have to install the application first, and while setting up you have to choose the Import option. You can then import the account by giving your seed phrase.
Receive
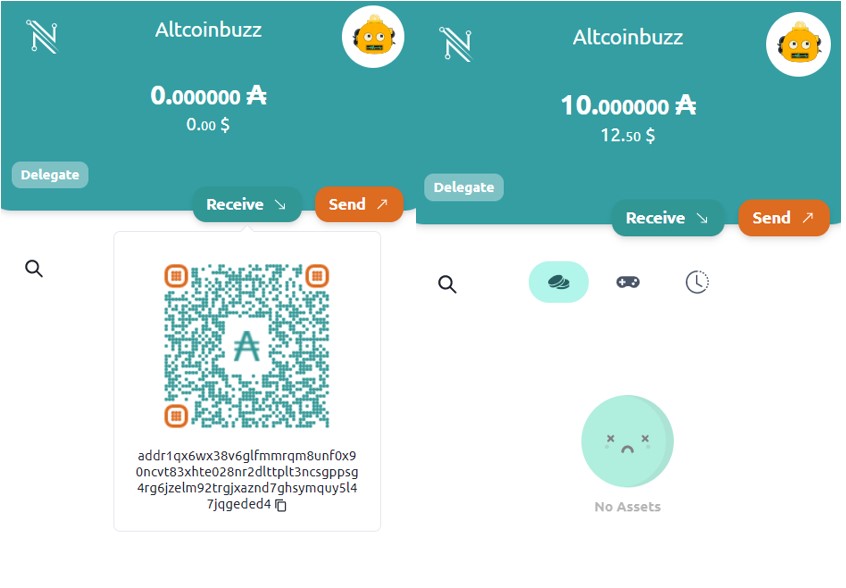
To receive funds in your Nami wallet, you need to get the public address.
Just click on the Receive button and it will show your public address and the QR code. You can copy the address and share it with other users to receive funds in your account.
Send
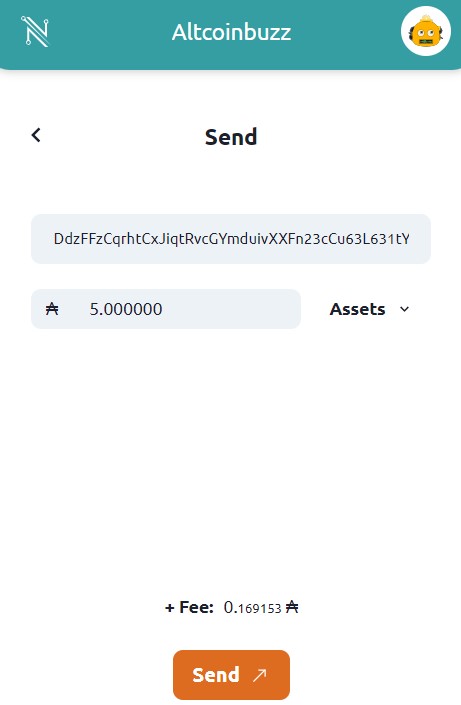
Using the Send option, users can transfer their funds to some other user.
To send funds, you just need to enter the recipient’s address and the amount that they wish to transfer.
Confirm the process by giving your wallet’s password.
Collectibles
Berry brought NFTs to Cardano, and the Nami wallet allows the users to store their NFT in the wallet application (collectibles tab).
New Account
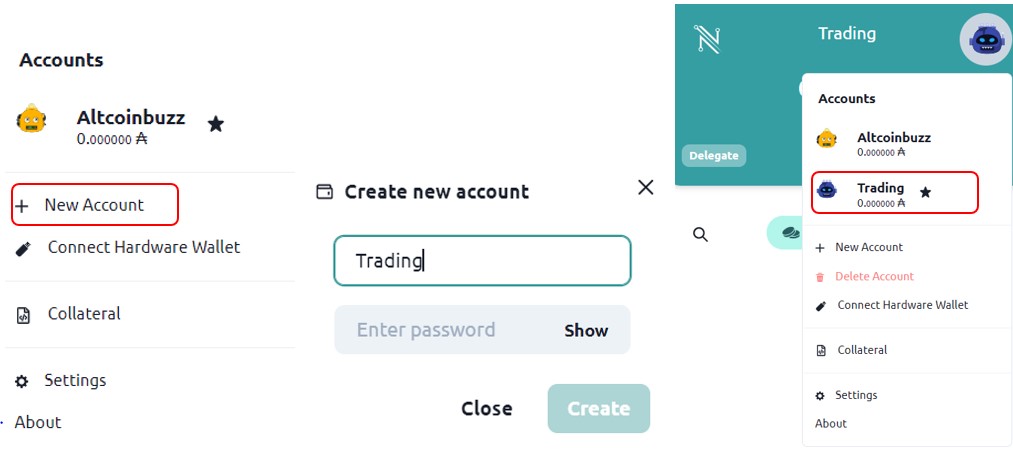
Users can create a new account and it will be a sub-account under the main account. To create a New Account, just select the option and give some names. It will now show in your application.
You can easily switch and monitor your accounts.
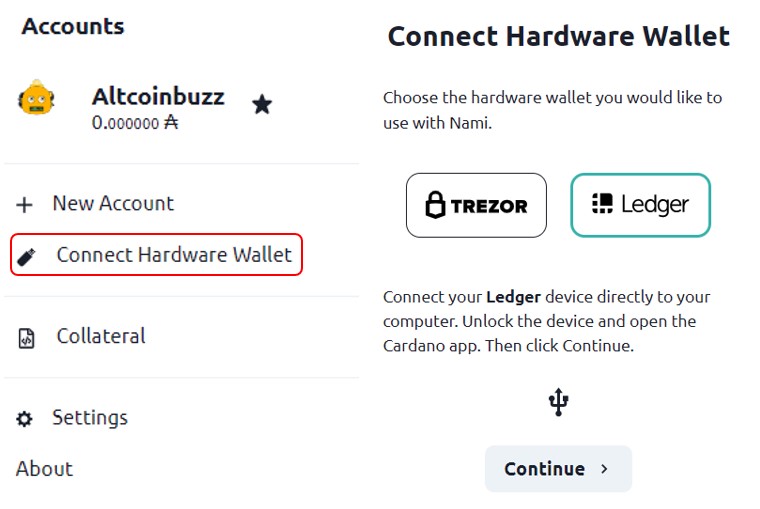
Connect Hardware Wallet
Users can connect their hardware devices like Ledger or Trezor with Nami wallet and access their funds.
Collateral
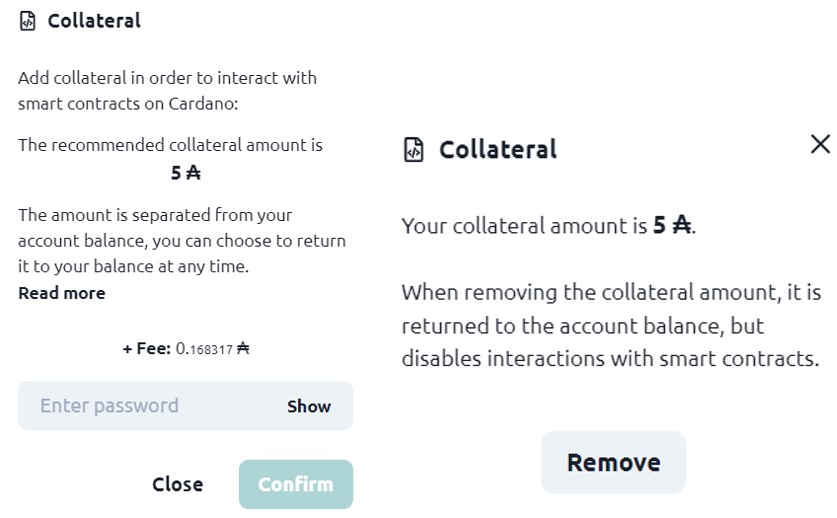
The Nami wallet allows you to deposit a fixed amount (5₳) as collateral to avoid any circumstances that arise due to contract failure. The system takes values from collateral to cover the resources like CPU and memory used by the node to verify the contract. That means collateral aims to secure the network and avoid network failure.
Note that values are taken from collateral only in case of failure. If the script runs smoothly, nothing is charged from your deposited collateral.
To deposit tokens into collateral, go to the Setting tab, and click on Collateral. A window will pop up where you need to enter your wallet’s password to confirm the process.
At any time, users can remove his asset from collateral by clicking on the Remove button.
Settings
The Settings tab allows you to do a few account setup-related things. Below are the options that you can change/update by going to the setting tab:
- Account Name
- Display Icon
- Appearance/ Theme
- Currency (USD, EUR)
- Network (Main net, Test net, Custom Network)
Delegate
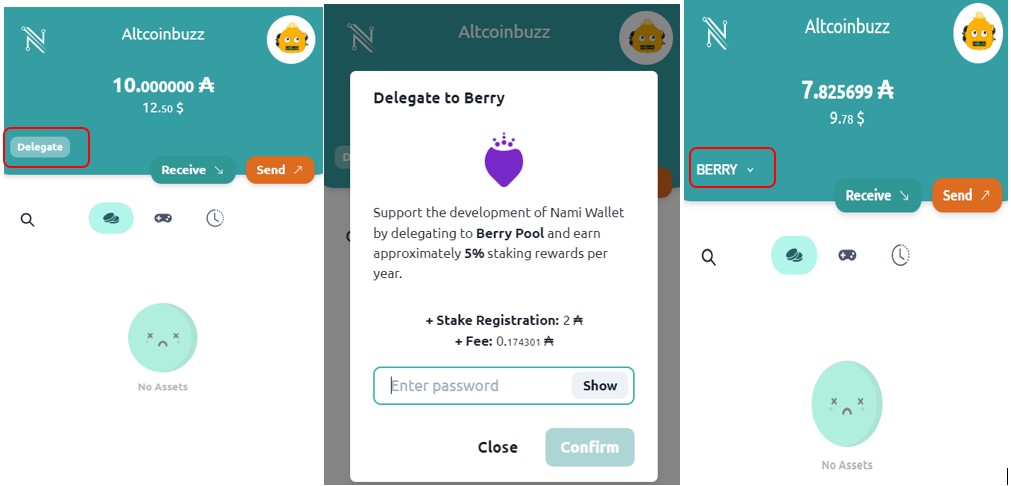
The Delegate option allows you to delegate your tokens to ADA pools. Note that if you are delegating via your browser wallet application, then you will be able to delegate only to Berry pool.
If you wish to delegate tokens to other staking services, then you have to find platforms where you can connect your Nami wallet.
Users holding tokens in multiple accounts can delegate their tokens to different pools.
By delegating tokens users can earn a staking reward of approximately 5% per year.
To delegate your tokens to Berry pools via wallet application, click on the Delegate button. The application will ask you to confirm the process by providing the wallet’s password. Once confirmed, you can see the Delegation option changed to Berry.
Remove Delegation
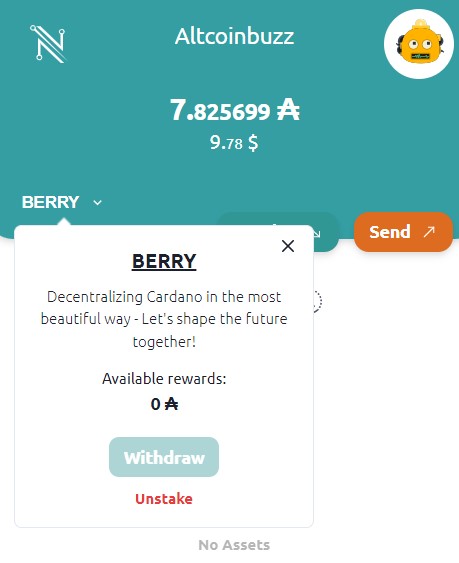
To remove your staked tokens, click on the Berry option. It will give you the option to withdraw or unstake. Click on the Unstake button and confirm the process.
Resources: Nami
Read More: How to Swap and Add Liquidity Into the Raydium Platform
Join us on Telegram to receive free trading signals.
For more cryptocurrency news, check out the Altcoin Buzz YouTube channel.


