The Terra chain resurfaces from the ashes after its black swan event in May 2022. Today, the new Terra chain remains active. Naturally, its Terra bridge continues to process cross-chain transactions.
In the previous part 1 of this article series, we spoke about what the bridge is, how safe it is, and how it works. In this second part, we’ll look at how to use its bridge with popular chains and wallets.
How to Use Terra Bridge to Avalanche
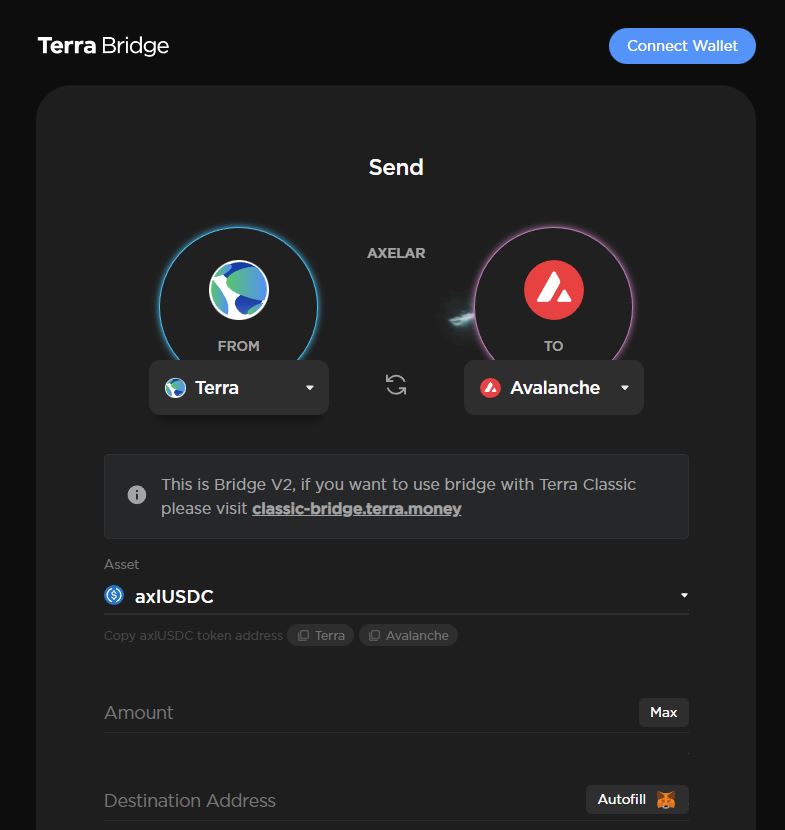
Now, it’s time to go through how to use the bridge. Let’s start off with the first example: bridging $USDC from Terra chain to Avalanche chain. Remember part 1 of this article series? If you did, you’ll recall that the bridge leverages Axelar’s technology for this. Hence, your $USDC token would be in $axlUSDC form instead.
Moving on, time to get our hands dirty. Follow the steps below to get your $axlUSDC from Terra to Avalanche:
- Head on over to the Terra bridge.
- Connect your Terra Station wallet. You can do this by clicking on the “Connect” button on the top right-hand side.
- Choose “Terra” as your “From” chain. Then, choose “Avalanche” as your “To” chain.
- Select $axlUSDC as the bridge asset. Note: Terra bridge only supports $axlUSDC for Terra to Avalanche transfers.
- Select the amount of $axlUSDC you would like to bridge.
- Connect your MetaMask wallet. You’ll be receiving your $axlUSDC on the Avalanche C-chain here.
Source: https://bridge.terra.money/
Lastly, click on the “Next” button at the bottom of the screen. Complete the transaction. Voila! Your funds will be on their way to Avalanche!
How to Use Terra Bridge to Cosmos Hub
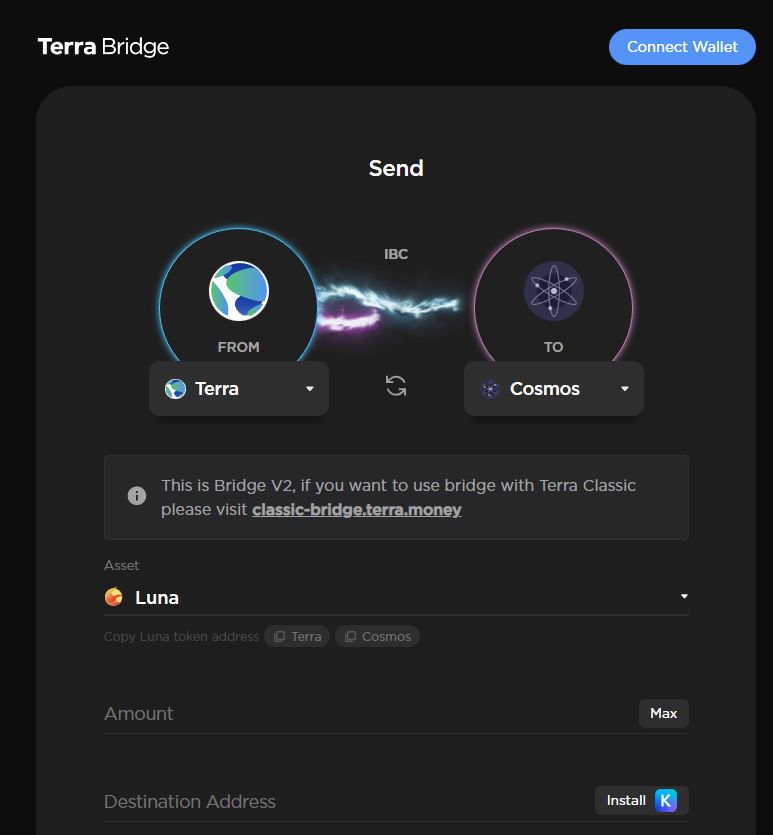
Moving on to the second example: bridging $LUNA from Terra to Cosmos Hub. Similarly, the bridge leverages another project’s technology to enable this bridge. Do you recall what that is? Yes! It’s Cosmos’ Inter-Blockchain Communication (IBC) tech.
To use the bridge to transfer funds from Terra to Cosmos Hub, follow the steps below. It’s pretty much the same as bridging to Avalanche. Only with a few minor differences.
- Head on over to the Terra bridge.
- Connect your Terra Station wallet. You can do this by clicking on the “Connect” button on the top right-hand side.
- Choose “Terra” as your “From” chain. Then, choose “Cosmos” as your “To” chain.
- Select $LUNA as the bridge asset. Note: Terra bridge only supports $LUNA and $ATOM for Terra to Cosmos Hub transfers.
- Select the amount of $LUNA you would like to bridge.
- Connect your Keplr wallet. You’ll be receiving your $LUNA on Cosmos Hub here.
Source: https://bridge.terra.money/
Now, click on “Next” at the bottom of your screen. Complete the transaction and ta-da! Your $LUNA is on its way over to Cosmos Hub.
How to Use Terra Bridge With MetaMask
As a MetaMask user, you’ll be glad to know that it fully integrates with Terra bridge. Let’s look at how this is done for two cases.
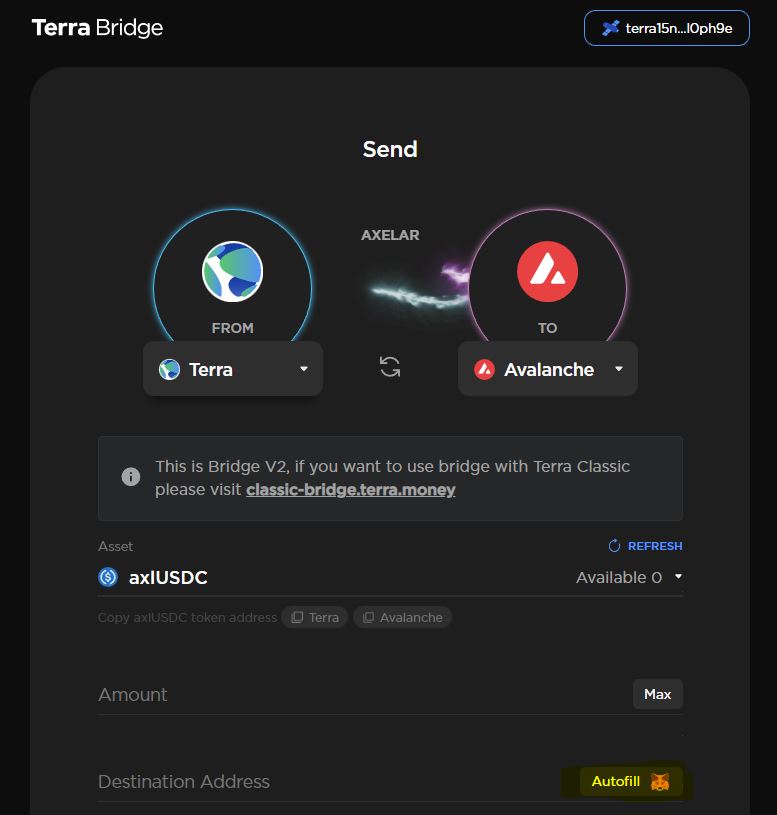
First, we’ll be sending funds from Terra to a chain using MetaMask as its wallet. So, either Ethereum or Avalanche. Refer to the screenshot below. Once you’ve connected your Terra Station wallet, click on the “Autofill” button below. Automatically, your MetaMask address will appear in the input field. Also, your MetaMask wallet is then connected to the bridge too.
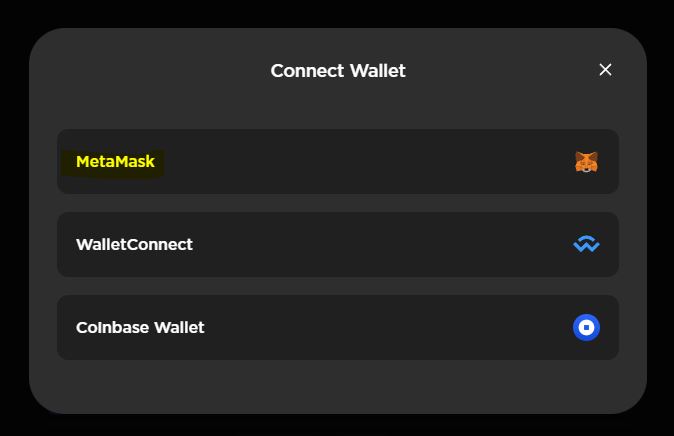
Second, we’ll be sending funds from Ethereum or Avalanche to Terra chain. To connect to MetaMask, simply click “Connect Wallet.” The bridge will then re-direct you to the screenshot below. Click on “MetaMask” as your wallet of choice. Now, your MetaMask wallet is then connected to the bridge.
Conclusion
Well, it’s time to wrap up our two-part series on Terra bridge! We hope it’s been informative for you. On top of that, we hope it has given you a good level of confidence and understanding to use the bridge. So, when you’re sending funds to and from Terra, remember to refer to this guide. Till next time!
⬆️ For more cryptocurrency news, check out the Altcoin Buzz YouTube channel.
⬆️ Check out our most up-to-date research, NFT and Metaverse buy, and how to protect your portfolio in this market by checking out our Altcoin Buzz Access group, which for a limited time, is FREE. Try it today.


