Maiar is a non-custodial, crypto wallet powered by the Elrond blockchain that allows users to store, manage, stake EGLD, and pay using their mobile phones. The application allows the users to set up herotags, a unique username powered by the Elrond blockchain, and deployed on Elrond Network through a DNS service.
Also, users can send/receive payments globally through Herotag by setting up their accounts simply by giving their phone number. The application is currently available only on mobile devices (Android, iOS). Moreover, the wallet supports Elrond Gold (eGLD), Binance (BNB), Ethereum (ETH), Bitcoin (BTC), among other tokens.
Therefore, in this article, we will explain how you can install, set up, and use the Maiar wallet.
How to Install the Maiar Wallet on an Android device
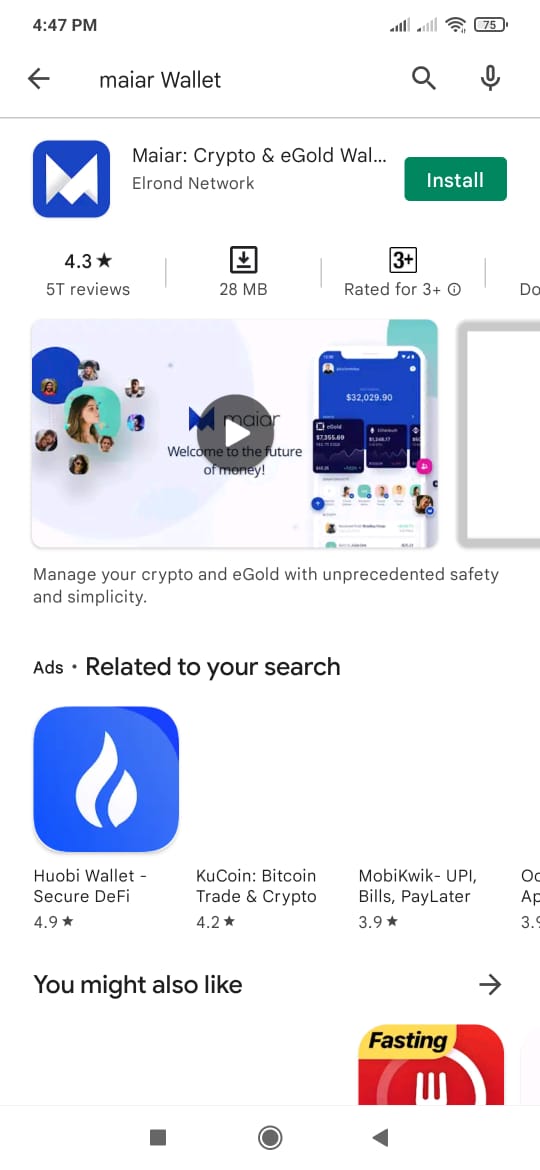
To install the Maiar wallet application on your Android phone, go to Playstore and search for the “Maiar wallet” application.
Note: To check the authenticity of the application, always go via their official website, and check the number of downloads field.
First, click on the install button, and the application will be downloaded to your phone.
1) Setup the Maiar Wallet Application
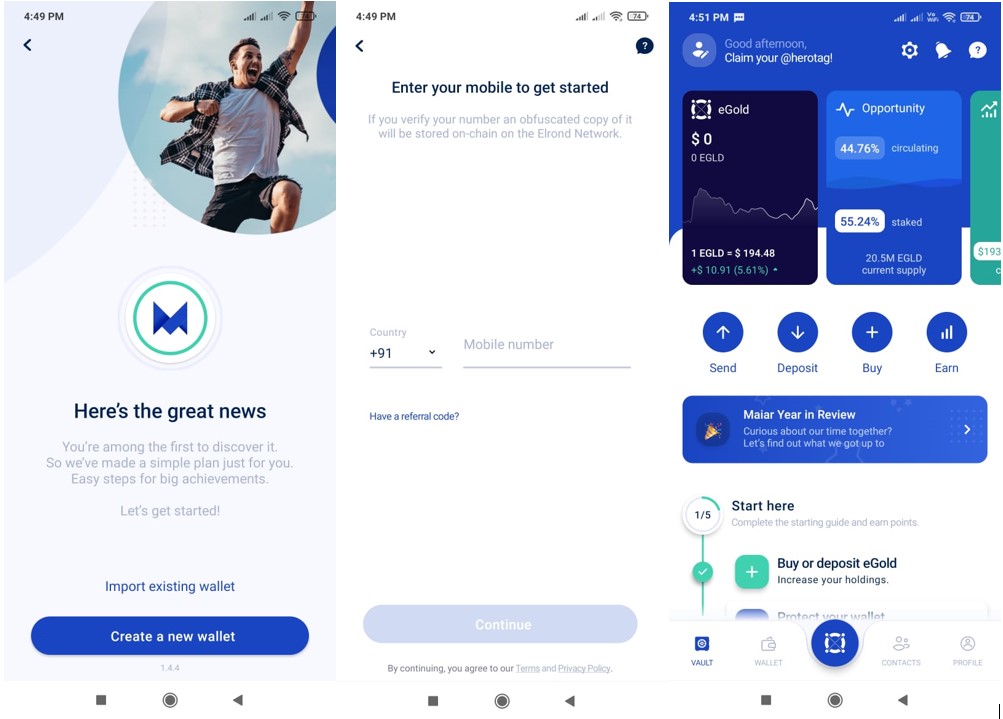
To set up the Maiar application, launch it. You will find two options for wallet setup:
- Import existing wallet
- Create a New Wallet
Select the first option to set up an existing account on a new device. But if you are a new user, then choose option 2 to create a new wallet.
We will create a new Maiar wallet. Once you click on the “Create Wallet” option, it will ask you to provide your phone number. And that’s it, your wallet is created with one simple step.
The next step is to set up your Herotag, but before that, you need to backup your key phrase and set your wallet’s pin.
Note: Do not forget to store your key phrase safely. If you lost it, you won’t recover your wallet’s data and funds.
2) Create a Herotag
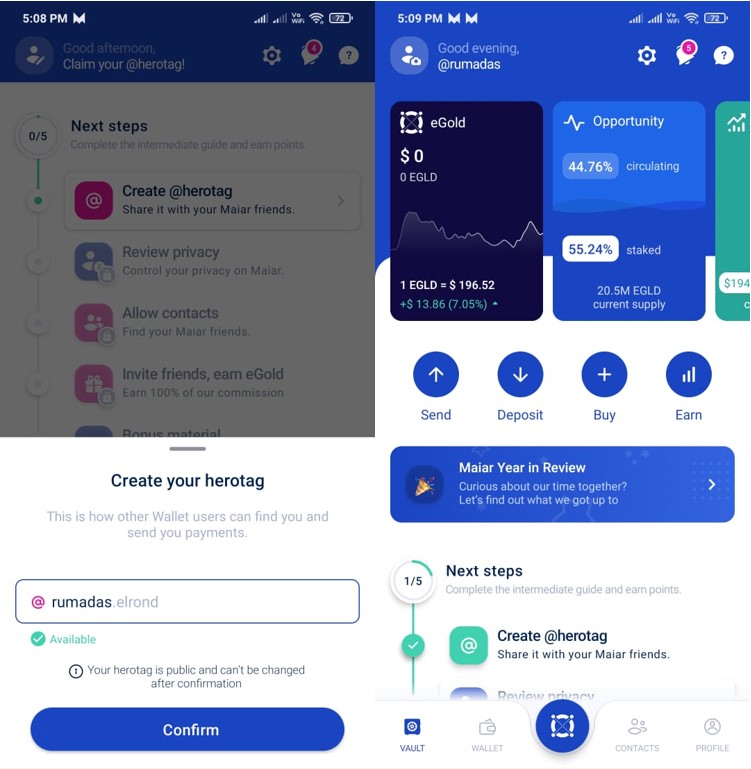
Once you have taken a backup of your key phrase and set your wallet’s pin, you will be guided towards creating a Herotag. Herotag is a unique, easily readable text that you can use to receive payments.
To create a Herotag, enter the text in the field and check whether it is available or not. If it is available, then confirm the process, and you can see your tag name has changed on the wallet landing page.
3) Deposit
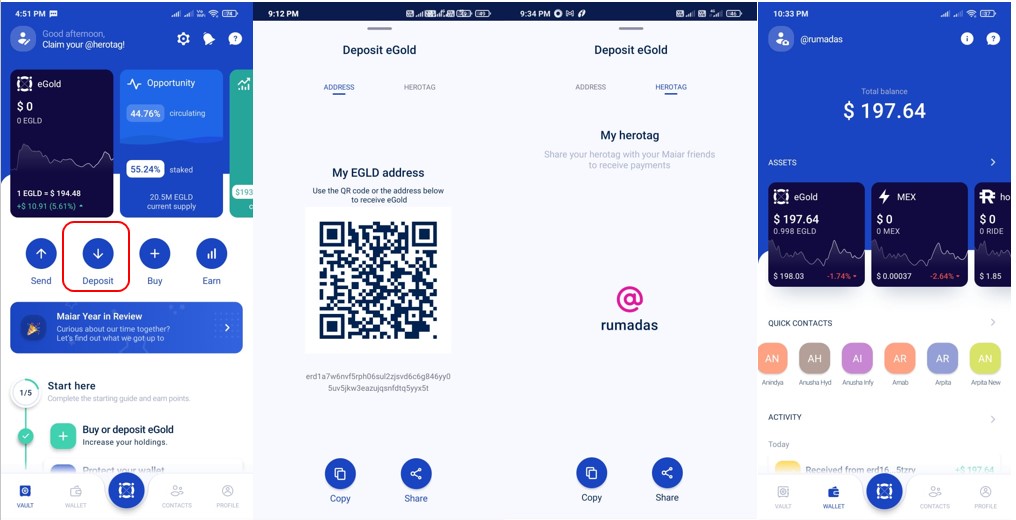
To receive EGLD in your wallet, you need the receiving/public address. To do this, click on the “Deposit” button and the application will show you the QR code that you can use to receive assets.
Also, you can use your Herotag to receive assets in your wallet.
4) Send
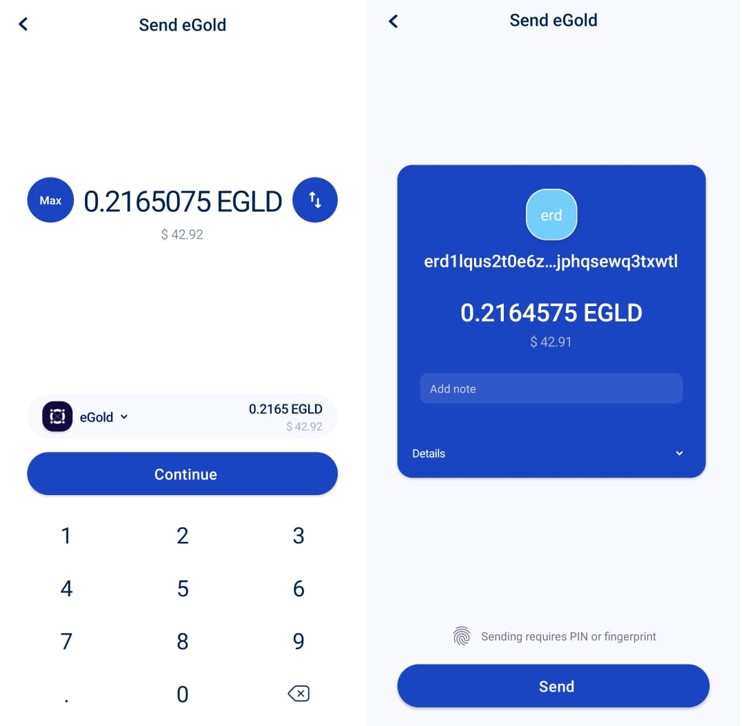
Using the “Send” option you can transfer assets to other users. To do it, you have to enter the amount and the address where you wish to send it. You can also add a note if you want. And, finally, confirm the process.
5) Buy
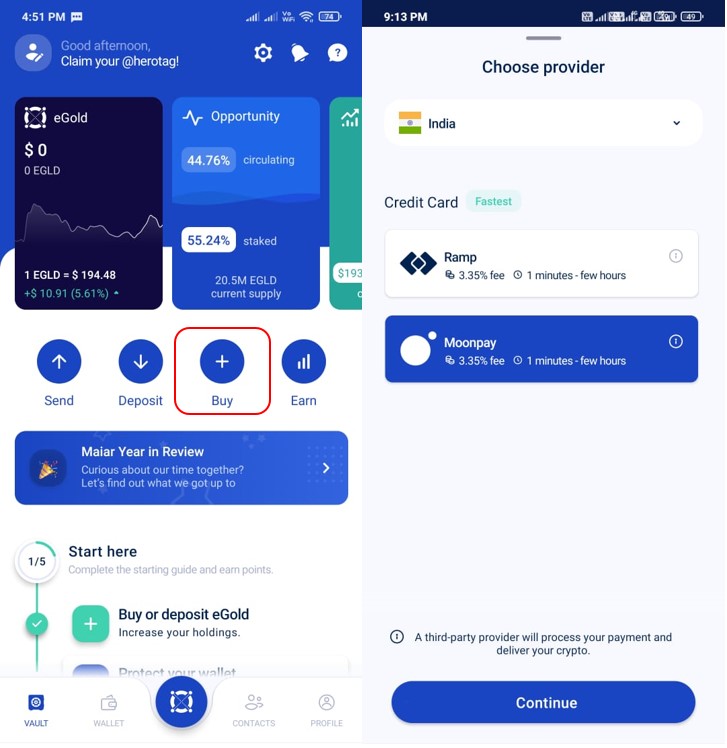
The Maiar wallet allows users to buy EGLD from the wallet interface. This feature is supported by a third-party service provider. Therefore, to use it, you have to select the country and service provider to pass through a KYC process before buying. They may take your personal and billing details as a part of the KYC verification process.
6) Add Contacts Address
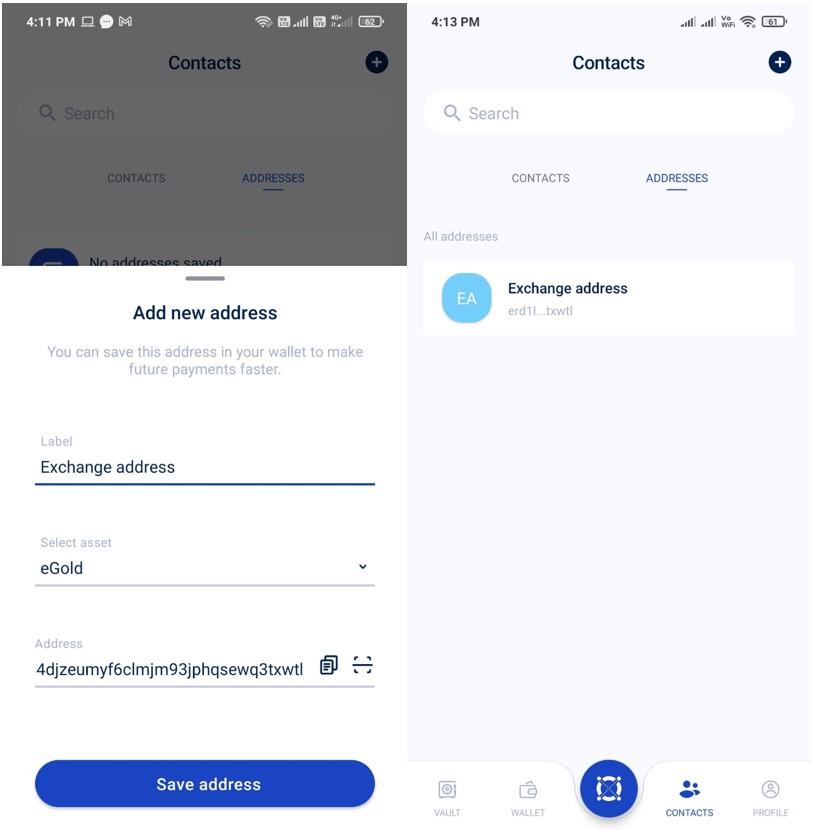
The wallet allows you to add your frequent address. To do it, users need to provide the below details for adding an address:
- Label
- Asset
- Address
7) Setting up the Account Privacy
Moreover, users can set their wallet’s privacy settings from this tab. They can enable/disable the visibility of their Herotag and phone number.
8) Invite Friends
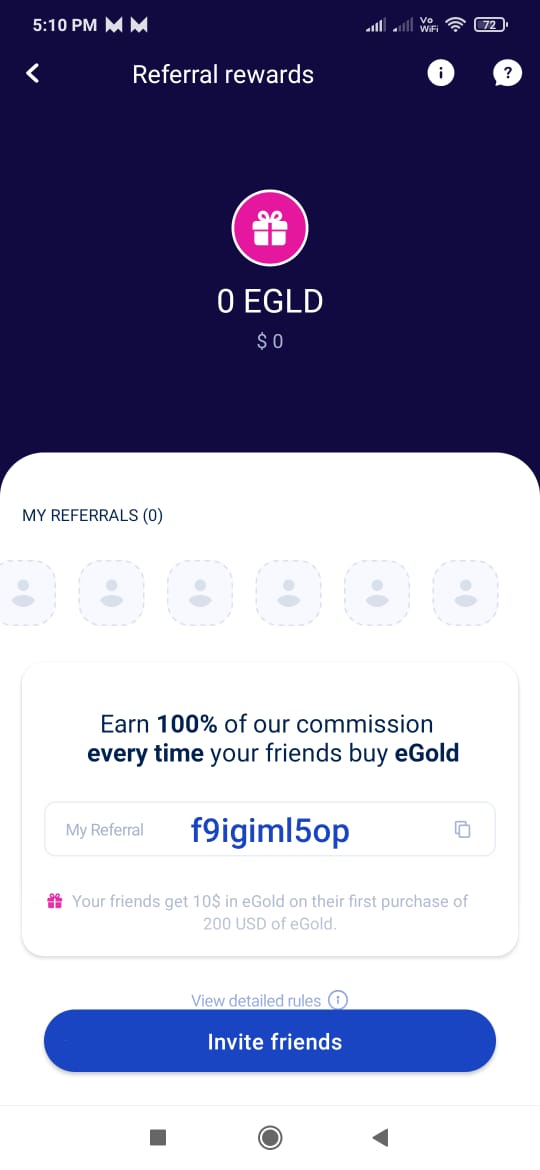
Also, Maiar wallet users can invite their friends/relatives to install the application on their devices. Existing users can share their referral code with other users and earn a commission whenever their friends buy eGold.
9) Staking
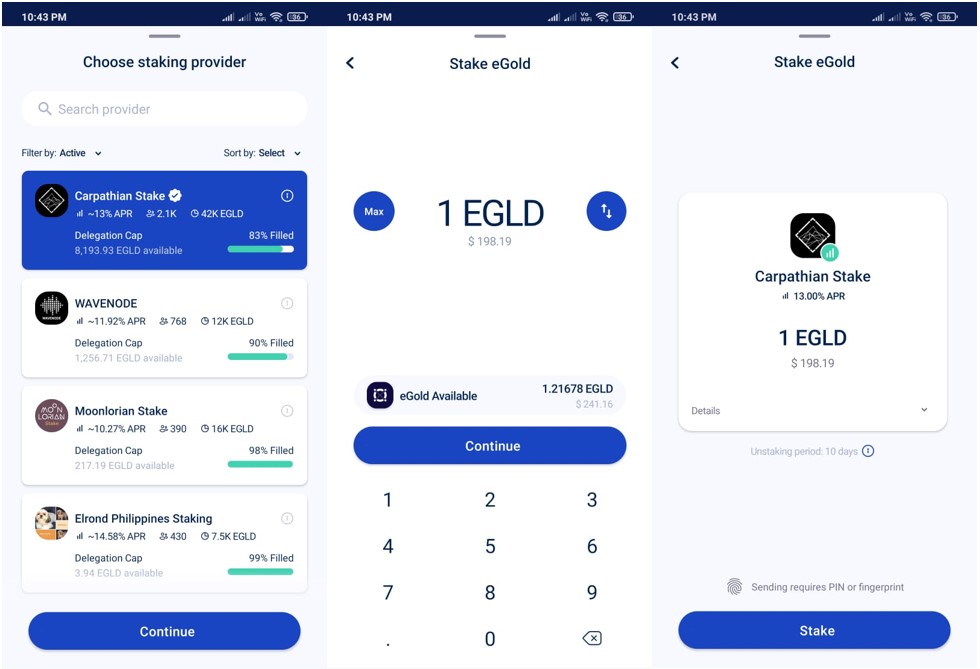
The Maiar wallet application allows the users to stake their EGLD token. Note that the minimum amount to the stake is 1 EGLD.
To do it, you need to click on the “Earn” option and you will find the “stake” button. Then, you have to select the staking provider to whom you can delegate your tokens. Now, enter the amount of EGLD that you would like to deposit, and confirm the process.
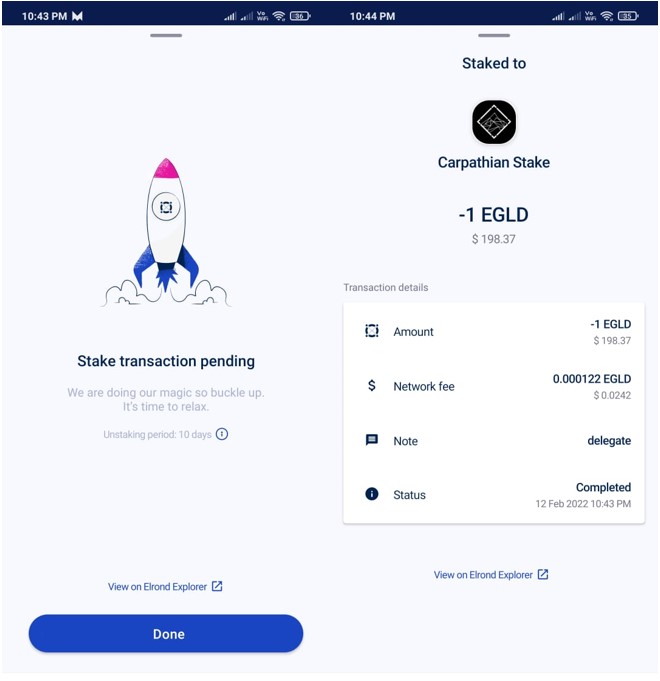
The staking transaction will take some time to finish. Once done, the transaction status will change to complete and you can see your staking details from the wallet interface.
10) Unstake
As you can see from the above screenshot, the wallet imposes an unstacking period of 10 days. You can unstake your token anytime but it will be released after 10 days.
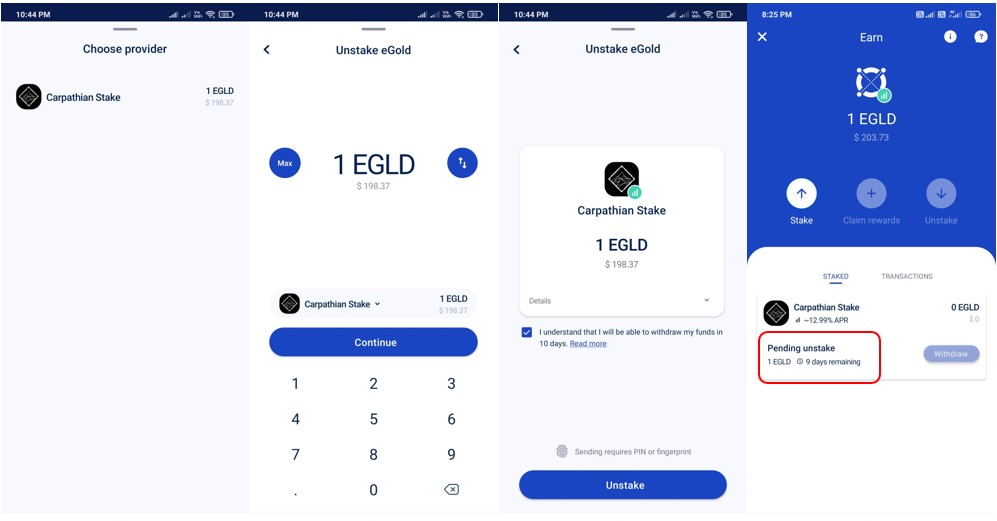
To unstake, first, select the service provider (in case of more than one) from whom you wish to unstake. Next, enter the amount that you want to unstake, and finally, confirm the process.
You can check the unstake details (number of days remaining) from the wallet interface (see highlighted above).
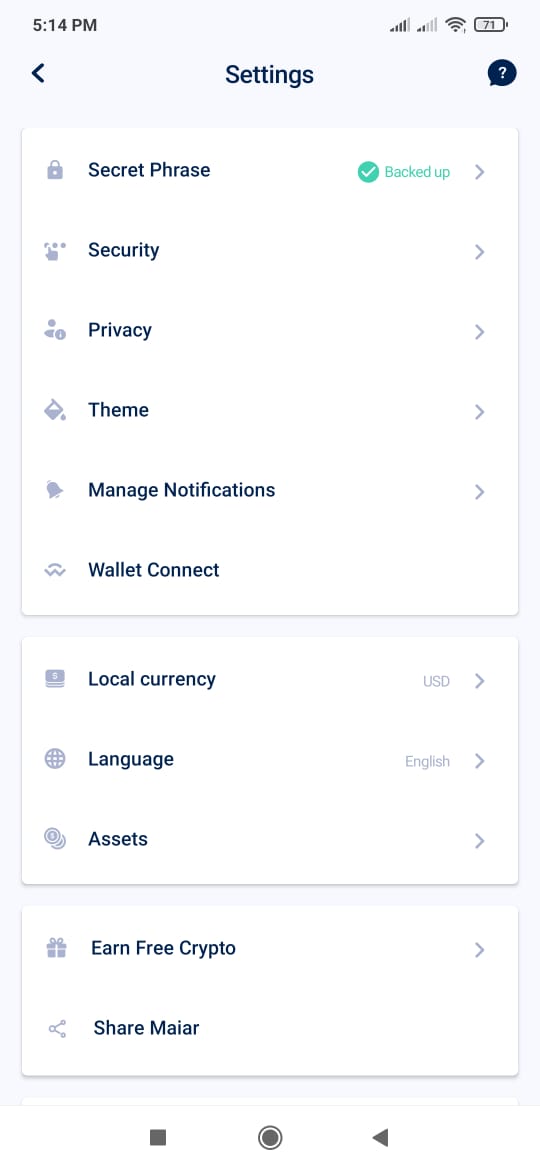
11 ) Settings
From the “Settings” tab, users can set the below parameters in their wallet application:
- Secret Phrase- Check backup status here. If the secret phrase is not backed up then you can take a backup from this section
- Security- Change your PIN, enable/disable fingerprint login
- Privacy- Manage who can see your herotag and phone number
- Theme- Set application theme (default, light, dark) here
- Manage Notification- Enable/disable notifications
- WalletConnect- Open the code scanner and connect with dApps via WalletConnect
- Local Currency- Shows the list of supported currencies
- Language- See the list of supported languages by the application
- Assets- Shows the list of assets
- Earn Free Crypto- Open the referral section and allows you to share your referral code with other
- Share Maiar- Share your referral link with others to install the wallet application
Join us on Telegram to receive free trading signals.
For more cryptocurrency news, check out the Altcoin Buzz YouTube channel.


