How to Stake DOT with Ledger – Part II
Ledger supports Polkadot. Users can now store their DOT token into any Ledger device. This article contains a step-by-step guide on how to store and stake your DOT token from your Ledger device.
By Victor

We are creating a detailed guide on how you can store DOT into a Ledger and carry out Polkadot staking from the device. In the previous part of this series, we have explained how you can set up an account and transfer tokens into a ledger. In this article, we will explore all the remaining steps and checks that a user needs to follow for staking their DOT token.
Install Polkadot Browser Extension
Users are required to install the Polkadot.js application. The wallet is built on the Polkadot-js stack.
If you are already using the Polkadot wallet, then you can skip this step.
To install the Polkadot wallet, go to this page. Here, you will find the links to the various Polkadot applications and other important sections.
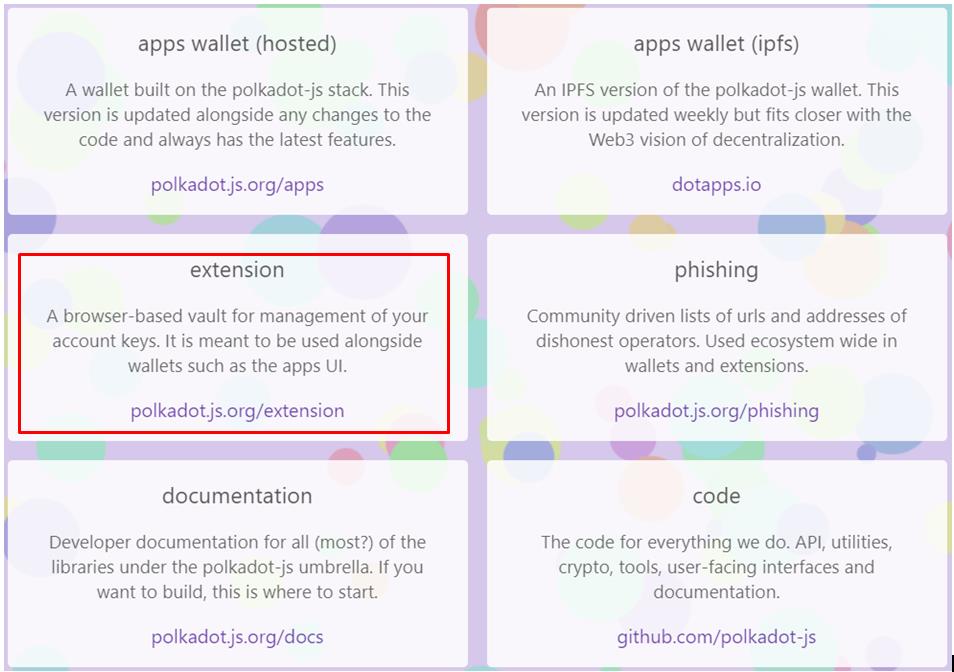
Important: It is recommended to close the Ledger Live application while using Ledger with Polkadot JavaScript (JS) Apps as it can interfere with your normal operation.
Click on Extension.
It will redirect you to this page where you will find the option to download the wallet application for the Firefox or Chrome browser.
Select your desired option. We are installing it in the Chrome browser.
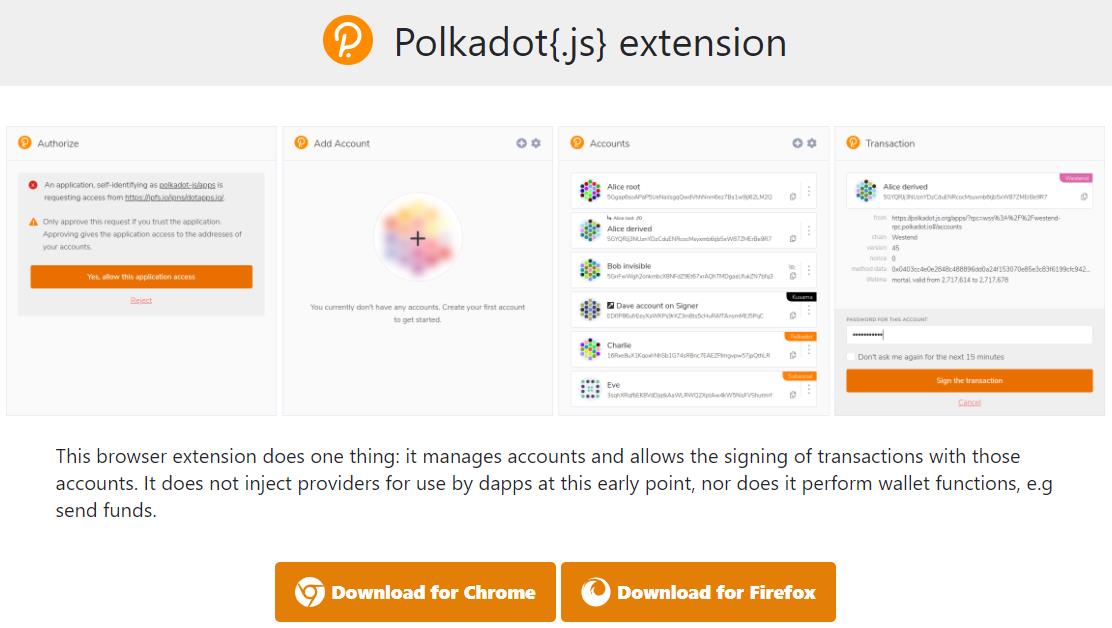
Click on Download for Chrome, and you will be redirected to the Chrome Extensions page.
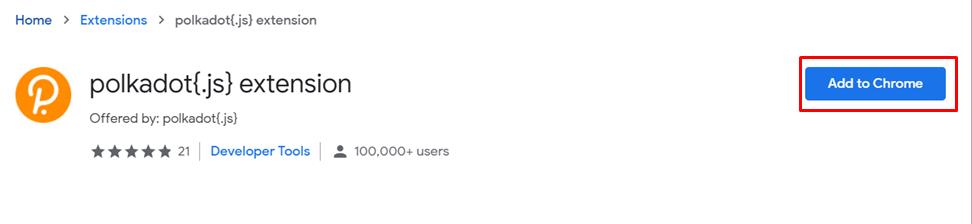
Next, click on Add to Chrome, and the Polkadot wallet application will be added to your browser extension.
You can find the icon highlighted below in your browser extension.

Import Ledger Account
Since you have installed and configured your Polkadot wallet application in your system, you can now import your Ledger account.
Users are required to connect their Ledger device with the computer while importing.
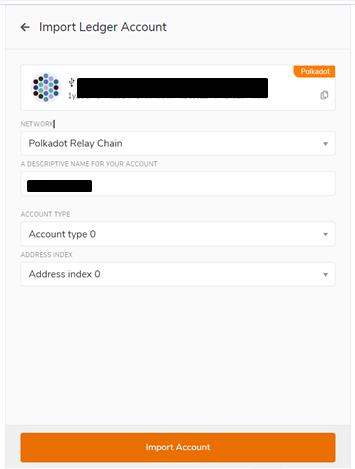
Click on the extension icon and then select the plus option (+) to attach a new Ledger account.
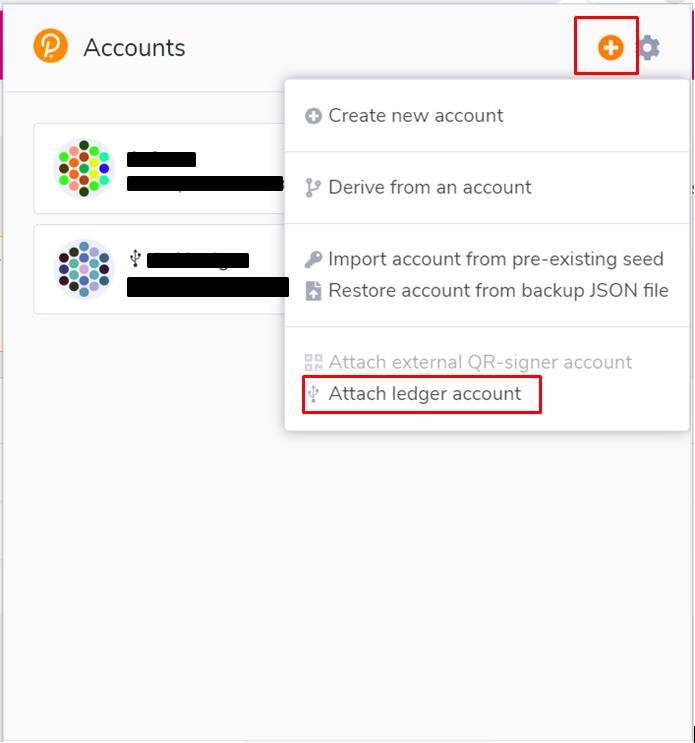
A page will pop up. Provide a meaningful account name and select the desired account.
Next, you have to select the network type from the list of available options:
- Polkadot Relay Chain
- Kusama Relay Chain
- Dot Mainnet
- Polymesh
In this case, we will choose the first option as our preferred network – Polkadot Relay Chain.
Users are now required to select the account type and index. Both parameters define your account address and help you to identify the address if you have multiple accounts on a single Ledger device.
With each account type, you can choose a different account index (second dropdown).
If you are a new user, we suggest you go with the default (account type 0, address type 0) setting to avoid any confusion.
Now, click on the Import Account to add the Ledger account onto the Polkadot wallet application.
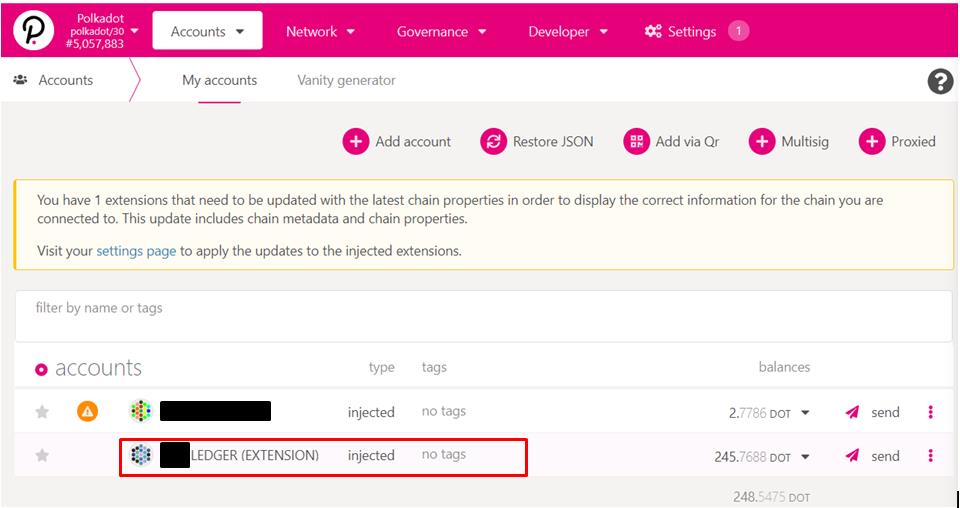
You can now see the Ledger account has been added to your Accounts section.
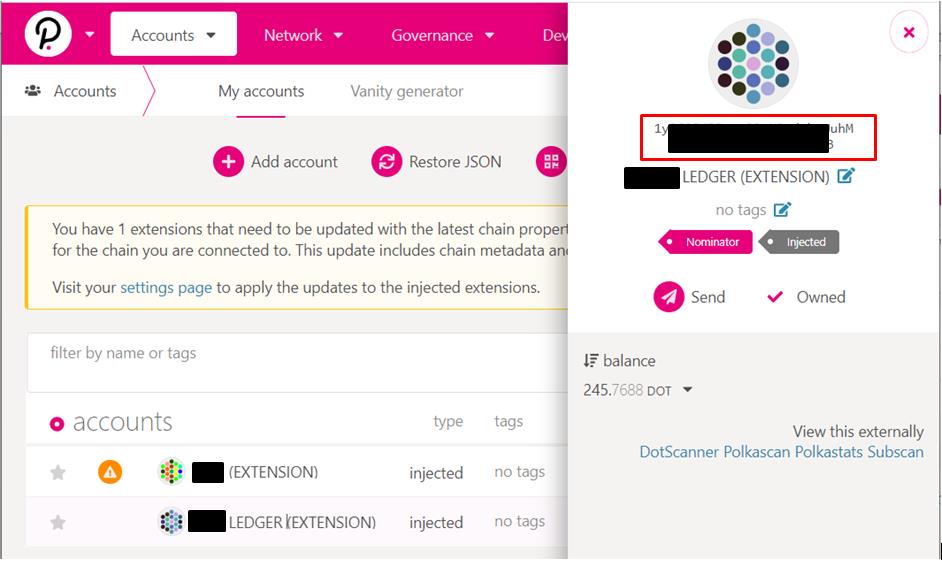
You can check the Ledger account address by clicking on it. Once clicked, a sidebar will open that displays your Ledger account address along with your current balance.
Polkadot Staking
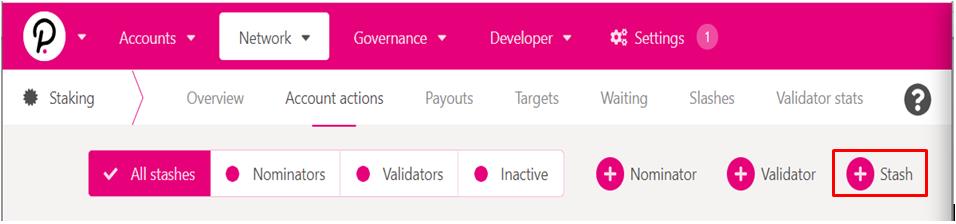
To stake your DOT token, go to the Network tab and click on Staking.
From the Account actions tab, click on the Stash (+) button highlighted in the screenshot below.
A page will pop up. Select your Stash and Controller account, respectively. We recommend you select your Ledger account as your Stash account for additional security. Users can select another account as their Controller account.
Funding operations are managed by the Stash account, and non-funding actions are managed by the Controller account. Thus, selecting a different account as a Controller would not need your Ledger device to perform any actions on your account.
However, to maintain high security while using the hardware wallet directly, we have selected our Ledger account for both the Controller and Stash.
Now, enter the amount of DOT token that you wish to stake in the bonding preference.
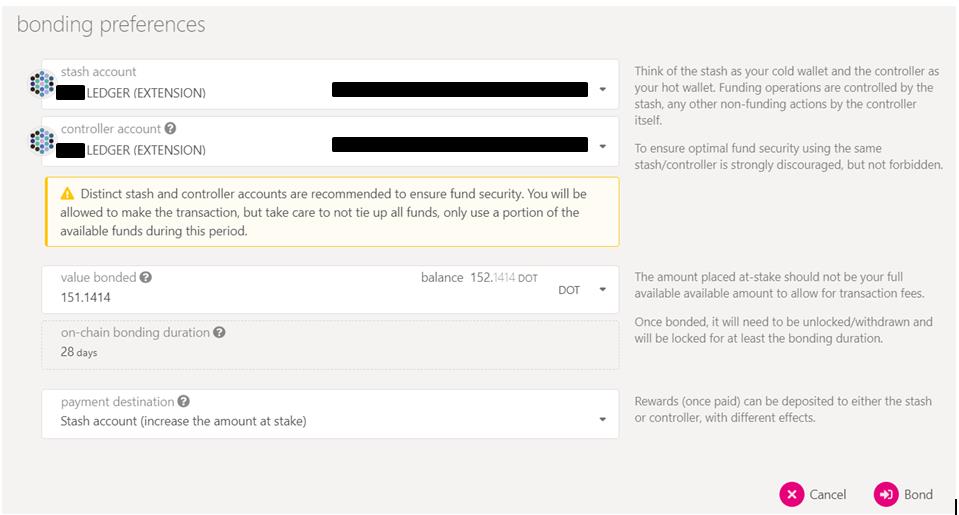
The bonding duration is currently set to a default value of 28 days. During this period, the user funds will be locked in the ecosystem.
Users can set the payment destination by choosing any of the below options:
- Stash account (increase the amount at stake)
- Stash account (do not increase the amount at stake)
- Controller account
- Specified payment account
Once you have filled the details with your desired option, you can click on Bond to confirm the transaction.
Confirm the transaction on your Ledger device.
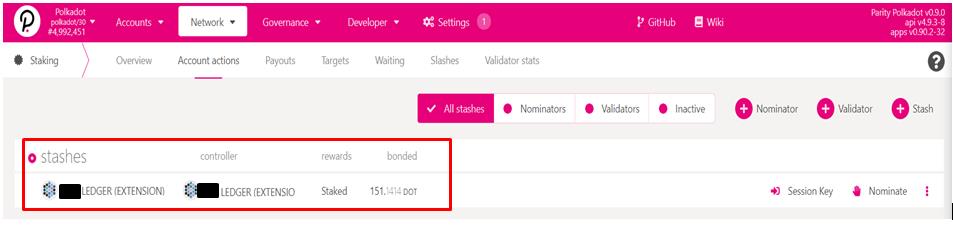
You can now see your bonded DOT on the Account Action page.
In the next and the final part of this Polkadot staking series, we will explain how you can select a validator and what to consider before selecting one.
Join us on Telegram to receive free trading signals.
For more cryptocurrency news, check out the Altcoin Buzz YouTube channel.
Next up

BBIT Spot Bitcoin ETF Heads to SIX in November, Swiss Investors Only
BIT Asset Management's BBIT, Switzerland's first retail spot Bitcoin ETF, should start trading on SIX in November. It is offered in Switzerland only.
 BTC
BTCRelated
More in Crypto NewsRelated
Sui's Hashi Adds Anchorage Digital as $500M Bitcoin Launch Nears
BTC SUI
SUI
Bitcoin Core Speeds Up Fixes for AI found Bugs Drops
BTC
Bitcoin ETFs Lose $635M in a Day as DWF Study Says Flows Chase Price
BTC
Bitcoin ETFs Draw $1.07B in Three Days, Short of Rally-Era Pace
BTC