


")


 Tokens Playing This P2E Game")
")
Launched on August 28th, 2021, Synapse is a layered ∞ protocol that supports cross-chain assets transfer between various major blockchain networks and L2 sidechains. Currently, it supports token transfer between 12 networks. Apart from the bridging solution, the protocol allows you to swap assets and add liquidity. It has liquidity pools on almost every chain it supports where users can deposit tokens and earn rewards.
The AMM contract of the protocol was audited by Certik, OpenZeppelin, and Quantstamp. The Synapse Bridge contracts are currently undergoing multiple audits whereas the network validator code has not had an audit.
The Synapse protocol has a native token, named SYN that is used in its ecosystem. The token is used for governance voting, paying network fees, and as an incentive to the liquidity providers.
So, in this article, we will explain how you can use the Synapse bridge to transfer your assets from the Ethereum network to the Avalanche network.
Table of Contents
Access the Synapse Bridge Portal
To use the bridge, visit the link.
Connect your wallet first before using the portal. You can find the connect wallet option in the top corner of the page.
Connect Wallet
The Synapse bridge allows you to connect with the below wallets:
- Metamask
- WalletConnect
- Coinbase Wallet
- Binance Smart Chain Wallet
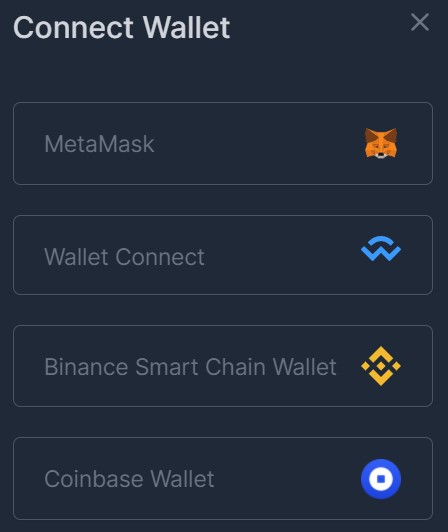
You can connect with whichever wallet type works for you.
Supported Network
The bridge allows you to transfer assets between all major networks including Ethereum, Binance Smart Chain, Fantom, Harmony, Moonriver, Moonbeam, Avalanche, Arbitrum, and many more.
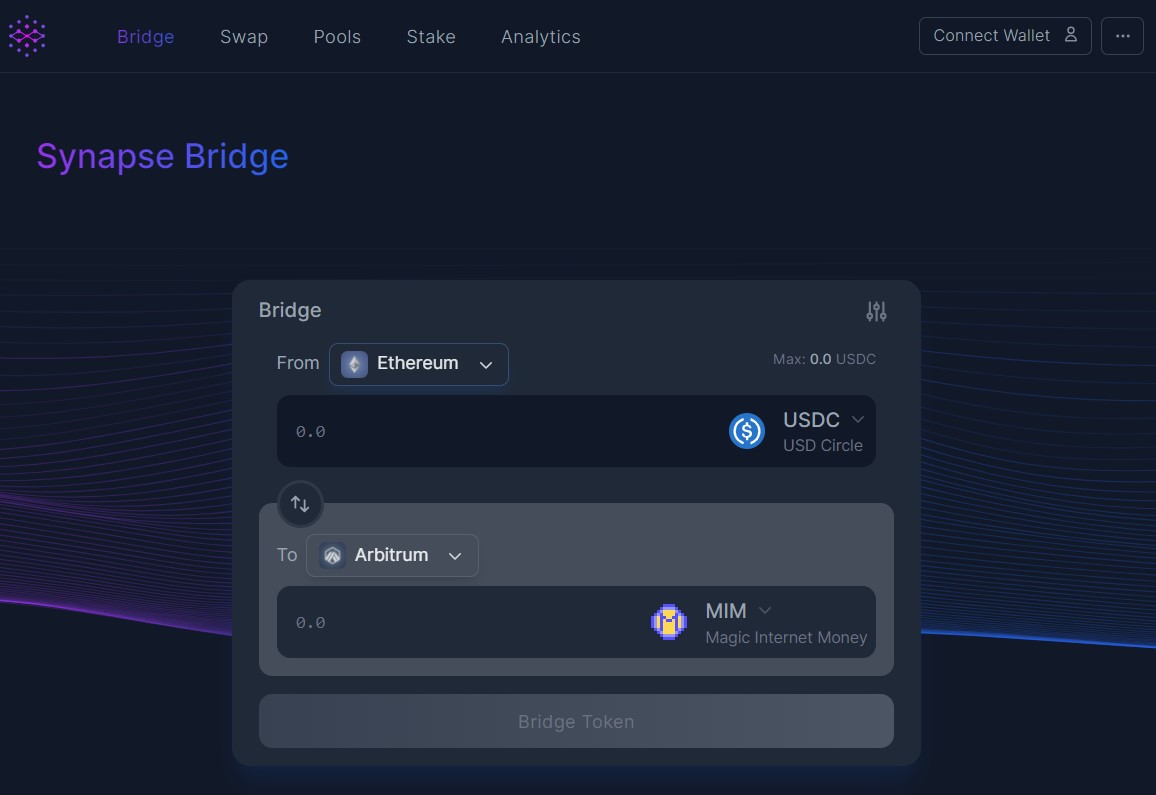
Transfer From Ethereum to Avalanche
Once you connect your wallet, you can use the bridge portal. To transfer assets users must select/fill the below details:
- Fill Source network in the From field
- Fill destination network in the To field
- Select the token and the amount to transfer
Once you fill in the above details, you will automatically see the token the amount you will receive in the destination network, and the fee the bridge charges.
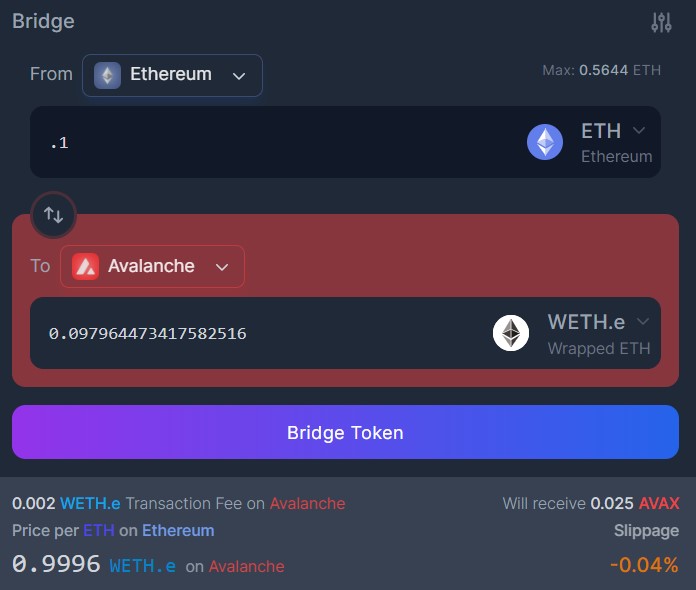
Confirm the process by clicking on the Bridge Token button. A Metamask transaction is generated that you need to confirm. Once the transaction is confirmed at the source chain, you can see the Bridge watcher where you can check the process status and the number of confirmations required to complete the process. See the below screenshot.

You will receive a confirmation message when the process is successful (see below screenshot).

The transaction is pretty fast. You can now see your desired tokens on the destination network.
Avalanche Network Details
If you are using the Avalanche network for the first time, then you have to add the network details in your wallet to see the token. You can use the following details to set up the Avalanche network.
To add a network in Metamask, go to Setting-> Network. Then click on Add Network and fill in the following details there.
- Network Name- Avalanche Network
- New RPC URL- https://api.avax.network/ext/bc/C/rpc
- Chain ID- 43114
- Currency Symbol (Optional)- AVAX
- Block Explorer URL (Optional)- https://snowtrace.io/
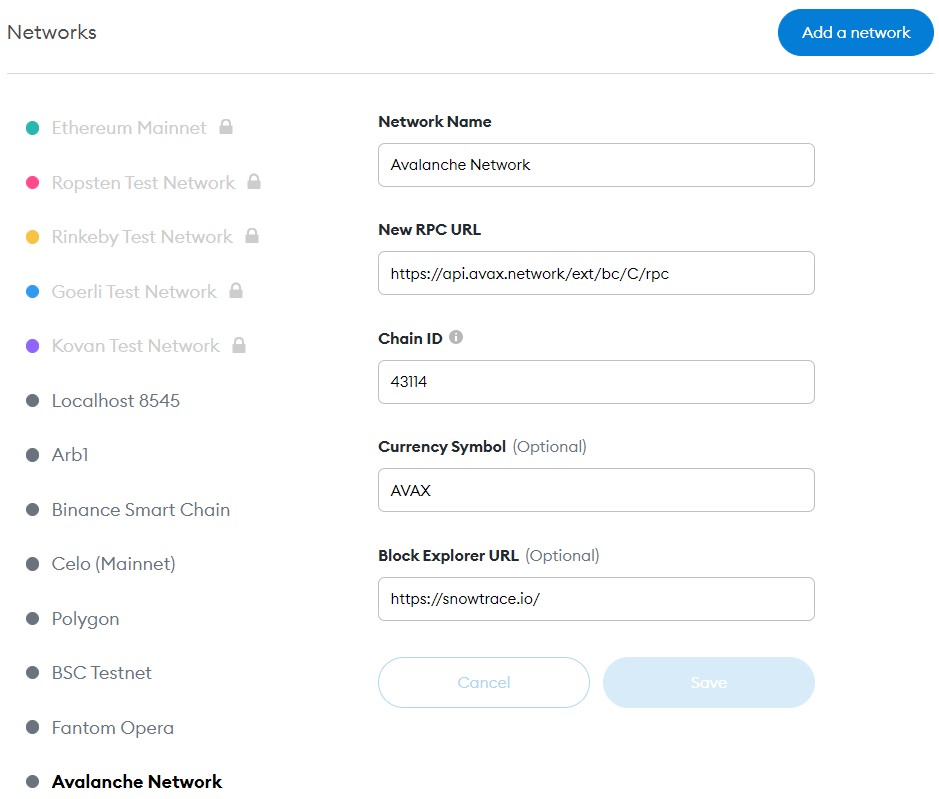
Finally, click on the Save button to save the network details.
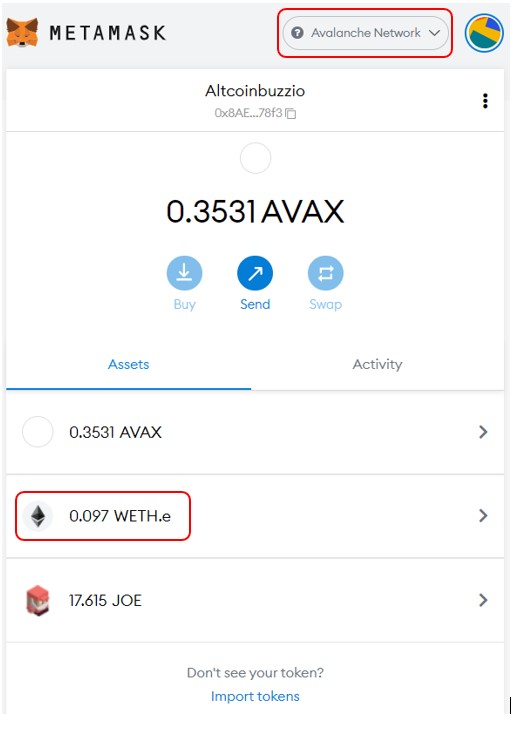
Token In Metamask
If you are working with the desired output token for the first time, then you won’t be able to see the token in your wallet. You have to manually add the token contract address to see the token. Copy the contract address from the block explorer and add it to the Import Token-> Custom token field to view the token and its balance.
Users can follow similar steps to transfer assets among any supported network.
For more info, join us on Telegram to receive free trading signals.
Also, for more cryptocurrency news, check out the Altcoin Buzz YouTube channel.


