This guide contains detailed steps on how you can install and use the Electrum Wallet.

The application also provides support to hardware devices like Ledger, Trezor, and Keepkey. Also, the Electrum wallet is available for various operating system users i.e Windows, Linux, Python, etc. So, in this article, we will explain how you can install and set up your Electrum wallet for Android devices.
Table of Contents
ToggleFirst, to install the Electrum wallet, visit the official website
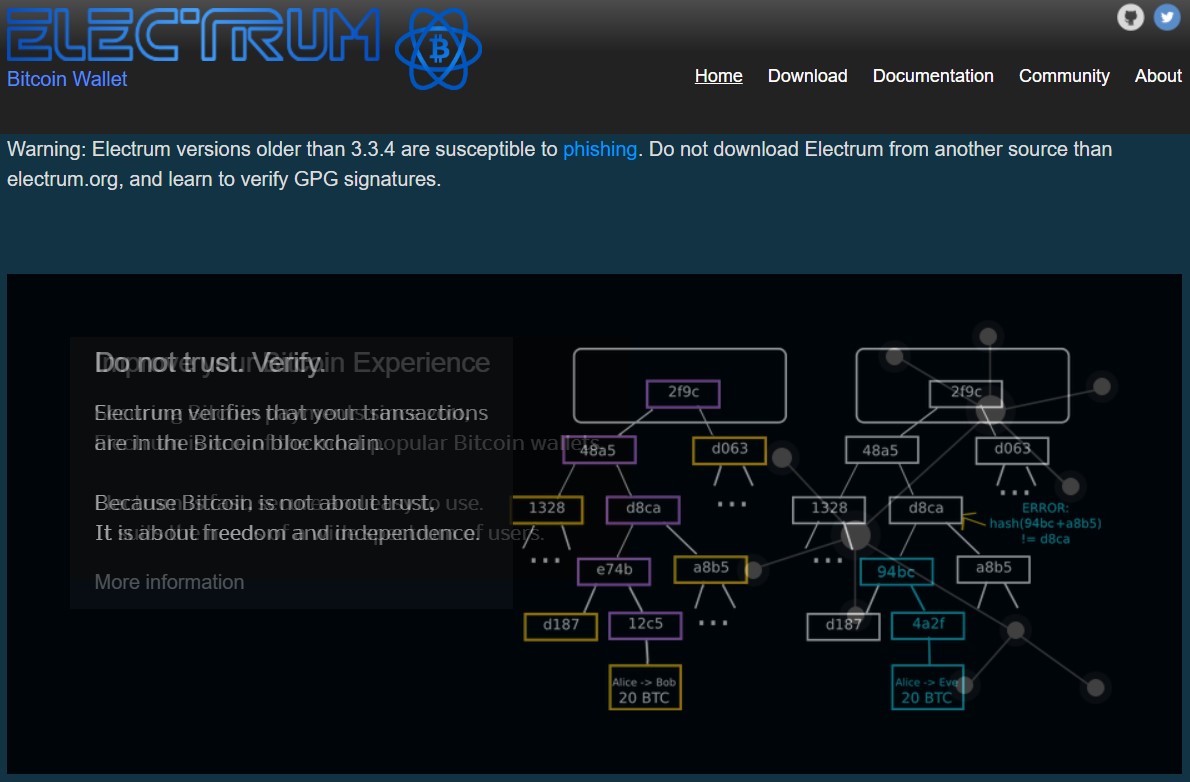
Then, on the main page, you may notice a warning message regarding the application versions that are prone to a phishing attack. Therefore, users are advised to download version 3.3.4 or above for secure transactions.
Now, you need to click on the Download button appearing at the top of the page. Therefore, users will get the option to download the application for different Operating systems.
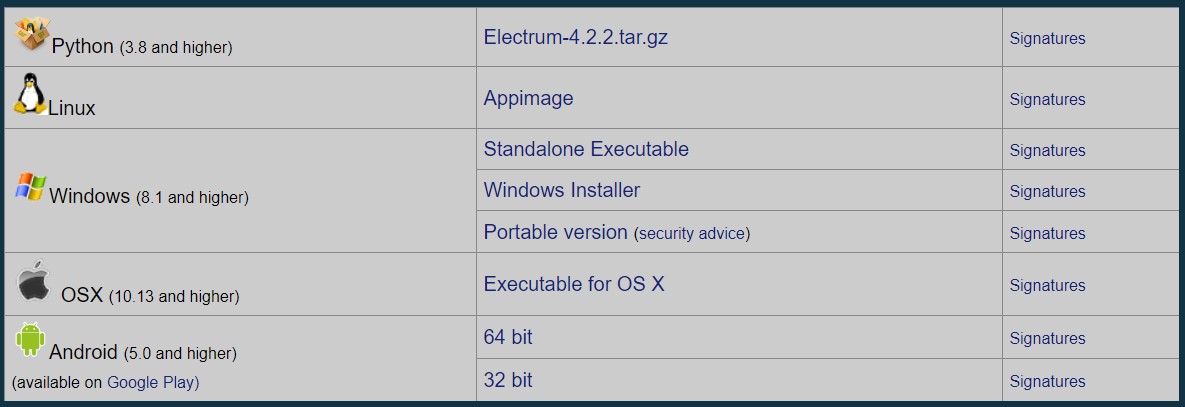
Source: Electrum
Select your desired option.
Search for the Electrum Application on the Google PlayStore.

Now, click on Install, and the application will get downloaded to your device.
Then, we will now explain the different wallet types in detail so that you can decide what wallet type you need:
You can install the Electrum wallet on multiple devices (having different private keys, different or same owner). When a transaction is triggered, it needs to be signed by the minimum number of owners (specified during setup) to approve the process. This method is also secured as it requires more than one person to approve a transaction.
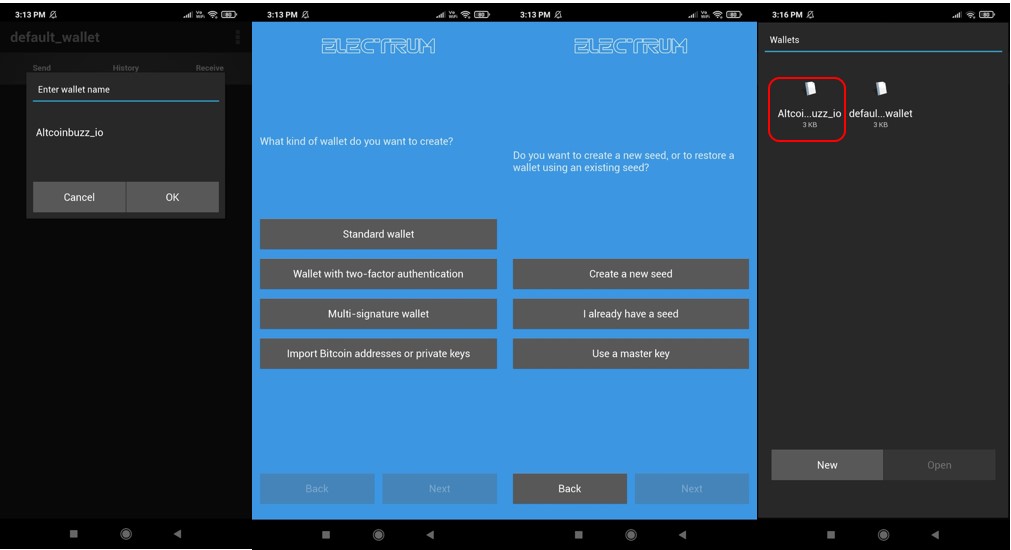
On the other hand, to setup your electrum wallet, you need to select the kind of wallet that you wish to create. If you want to create a simple wallet, then go for Standard Wallet. Next, you will find the below options for wallet setup:

Source: Electrum
The First option i.e Create A New Seed will let you create a new Electrum wallet. Then, existing users can again set up their accounts on different devices by using the seed phrase. All they need to do is to select option 2 i.e I Already Have A Seed. This option requires you to enter the 12-word backup phrase. Once you provide the key phrase correctly, your account will be imported.
New users who wish to create a new wallet need to select this option. Next, the application will show your 12-word backup phrase, and ask you to verify your key phrase.
Note: A 12 or 24-word backup phrase is important to recover your account and its associated funds in the future in case you lost your device. Therefore, store your key phrase safely. If you lost access to it, you won’t be able to get your funds back. Or if someone gets access to it, they can steal your assets.
The application will now prompt you to set your wallet’s password. Once done, you can see the landing (History) page.

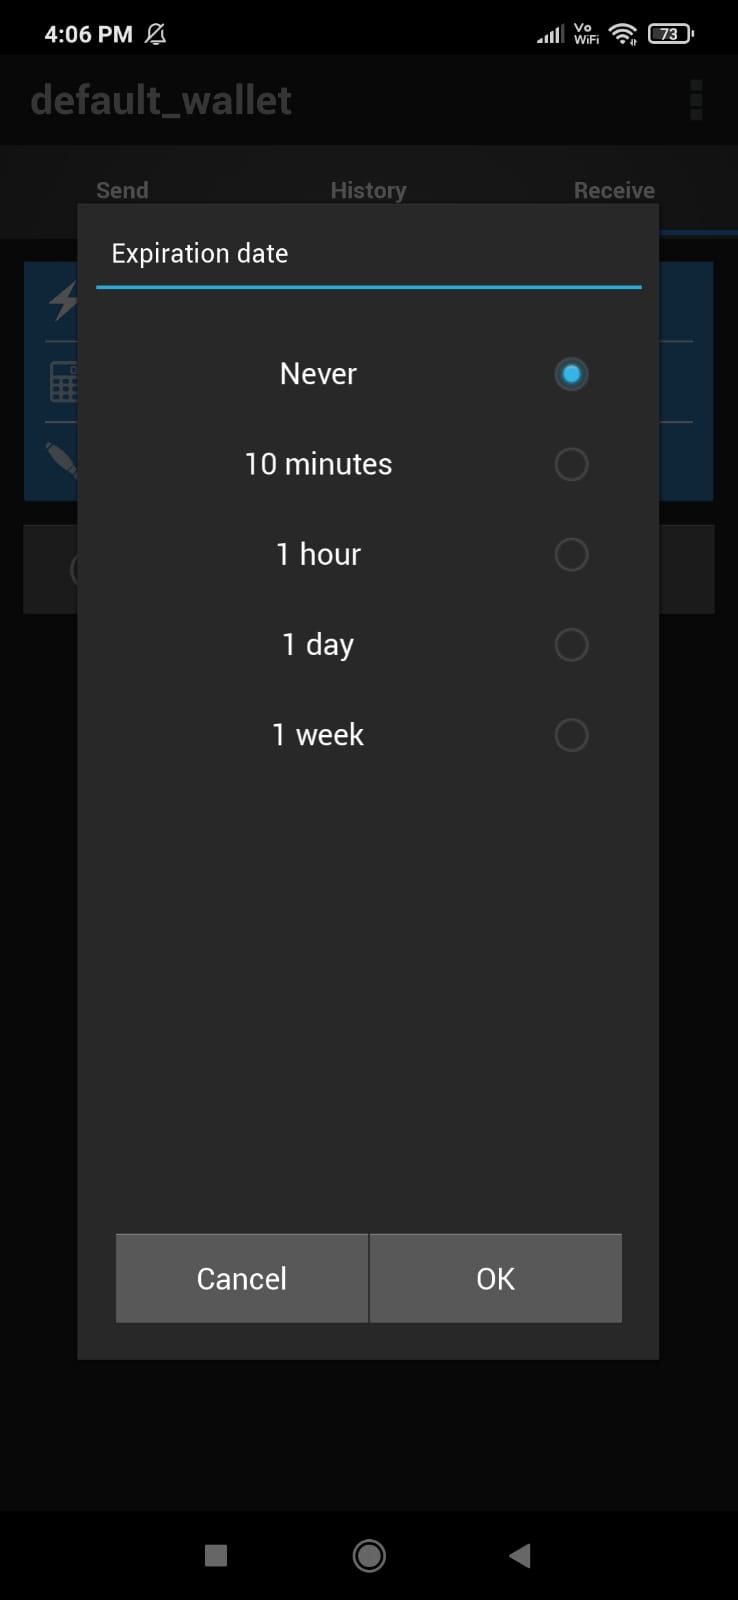
Then, to receive BTC in your wallet, you need the receiving address. However, the process of getting the receiving address is not easy as any other network.
First, go to the Receive tab. Then, you can change the expiration date to Never.
Now, in Receive tab, you can see a few fields:
Fill the Amount, and description field. Now, click on Request. Then, you can see your submitted request at the bottom.
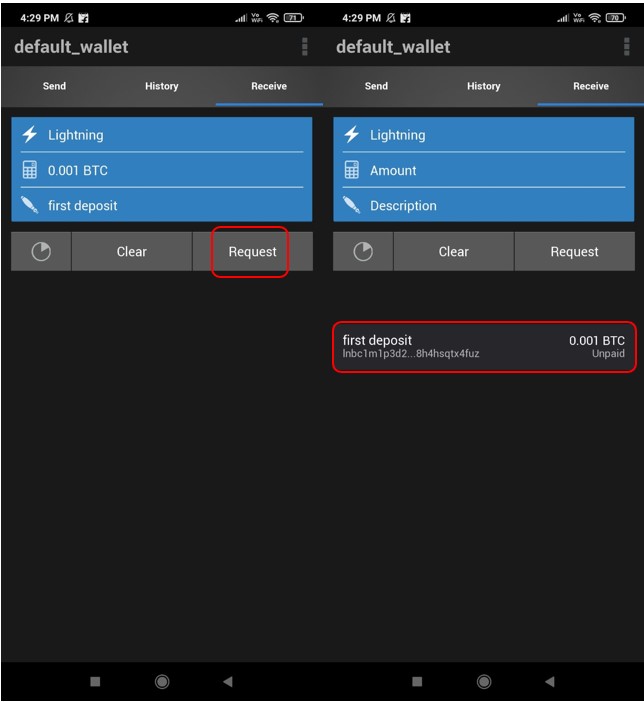
Note: The amount that you enter is only for your reference. The sender can send any amount to the address.
Next, go to the Address section. Here you can see the list of all unused addresses that you can use to receive BTC. Then, select and copy any address. You can use this address to receive BTC.
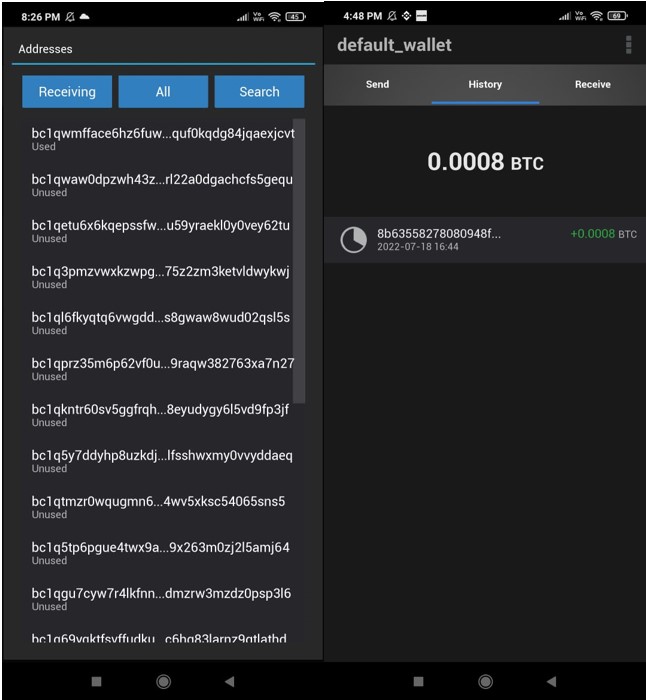
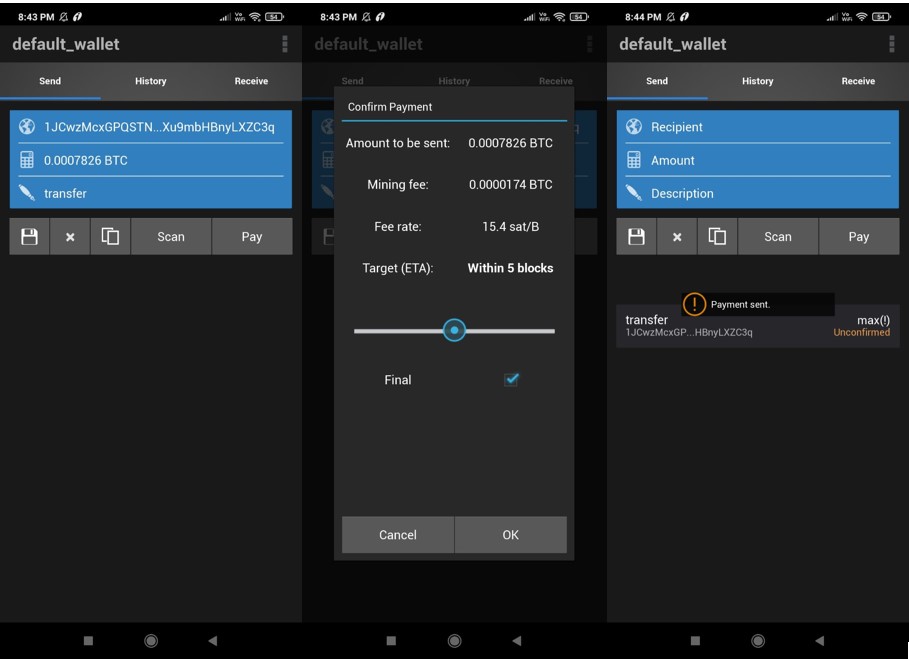
To transfer BTC from your Electrum wallet, you need to fill in the below details:
Now, click on Pay. A window will appear where you can check the ETA and mining fee required for the process. Then, once you are satisfied, confirm the process.
In addition, under the Wallets section, you can check the wallet that you have created. Then, if you wish to create another wallet, you can do that by clicking on the New button. Therefore, this will create a new wallet with the different key phrases. So, follow the below steps to create a wallet:
Then, you can now check your newly created wallet in the Wallets section.
Moreover, from the Settings page, you can check the below parameters:
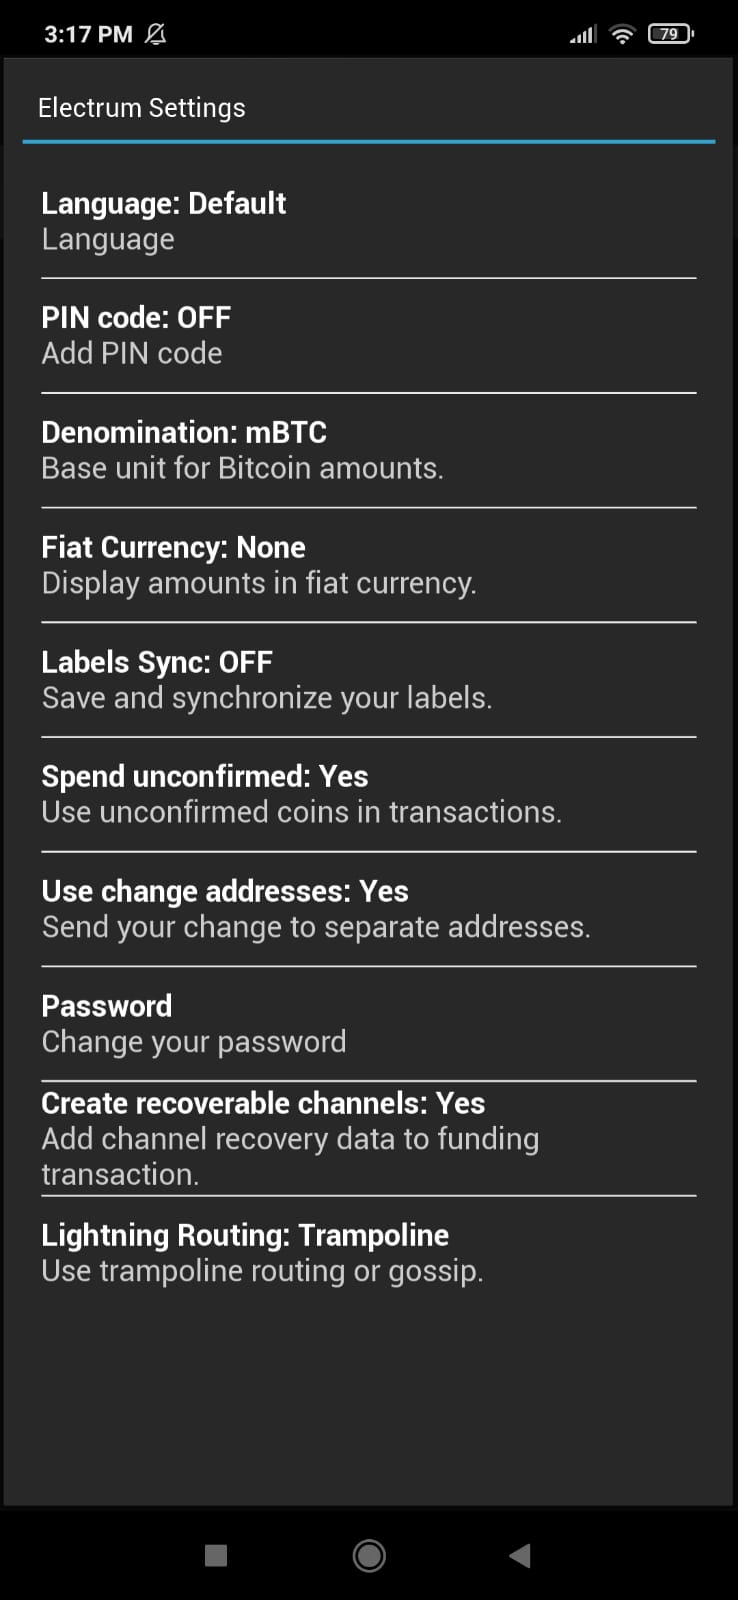
Finally, we recommend our users not change any default setting until they have the proper knowledge.
⬆️Also, for more cryptocurrency news, check out the Altcoin Buzz YouTube channel.
⬆️Above all, find the most undervalued gems, up-to-date research, and NFT buys with Altcoin Buzz Access. Join us for $99 per month now.

Casper Network is betting big on EVM support, AI payments, and quantum-safe blockchain infrastructure with its new multi-year roadmap.

Microsoft's bet on Space and Time is starting to pay off with the launch of Dreamspace, a no code app builder

Worldcoin's World ID is now live and updated. It's out to prove you are human when on the web instead of dealing with a bot.