


")


 Tokens Playing This P2E Game")
")
Solana is a Proof-of-Stake-based blockchain network that offers fast and secure transactions. The platform allows building a crypto application that can scale. To deal with the network speed, and scalability issue, it uses a new method called Proof of History (PoH) to verify transactions that help it to process 50k transactions per second. The platform has a native token named SOL that is used to pay the network transaction fee.
Since Solana is a Proof-of-Stake (PoS) network, that means the network operations are supported by a group of validators. SOL token holders can delegate their token to one or more validator who helps in validating network transactions. In this article, we will explain Solana Staking, and show you how to stake your SOL tokens to the validator; earning rewards.
You can read our previous guides on how to stake Tezos (XTZ), Polkadot (DOT), and Binance Coin (BNB). In this article, we will explain how you can stake your SOL tokens, and earn rewards.
Table of Contents
Supporting Wallet
Currently, not many wallets are providing support to stake SOL tokens. Users can use the following wallet for staking:
- Exodus wallet
- Binance and FTX exchanges
- SolFlare Web Wallet
However, for the first two wallet options, you will not have the flexibility to choose the validator from your own. Users are by default assigned to the partner validator.
SolFlare Web Wallet
SolFlare is a simple and non-custodial wallet created specifically for Solana that allows users to connect with the network, and manage their SOL tokens. The wallet’s private keys are stored in a Keystore file. Users can also connect their ledger device to access the wallet.
In this guide, we will describe how you can set up your SolFlare wallet using the Keystore file? How you can send and receive SOL tokens, and how you can create, and manage a staking account.
Create a Wallet
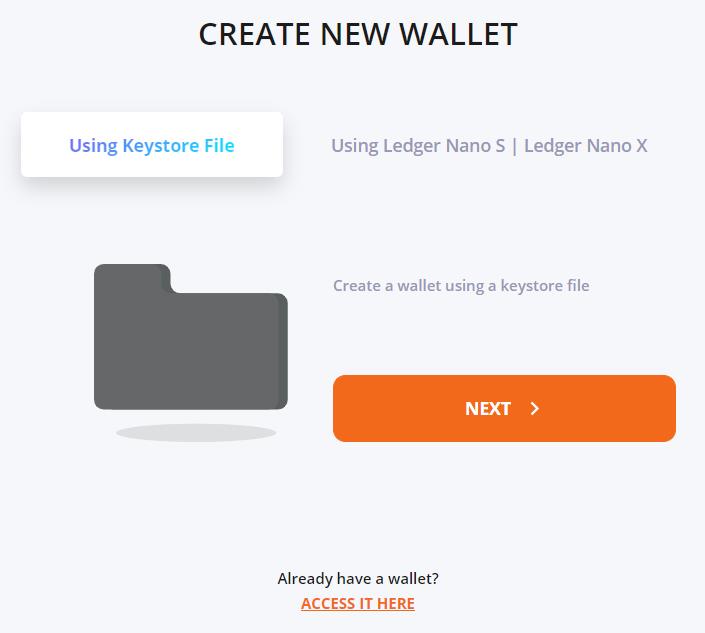
To use the SolFlare wallet, go to this page, and click on Create A Wallet. The application will provide you two options to create a wallet:
- Using Keystore File
- Using Ledger Nano S | Ledger Nano X
Choose the first option if you wish to work with the SolFlare browser wallet. You can also connect your Ledger Nano S or your Ledger Nano X to access the wallet.
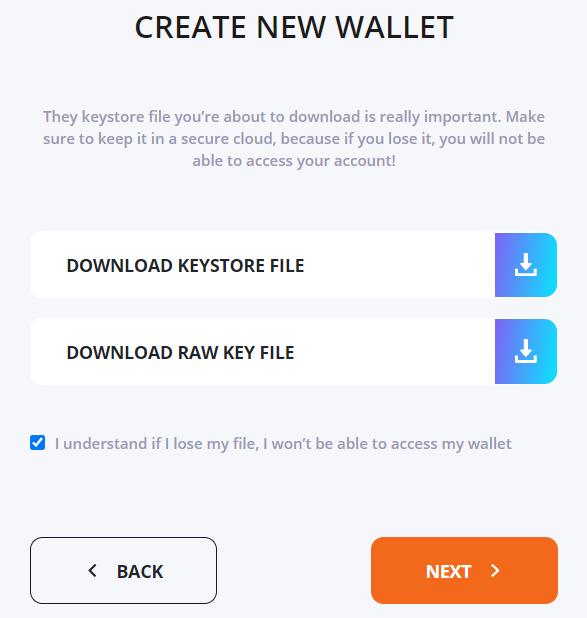
Click on Next. The application will ask you to set up a password for the Keystore file and will provide you the option to download it. Store the file and the password safely. Users will not be able to recover their funds if they lose the Keystore file or the password.
Access the SolFlare Wallet
To access the Solflare wallet through a Keystore file, go to Access your wallet.
The application will ask to upload the Keystore file and the password.
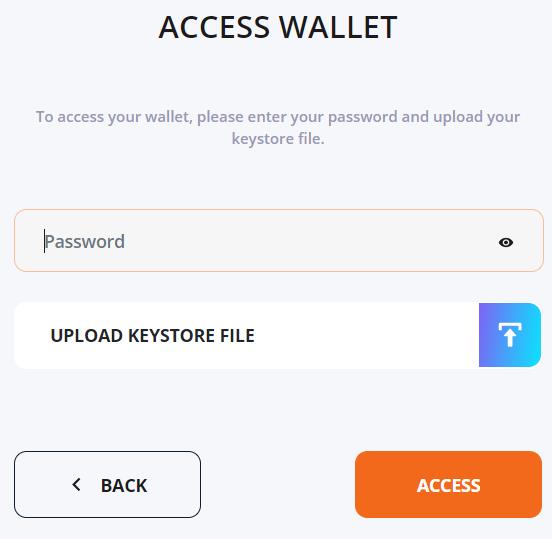
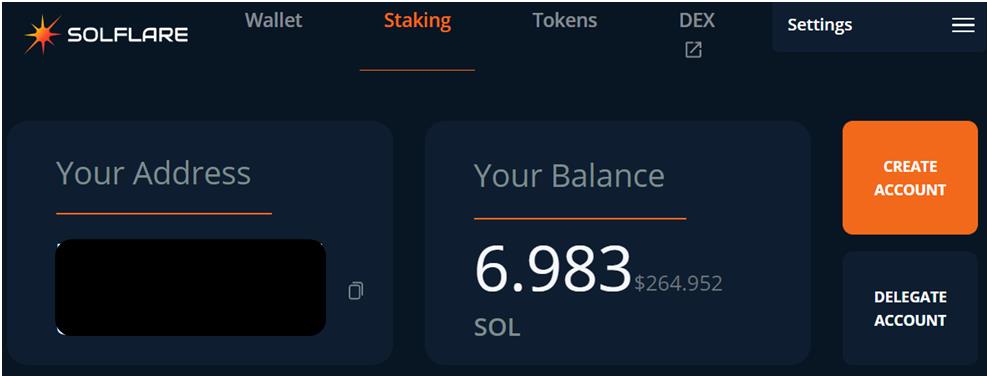
Once you provide both the details correctly, you will be directed to the wallet landing page.
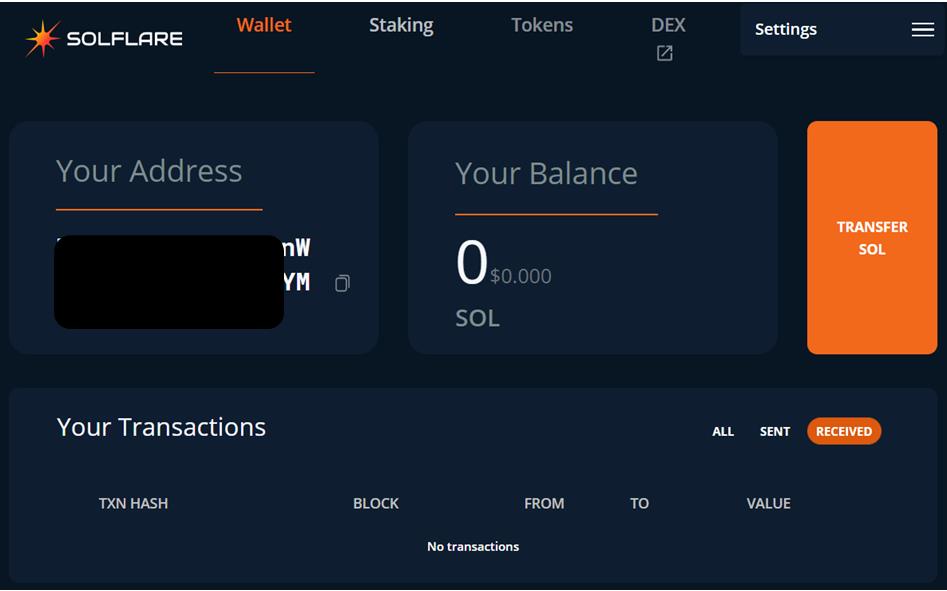
The wallet landing page looks like this. You can check your public address here. This same address you can use to receive SOL tokens in your wallet.
Transfer SOL
We have some SOL tokens in our exchange account that we want to transfer to our SolFlare wallet.
To receive the SOL token in your SolFlare wallet, you need to get the public address. You can get your receiving address from the wallet landing page (see above screenshot).
Now login to your exchange account, and click on withdraw against the SOL token.
Enter your receiving address in the Recipient address field, and confirm the transaction.
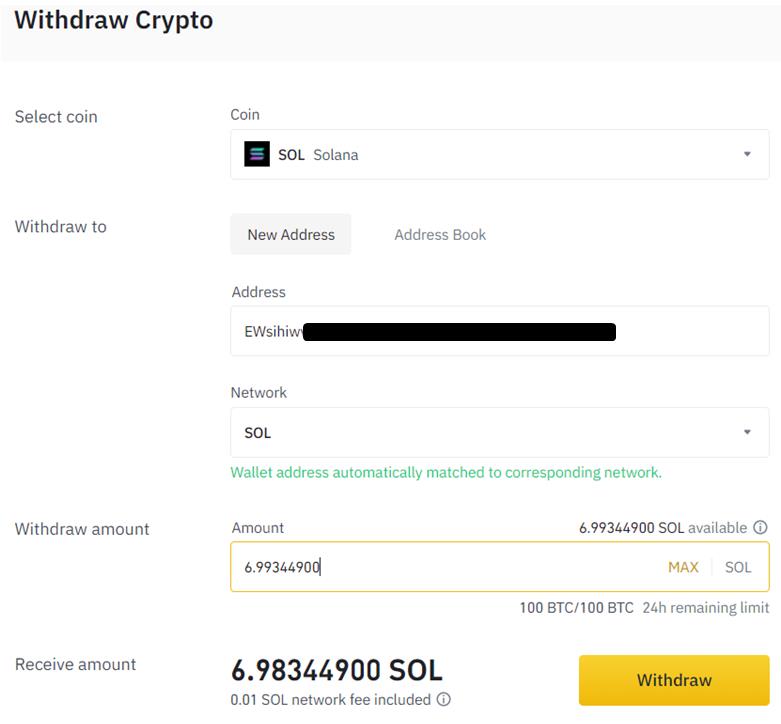
Once the transaction is successful, you can see the SOL token in your wallet.

Stake
To Stake SOL, you need to first move the desired wallet balance to the staking account. Users can create multiple staking accounts within a single wallet address. Each staking account will have a unique address.
To stake SOL go to the Staking tab and click on Create Account.
Now enter the amount of token that you wish to deposit to your new stake account. Do not deposit all your funds to your staking account as you need to hold some SOL tokens in your wallet to pay for the transaction fee.
Confirm the process. You will receive a notification regarding your account creation and fund deposit.
Once the process is confirmed, you can see your staking details from the Your Staking Account section.
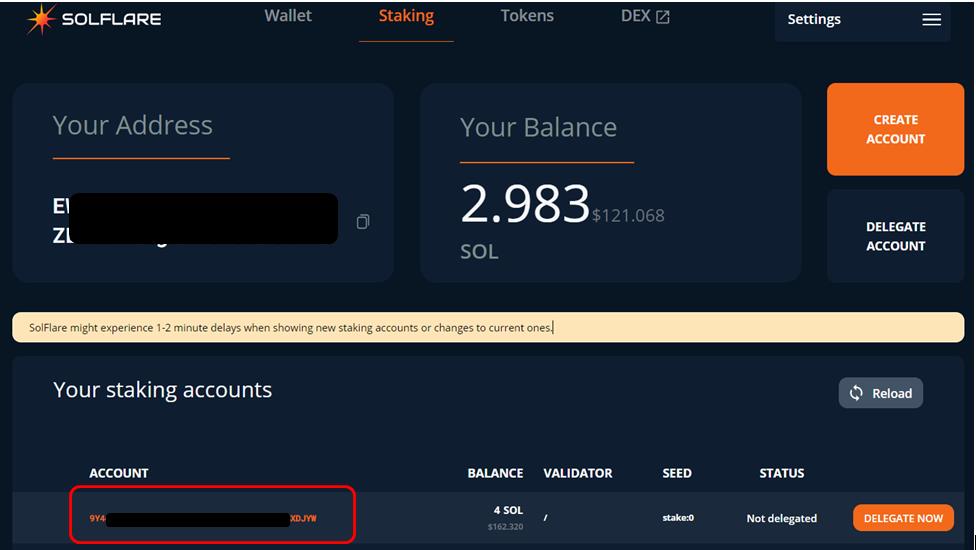
Note that the balance has moved to your staking account but since we have not delegated the token yet, the status shows as Not Delegated.
Delegate
To earn rewards, users need to delegate their tokens to a validator. All the tokens in a single staking account can be delegated to a single validator. If you wish to delegate to multiple validators, you can choose the option Split (we will explain later) to divide the tokens into multiple staking accounts.
Users can see the list of validators from the bottom of the page.
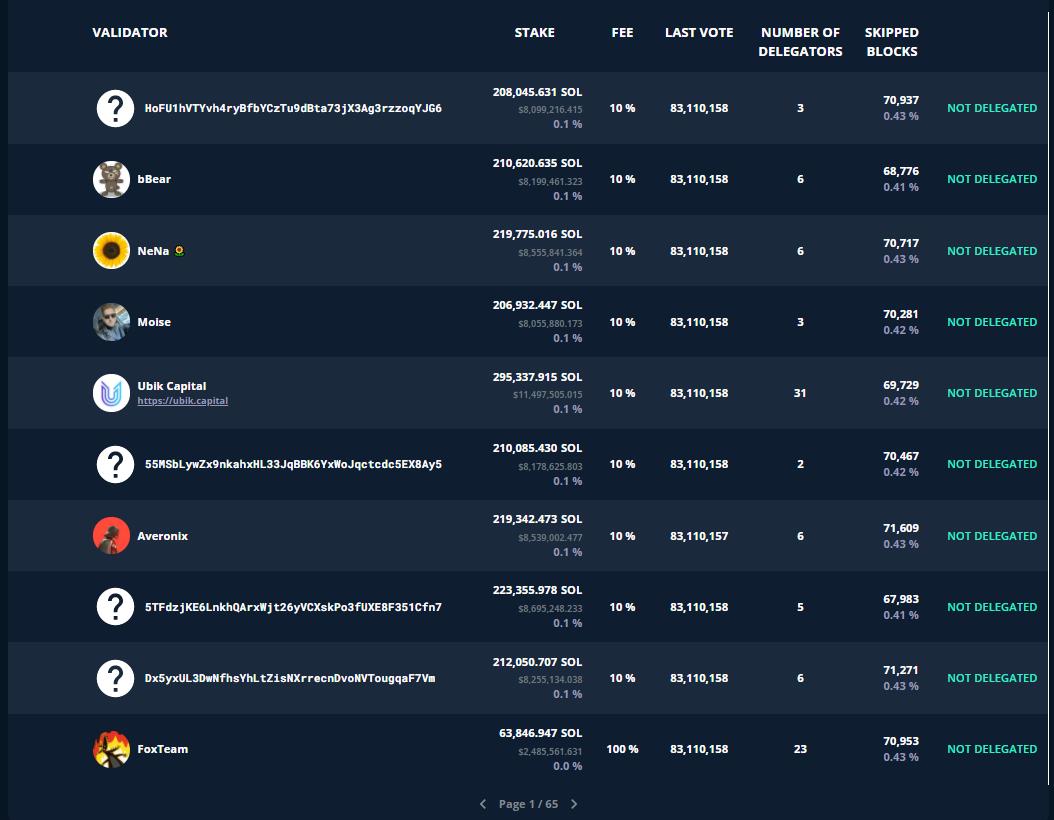
You can check the Solana Beach, and Validator App website to know more details about the performance of the validator.
Once you have finalized your validator, you can proceed with delegation.
To delegate your token, just click on the Delegate Now button. Next, the application will show you the list of validators to choose from. Select your validator and confirm the process by providing your password.
Once the process is successful, you can see the status has changed to Activating. The newly delegated tokens are first to go into a state of Activating or Warming up. The state of the staked tokens changes with the beginning of a new epoch. Each epoch is approximately 2 days long.
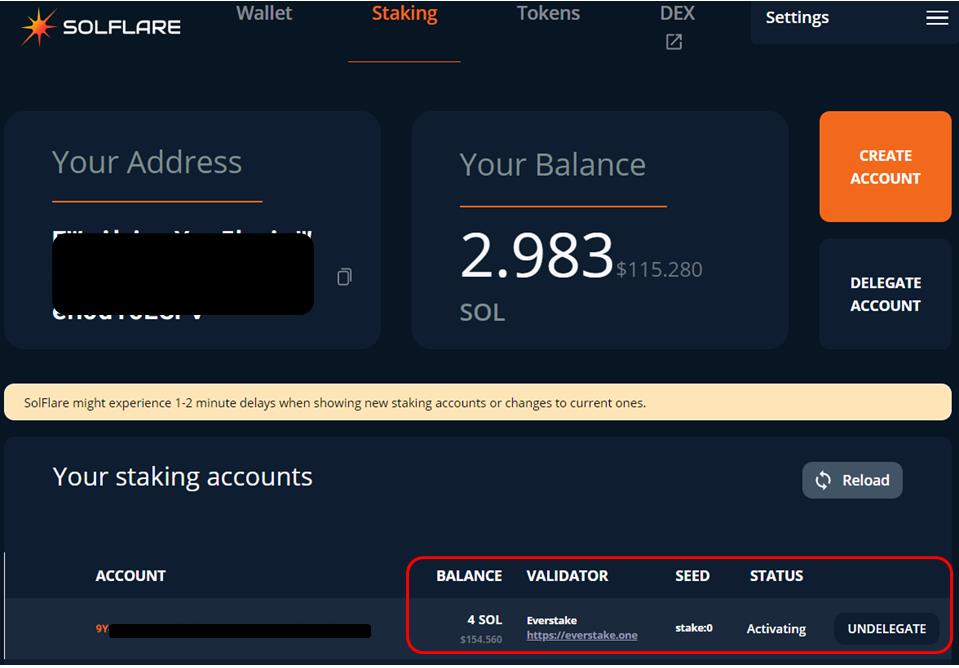
Note that during the activating period, you are not eligible to earn rewards. Users start receiving rewards once your token staking is fully activated.
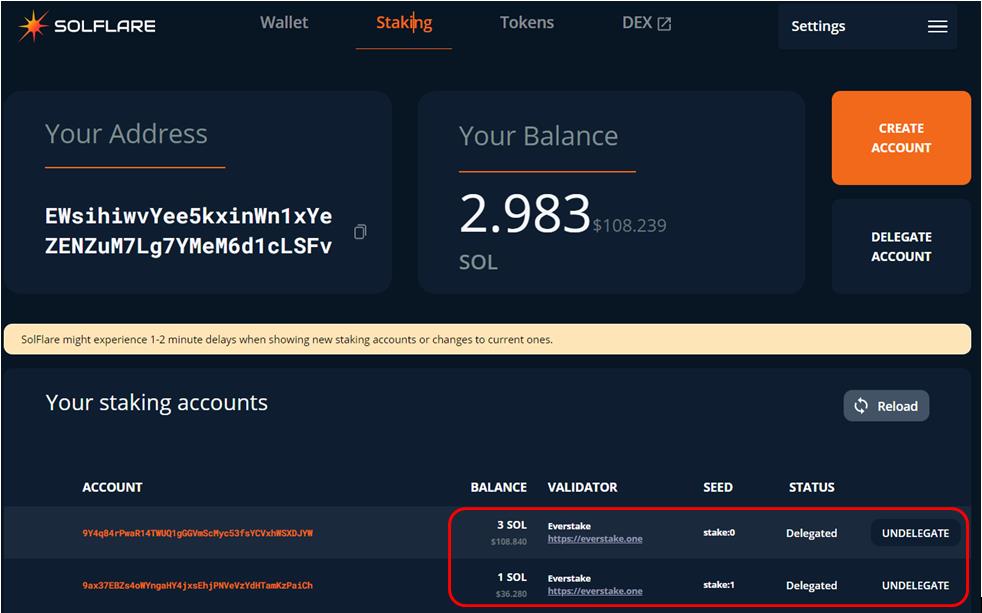
As you can see from the above screenshot, the status has changed to Delegated. Users are now able to earn rewards.
Action
Once you click on your staking account, you will find your detailed staking information along with the rewards earned, and the different actions that you can perform on your staked amount:
- Split
- Undelegate
- Withdraw
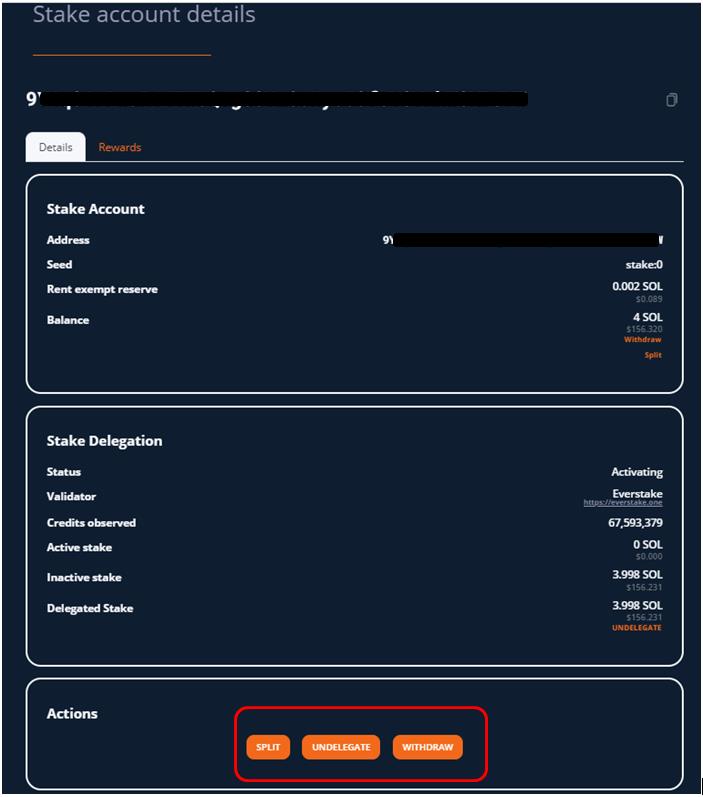
Note that the Withdraw option is currently available because the token staking has not been activated.
Split
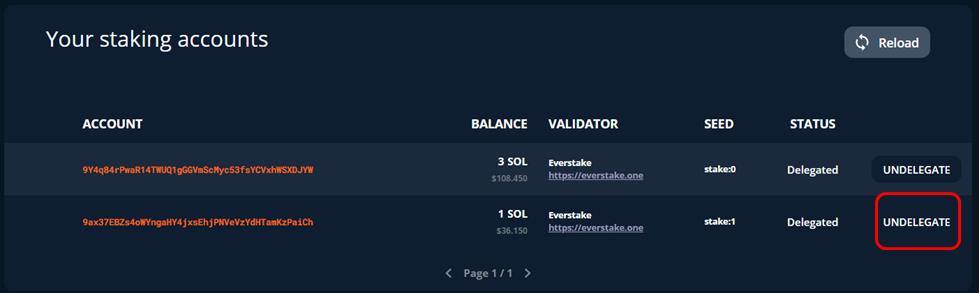
The split allows you to divide your staking amount into multiple parts, and create multiple staking accounts. The advantage of the split feature is that you can delegate your tokens to multiple validators. There is no limit in the number of splits that a user can perform on his staking account.
To split, click on the Split button, next the application will ask you the amount that you wish to transfer to your new staking account. The same amount will be deducted from your original staking account.
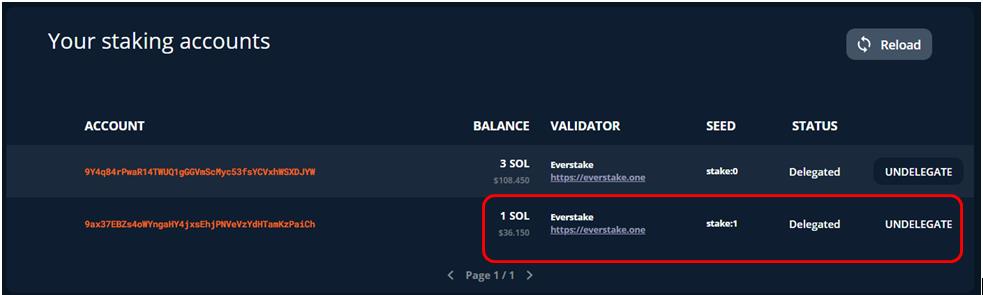
Once the process is successful, you can see two staking in your wallet. Each staking account takes the same time to activate the status of your staked token.
Undelegate and Withdraw
At any time, users can remove their delegated tokens from a validator. To remove delegation, first, select the staking account from where you wish to undelegate, and then click on the Undelegate button. Once you opt to Undelegate, the tokens will be moved to the deactivating, or cooling down status. When the deactivating status changes to inactive, users can then withdraw the funds from their staking account. The withdrawn funds will be added to your current normal wallet balance that you can use to transfer or other wallet activities.
Reward
You can check your earned rewards from the Reward tab. Users directly receive the rewards in their staking account which is then again added to the active stake automatically. Rewards are issued on each epoch.
Conclusion
Staking/delegating allows the users to delegate their token to the network validator who runs and maintains the network operation. Through delegating, tokens holders can participate and help in network activities along with earning an additional income. The platform also allows the users to stake through their Ledger Nano S and Ledger nano X. The SolFlare wallet is non-custodial, and the users will have full ownership of his account. But, if you are holding quite a number of tokens, then ledger staking will be a good option for you.
Resources: Solana
Read More: How to Use the Secret Binance Smart Chain Bridge


