


")


 Tokens Playing This P2E Game")

We have seen the Bitcoin ecosystem grow rapidly in the past year. With the birth of Ordinals and Inscriptions, BRC-20 tokens shortly followed. Just a few months later, people were making millions from these tokens.
However, many users want to bring liquidity from EVM blockchains to Bitcoin to have more profit. Today, we’ll guide you on how to bridge your ERC-20 assets to the Bitcoin ecosystem.
How to Bridge Your ERC-20 Assets to the Bitcoin Ecosystem
For today’s bridging guide, we’ll be using the information from the tweet below. Without further ado, let’s dive into the bridging right away.
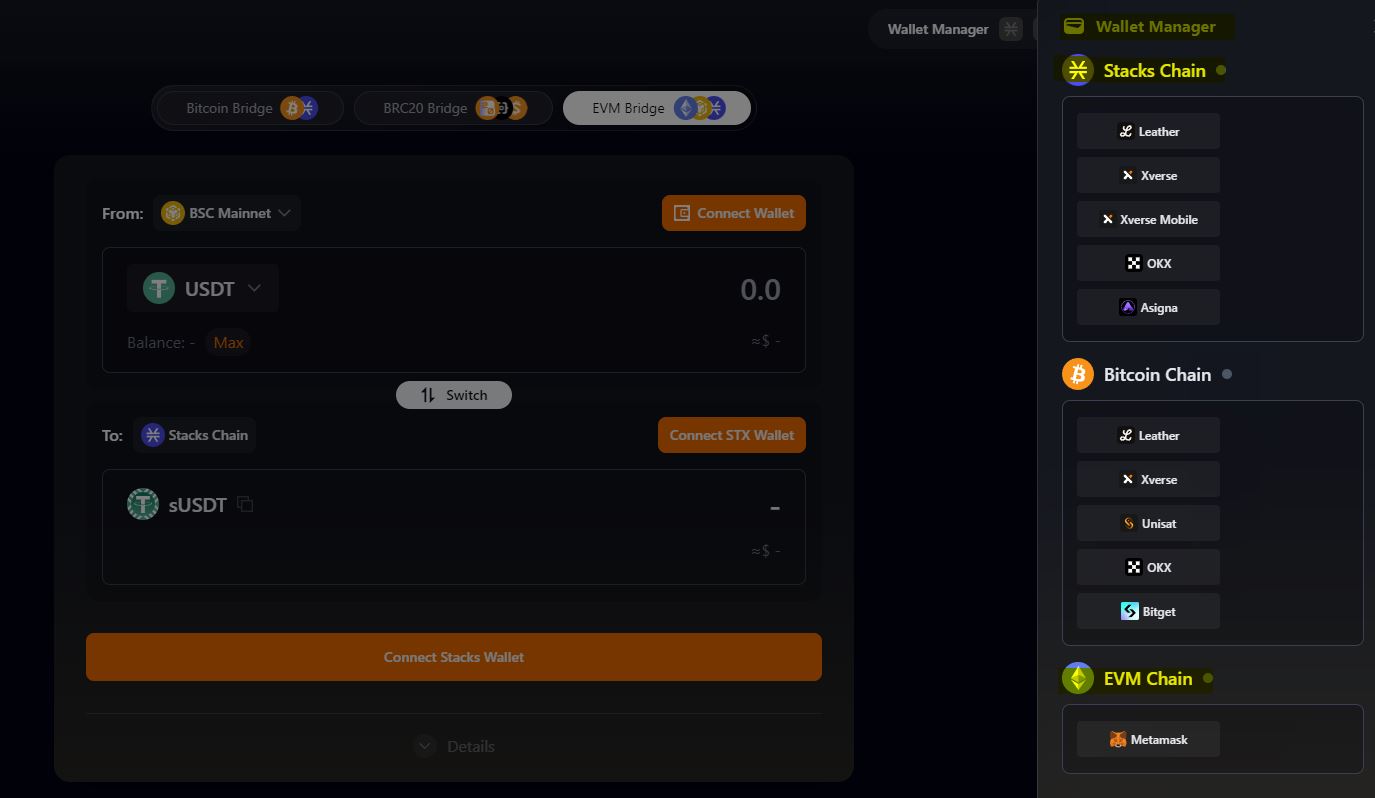
Step #1 – Connect Your Two Wallets
To bring your ERC-20 assets to the Bitcoin blockchain, you’ve got to first connect your two wallets to the bridge. To do this, you need to:
- Head on over to XLINK’s bridge here.
- Click on the “Wallet Manager” button. From there, connect your Stacks chain wallet and your Metamask wallet.
- Note: XLINK supports five Stack chain wallets. These are Leather, Xverse, Xverse Mobile, OKX and Asigna.
Step #2 – Pick Your Source EVM Chain
Next, you’ve to choose the EVM chain from which your ERC-20 assets are. In short, there are only two choices: Ethereum and BNB Chain. However, the XLINK bridge could be adding more options shortly.
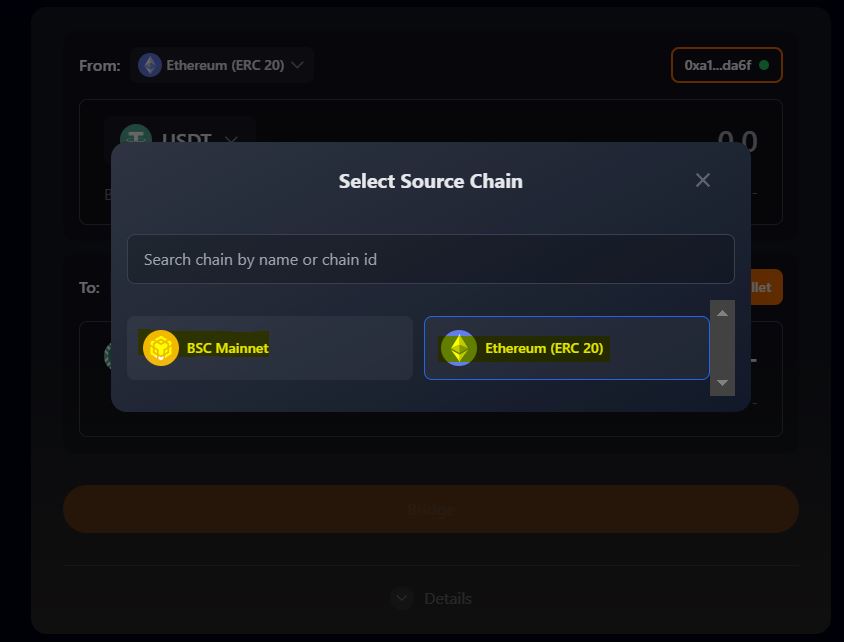
Once you’ve connected your Metamask wallet, click on the EVM chain you wish to bridge from.
Step #3 – Select Your Tokens to Bridge
To bridge your ERC-20 assets to the Bitcoin network, you’ll next need to choose the tokens. For now, the XLINK bridge supports four tokens: $USDT, $LUNR, $WBTC and $BTCB.
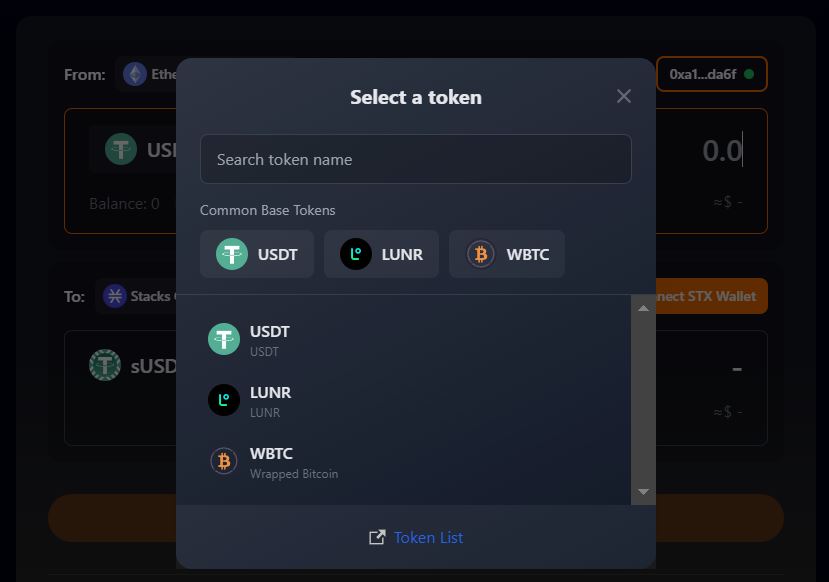
To choose the token to bridge:
- Click on the down arrow beside the token symbol under the “From” tab.
- From the above menu, choose the token you want to bridge.
- Note: The token under the “To” tab will automatically switch to the chosen “From” token.
- Next, choose the amount of the token you want to bridge. The bridge will display an estimated gas cost.
- Click on the “Confirm” button. If successful, you’ll see a “Transaction Broadcasted” message.
Voila! Your tokens should be bridging as of now.
Step #4 – Track Your Bridging History
Lastly, to track your bridging history, click on the “History” button at the top right-hand side of the screen. You’ll be able to view your history under the “EVM Bridge” tab.
Conclusion
That does it for today’s bridging guide! See? It’s pretty simple to get your ERC-20 assets to the Bitcoin ecosystem. So, what’re you waiting for? Get bridging right away, to avoid missing the BRC-20 hype train!

Disclaimer
The information discussed by Altcoin Buzz is not financial advice. This is for educational, entertainment, and informational purposes only. Any information or strategies are thoughts and opinions relevant to the accepted levels of risk tolerance of the writer/reviewers and their risk tolerance may be different than yours. We are not responsible for any losses that you may incur as a result of any investments directly or indirectly related to the information provided. Bitcoin and other cryptocurrencies are high-risk investments so please do your due diligence. Copyright Altcoin Buzz Pte Ltd.


