


")


 Tokens Playing This P2E Game")

SushiSwap is one of the most popular decentralized exchanges on the Ethereum network. It came into existence from the hard fork of Uniswap. The platform is non-custodial and allows you to connect to multiple networks like Ethereum, Binance Smart Chain, Polygon, etc.
Users can use the SushiSwap platform to exchange tokens, add liquidity, decentralized lending/borrowing market, yield farming, and staking its native governance token, $SUSHI.
In this article, we will explore how you can swap your tokens, add/ remove liquidity in the pools and earn rewards.
Usage Guide
To use the application, go to the page.
You will be directly sent on the Swap page.
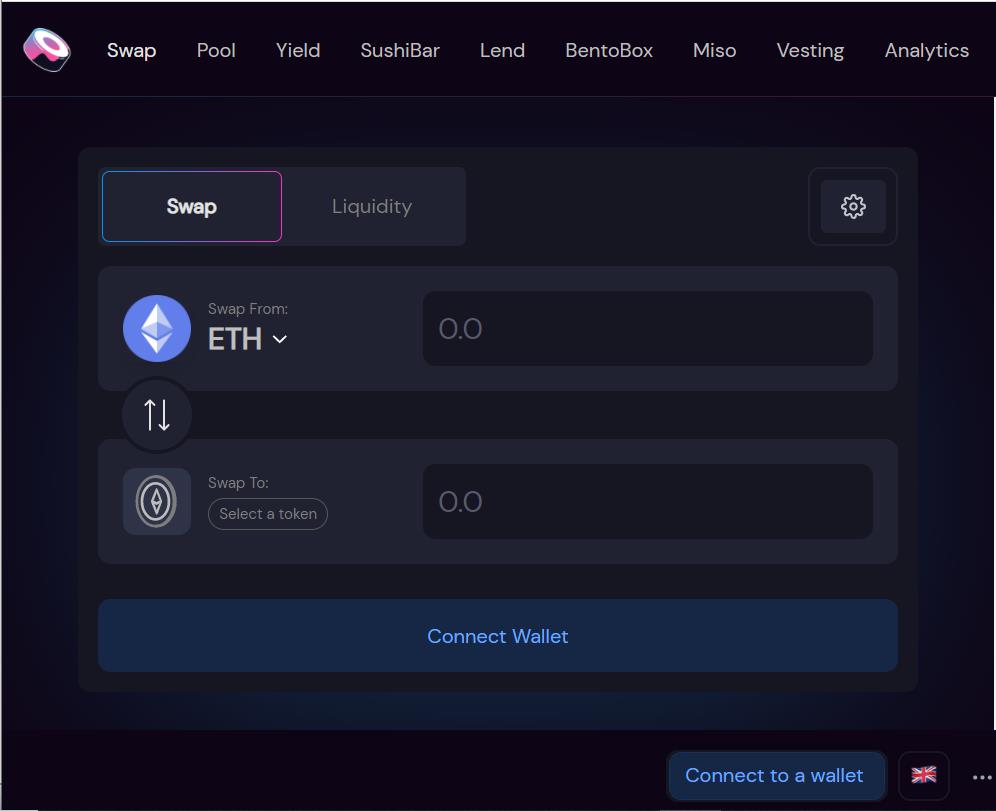
Users are now required to connect their wallets to access the platform and its features. Click on the Connect to a wallet button.
Table of Contents
Connect Wallet
The platform allows the users to connect with any of the below wallets:
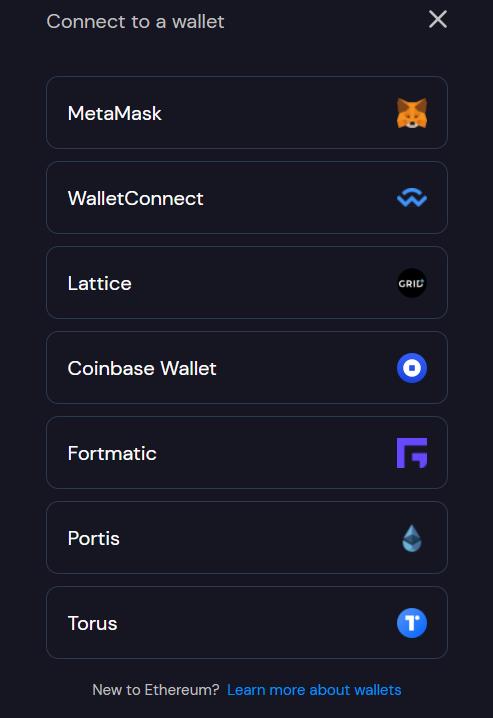
You can use any of the above wallets to connect with the platform. We are connecting with Metamask wallet.
Next, you need to select the network where you want to work.
Network Selection
SushiSwap allows you to work and connect with many different networks. Below are the networks with which users can connect:
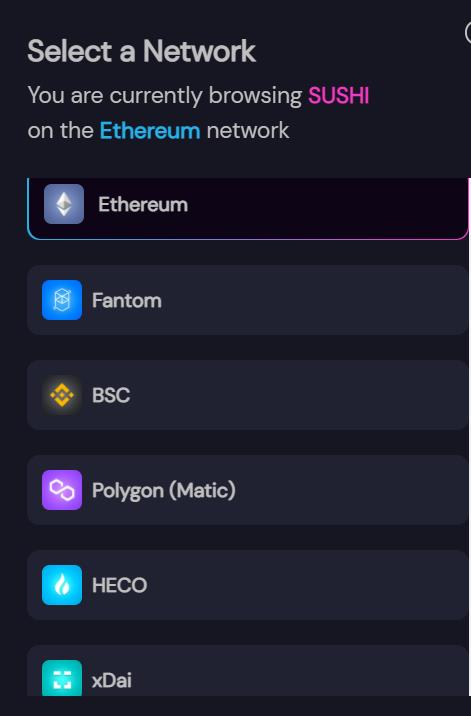
We are connecting with the Binance Smart Chain (BSC) network. In the second part of the article, we will see some of the extra SushiSwap features that are available on the Ethereum network.
Note that the user is required to have a BSC network setup in the Metamask wallet to connect with the SushiSwap application.
In case you don’t have a BSC network setup, you can still create, and set up a network by going to the Setting-> Network, and then click on Add Network and fill in the following details.
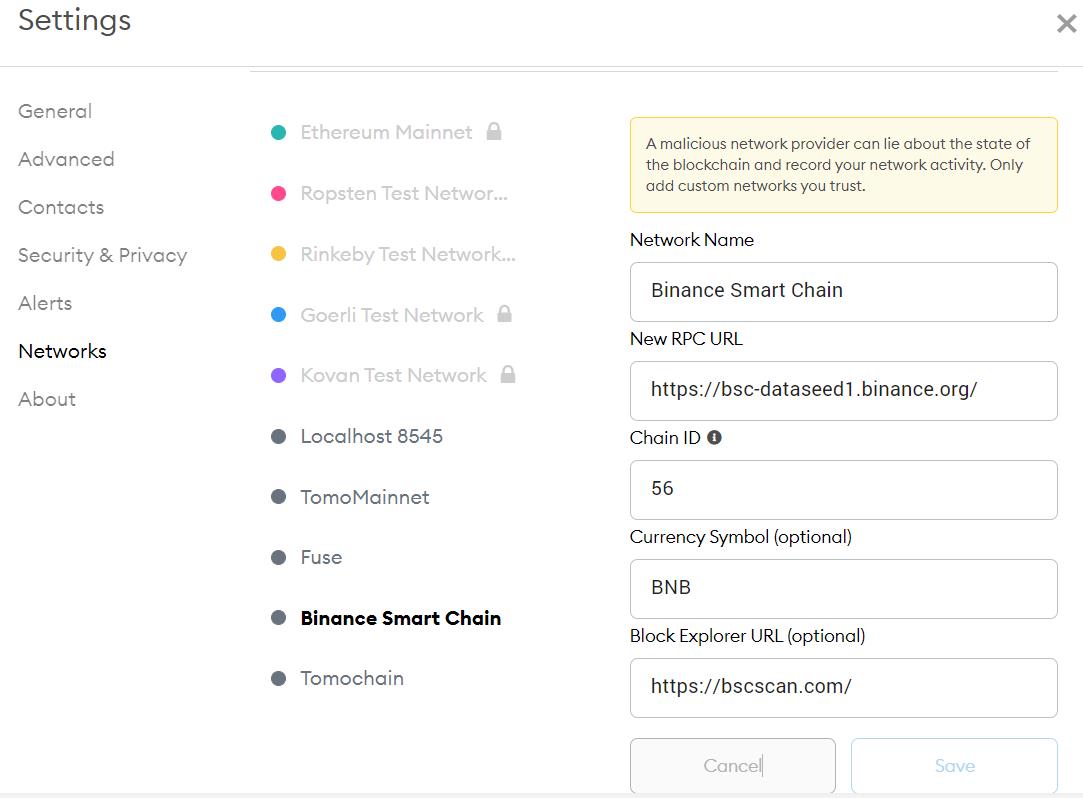
The Metamask wallet is connected with the network selected as Binance Smart Chain to the SushiSwap website.
Platform Features
SushiSwap mainly supports five major features:
- Swap
- Pool
- Lending And Borrowing
- Farm (Ethereum Network)
- Stake SUSHI (Ethereum Network)
In this article, we will focus on the Swap and Pool feature supported by the SushiSwap application.
Swap
Users can go to the Swap tab to swap different tokens supported by the SushiSwap platform.
To swap, you need to first select the input and the output token. Now enter the amount of the input token that you wish to spend on swapping with the other token. Once you fill it, the resultant output token will automatically be calculated. You can also use the Max button to swap your entire token value.
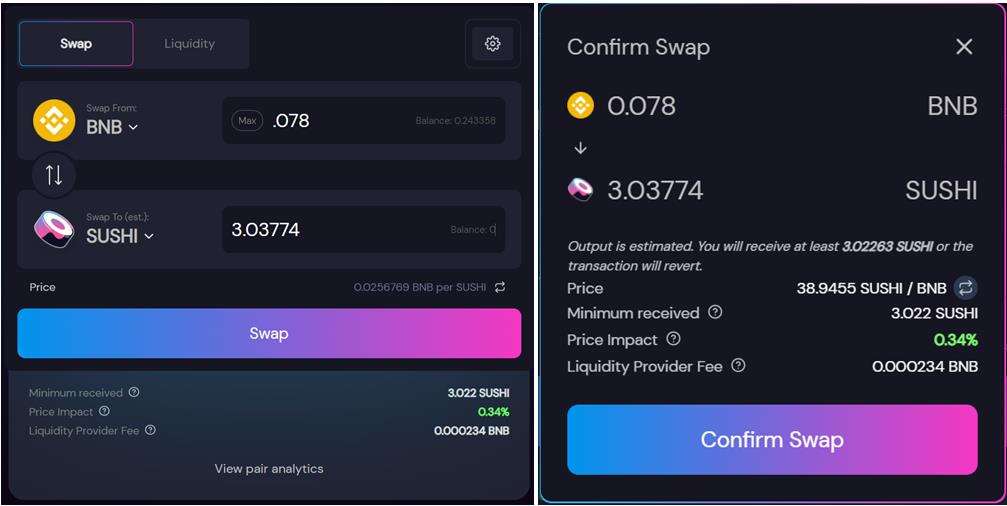
Confirm the process by clicking on the Confirm Swap button.
Note that users should have a sufficient amount of BNB or ETH in their wallet to pay for the gas charges.
Users are required to pay a 0.3% trading fee whenever they swap any token on the exchange. Out of which 0.25% of the trading fee is distributed among liquidity providers.
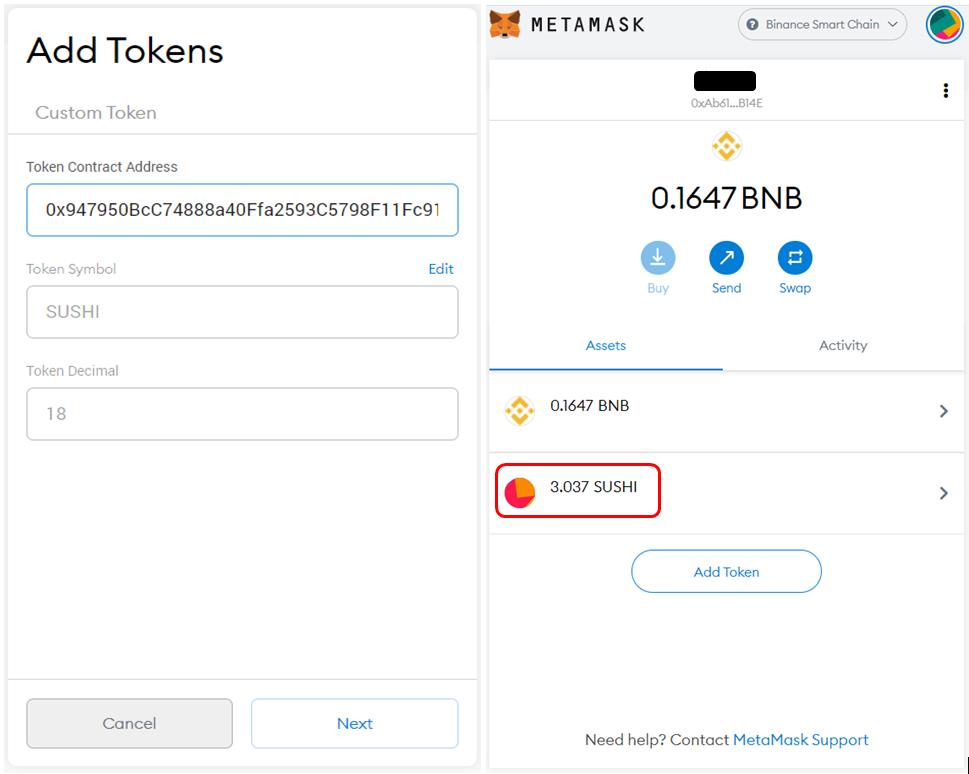
Add Token in Metamask
To see the newly swapped SUSHI token in the Metamask wallet users are required to add the token by providing the contract address of the token in the Custom Token tab.
Since the token supports multiple networks, copy the correct contract address from Coinmarketcap to see your token balance.
SUSHI Contract Address (BSC Network)- 0x947950BcC74888a40Ffa2593C5798F11Fc9124C4
See the below screenshot and add the token address. You can now see the SUSHI token in your wallet.
Liquidity
Users can add liquidity into the SushiSwap liquidity pools and in return, they receive the SLP tokens (SushiSwap Liquidity Provider token) that represents their share in the pool. Liquidity providers also receives a reward of 0.25% of the trading fees against their pool.
Add Liquidity
To add liquidity, go to the Pool tab and click on Add. You are required to select the token pair. We will add liquidity with the BNB and SUSHI tokens that we have in our wallets.
While providing liquidity, users are required to pay an equal amount of both the tokens that they wish to add to the pool.
Select your token pair. Enter the value against one token and the value of the other token will be automatically displayed.
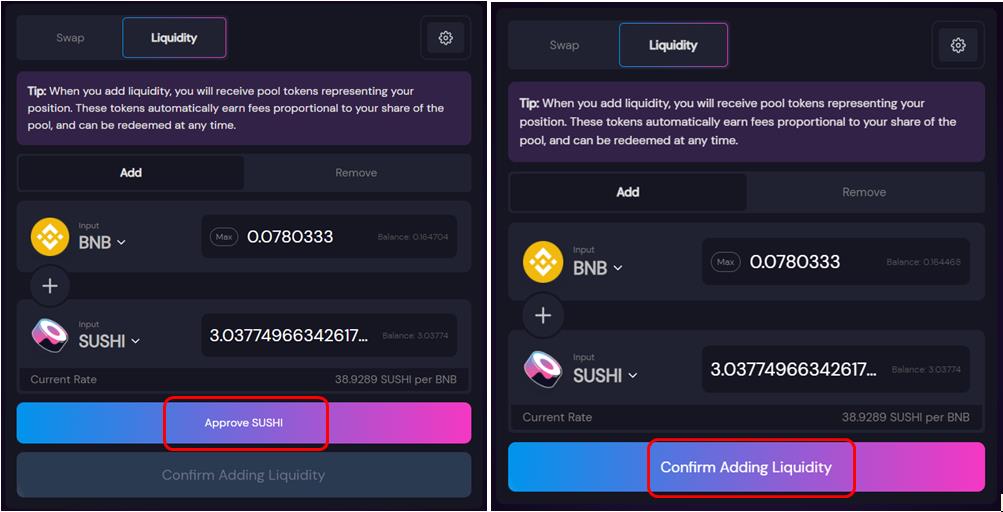
If you are using the token pair for the first time, you have to approve it first before adding it to the liquidity pool.
The application will also show you the percentage of your share in the pool. Confirm the Supply.
Once the transaction is successful, you will become a liquidity provider in the selected pool, and will earn a liquidity fee for every transaction in that liquidity pool.
You can check your liquidity details now.

The BNB-SUSHI SLP token gets added to your Metamask wallet.
Remove Liquidity
Users can partially or completely remove their liquidity from a pool at any time, and remove their tokens. After withdrawal, they will receive their tokens along with the fee that they have earned for the period the tokens were in the pool.
To remove your existing Liquidity, click on the Remove button in the Liquidity section. Now, select the liquidity you want to remove. Enter the percentage of liquidity you wish to withdraw, and confirm the process.
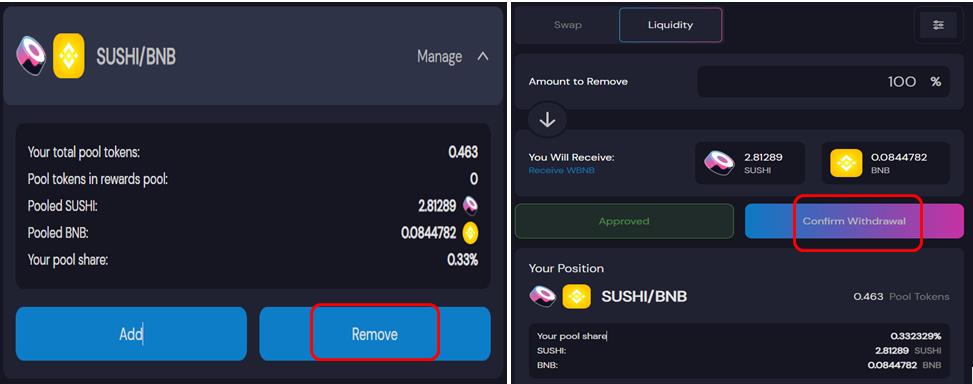
Once the transaction is successful, you can see your LP token balance will become zero, and the token pair reverted to your Metamask wallet.
In the next part of this article, we will describe how you can use the Lending and Borrowing features of Sushiswap, and some added features available on the Ethereum network.
Join us on Telegram to receive free trading signals.
For more cryptocurrency news, check out the Altcoin Buzz YouTube channel.

