Nomad claims to bring a resolution to the blockchain interoperability issue by offering cross-chain transactions at a relatively low cost. The protocol is the extension of the existing Optics protocol (OPTimistic Interchain Communication). It aims to act as a base layer for all smart contract chains and rollups that can facilitate secured cross-chain transactions smoothly at a fast pace. It also allows developers to design cross-chain applications (xApps).
So, in this article, we will explain in detail how you can use the Nomad bridge to transfer your tokens between the Milkomeda C1 network and the Ethereum network.
Table of Contents
Supported Networks and Tokens
The bridge currently allows you to transfer supported assets between the following networks:
- Evmos
- Ethereum
- Moonbeam
- MilkoMeda C1
Users can transfer ETH, WETH, WBTC, EVMOS (Evmos), GLMR (Moonbeam), mADA (Milkomeda C1), stablecoins like USDT, USDC, DAI, and many more.
Access the NOMAD Bridge
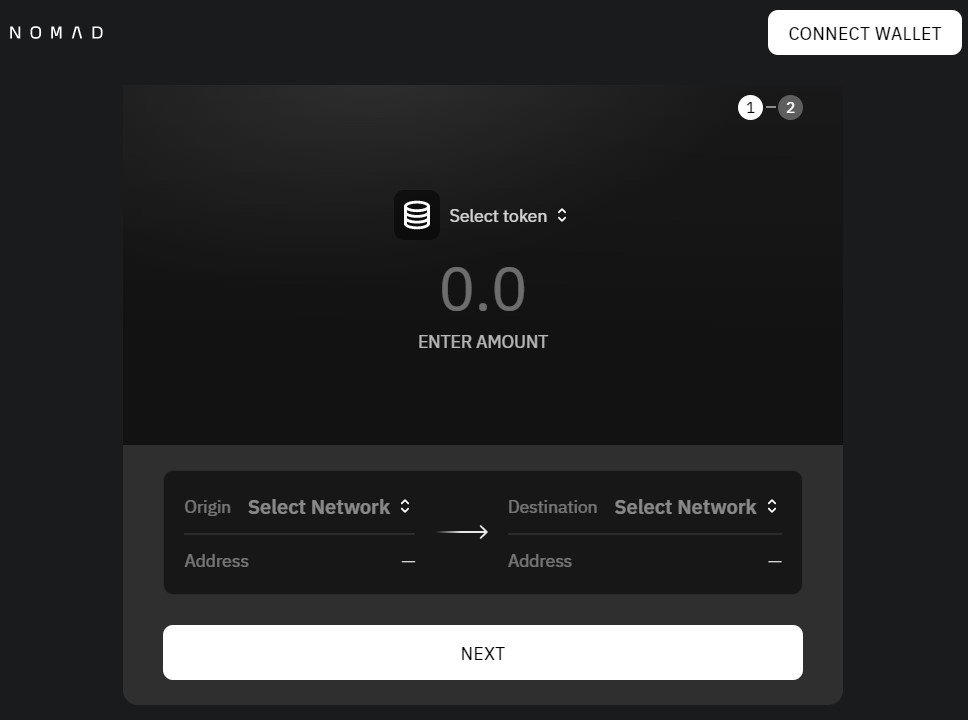
To use the bridge, visit the Nomad official website and click on Launch Bridge. You can see the bridge landing page.
Connect Wallet
To access the bridge, users are first required to establish a connection between the bridge portal and the user account. This can be done by connecting the user’s wallet with the bridge application.
The bridge portal allows you to connect with the MetaMask wallet. Click on the Connect Wallet button (see above screenshot) to connect your wallet with the Nomad platform.
How to Use the Nomad Bridge
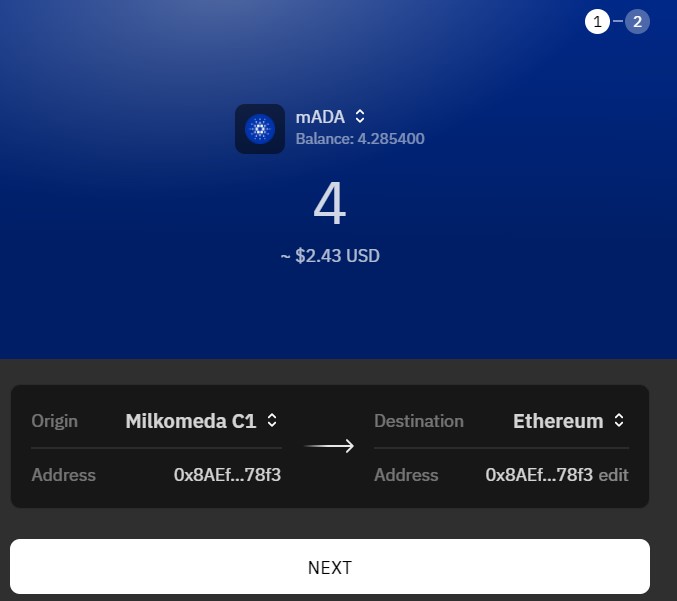
To initiate a transaction, users need to fill in the following details:
- Token and the amount you wish to transfer
- Origin network
- Destination network
We have some MilkADA tokens in our MetaMask wallet (Milkomeda network) that we will use to transfer to the Ethereum network.
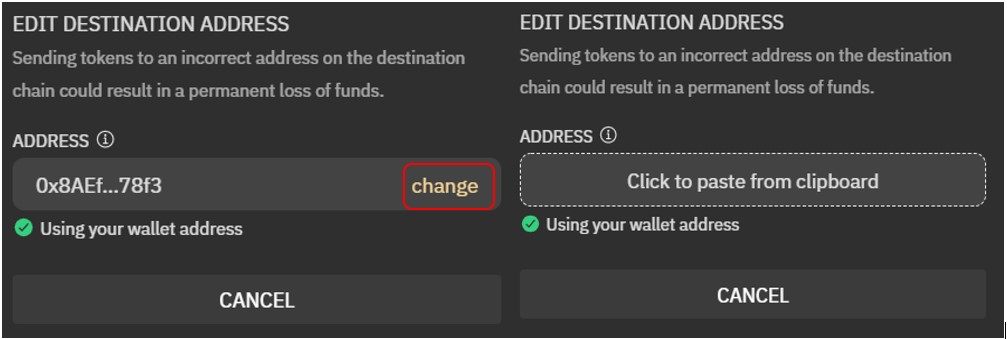
Important: The source network is automatically set to your connected wallet address. Users may choose the same address as the destination address. If they wish to set some other address to the destination address, then they need to click on the Change button. The application will now give you the option to paste a desired address in the destination address field (follow the steps shown in the screenshot).
Once you have finalized the above details, click on Next.
You can review the transaction details. As you can see from the below screenshot, users can either select Nomad or Connext as bridging solutions to transfer assets.
Note that not all transfers are supported by both the bridge solutions. For example, Connext does not allow you to transfer MilkADA tokens from the Milkomeda network to the Ethereum network. In that case, you can either go with Nomad or search for other bridges that can help you to carry out this particular transaction.
Once you have reviewed and chosen the bridge solution, you can confirm the process by hitting the Send button.
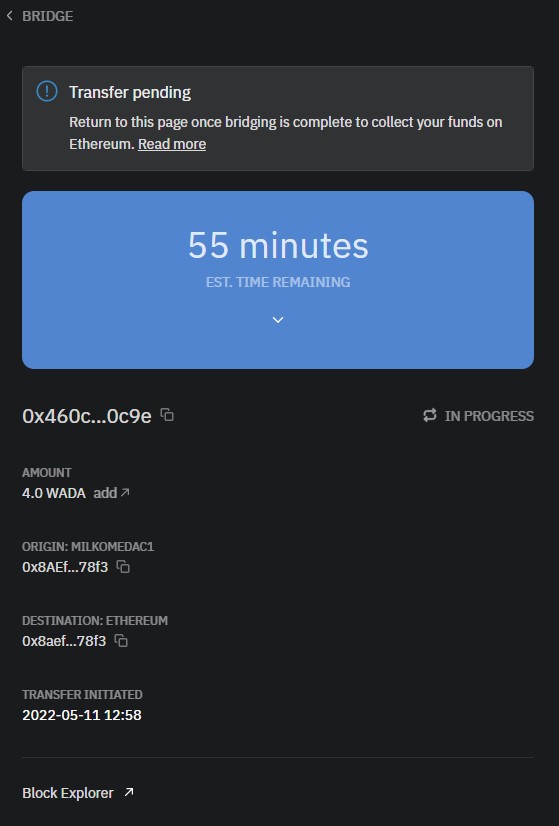
Your transaction is submitted, and you can see the In Progress status of the transaction.
Users can check their screens to know the time required/left to complete the process.
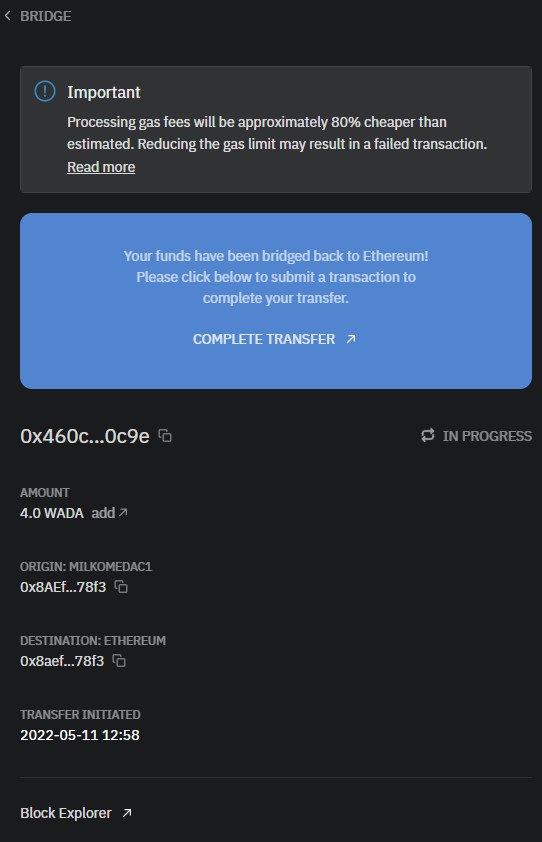
Wait for the transaction to complete. Once it is done, you can see the below screen.
Claim Tokens
The bridge transaction requires the users to claim the tokens manually once the transaction is successful.
To claim your tokens, click on Complete Transfer (see above screenshot). This will trigger a MetaMask transaction that you need to confirm.
In the review step, you may have noted that the bridge charges no fee. However, the users may need to pay the gas charges to claim their tokens in the destination network.
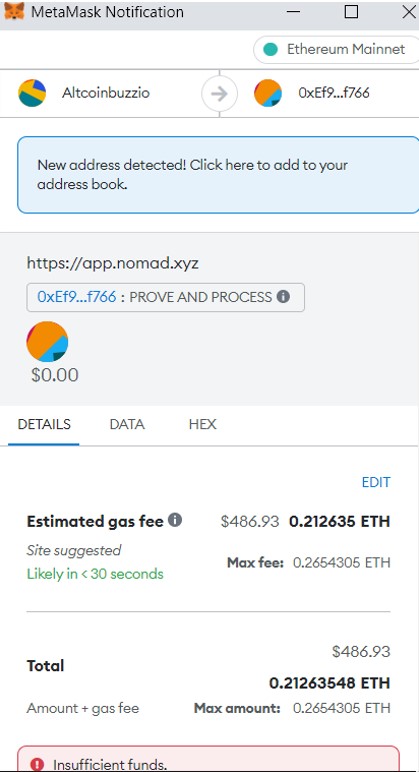
As you can see from the below screenshot, we tried to claim the tokens. However, we couldn’t confirm it due to the high gas cost.
Users who are willing to pay the gas cost can confirm the process. After that, they need to manually add the network and token details in their MetaMask wallet to see the desired output.
Important: If the users are using the network and the tokens for the first time, then they have to add the network or tokens details, otherwise you won’t be able to see the destination network or the token.
Users can perform similar steps to transfer supporting assets between any two supporting networks.
⬆️Get $125 for SIGNING UP with MEXC Exchange (FREE $25 in your MEXC wallet + 1-month ALTCOIN BUZZ ACCESS PRO membership (worth $99). MEXC supports U.S. Traders in all trading pairs and services.
(To get your ALTCOIN BUZZ ACCESS PRO membership, DM us with your “newly signed up MEXC UID” and “Telegram ID” on our Twitter @altcoinbuzzio)
⬆️Find the most undervalued gems, up-to-date research, and NFT buys with Altcoin Buzz Access. Join us for $99 per month now.
⬆️Finally, for more cryptocurrency news, check out the Altcoin Buzz YouTube channel.


