


")


 Tokens Playing This P2E Game")

DOP lets you control how much of your transaction information you want to share. You can find this information stored on a public blockchain. So, having control over this is a great advantage. Their testnet is now live. If you take part, you qualify for their airdrop, early next year.
So, let’s take a closer look at the DOP testnet tasks. Here’s a guide so you can easily qualify for their airdrop.
With our testnet live, our journey has just begun! What excites you the most about the potential impact of DOP on the future of DeFi?
💭 Share your thoughts with us!
— Data Ownership Protocol (@dop_org) December 17, 2023
The Testnet Guide
The testnet has seven steps. The steps are easy to follow, and this guide will make sure you understand them. However, before you can start step 1, you need to set up a DOP wallet and connect it to your MetaMask wallet. For this testnet phase, only a MetaMask wallet will work. You need the DOP wallet, so you can complete the tasks. The MetaMask wallet is for your future airdrop.
Make sure to only complete the tasks once. Multiple accounts may disqualify you from the airdrop. Here’s a link to our previous article on their testnet release.
Setting Up Your DOP Wallet
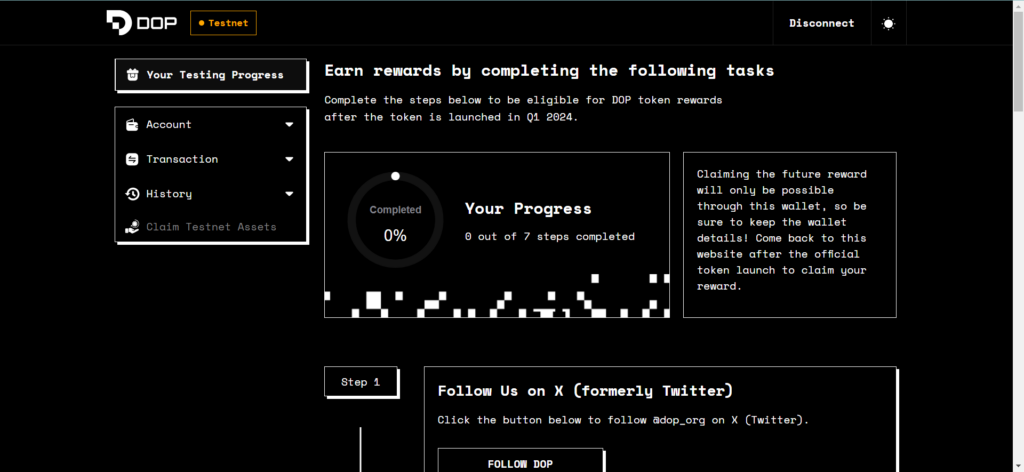
Follow this link, this will get you to the DOP testnet and wallet. In the top-left corner, click on ‘Account’ and ‘Create account’.

Source; DOP Testnet
You will see a seed phrase which consists of 12 words. Write down these 12 words and keep them in a safe place. You will also need to set up a password, which you use to log in. Connect your MetaMask and add the Sepolia Testnet. You can find this on Chainlist. Click on ‘Add to MetaMask’. See the picture below.
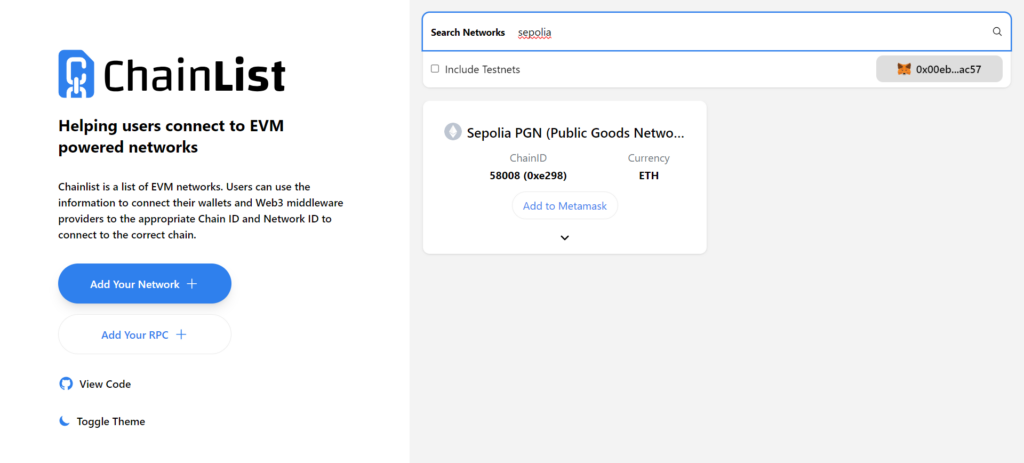
Source: Chainlist
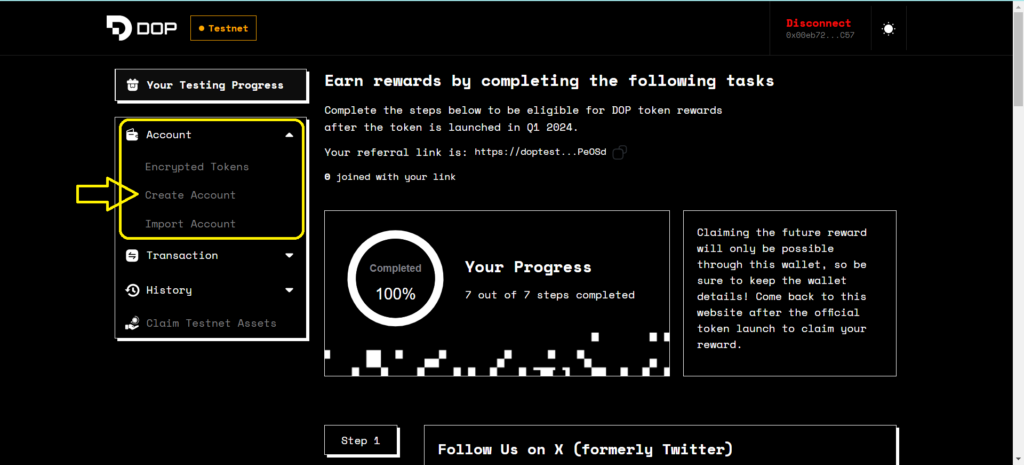
Step 1 Follow DOP on X
This is the easiest part. First, sign in with X. Second, follow DOP on X. If you don’t follow X by the time of the airdrop, you won’t qualify.
Step 2 Claim Sepolia ETH
This is also easy. The only thing you have to do is click the button. SepoliaETH is automatically added to your MetaMask wallet. You need this small amount of Sepolia ETH, so you can pay for all transaction costs. This is a testnet version of ETH and has no real-life value. You will receive 0.08 SepoliaETH. See the picture below.
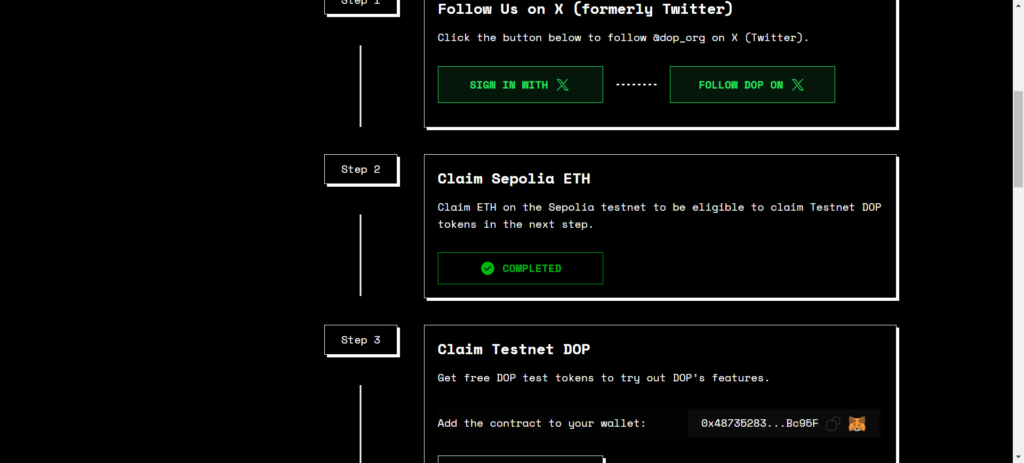
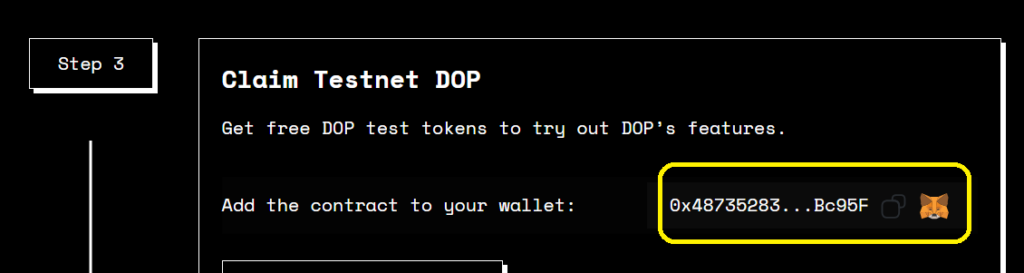
Step 3 Claim Testnet DOP
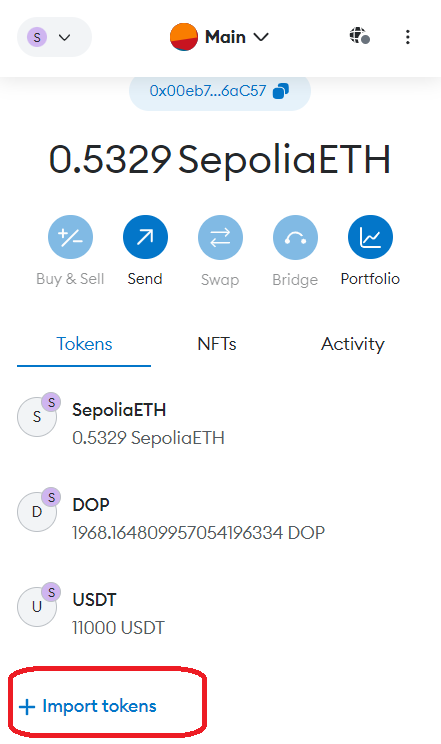
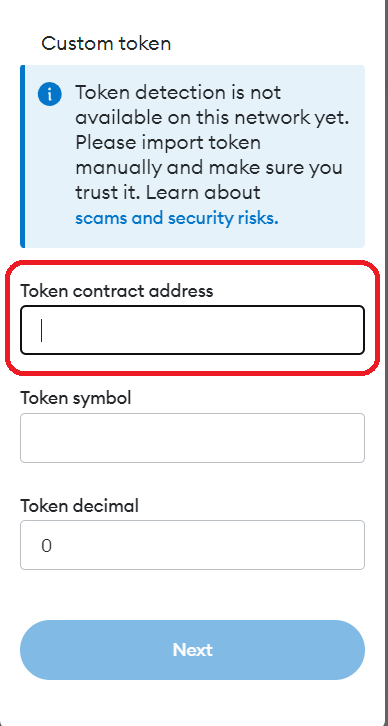
You need this DOP to try out the features on the testnet. Don’t worry, they are free testnet tokens. First, you need to add the testnet token contract to your MetaMask. Make sure to add this to the Sepolia network. Click on the contract address button and go to your MetaMask. Go to your tokens and click on the ‘Import tokens’ link. Now paste your contract address into the token address field. Now you can click the button and you will receive 1,000 DOP. Sign the transaction in your MetaMask. See the pictures below.
Step 4 Claim Testnet Assets
You need to add the contract address again to your wallet. If you add USDT, all other testnet coins will be added as well. Follow the same procedure as before, with the DOP tokens. You will see all the tokens in your DOP wallet. You will only see SepoliaETH, DOP, and USDT in your MetaMask.
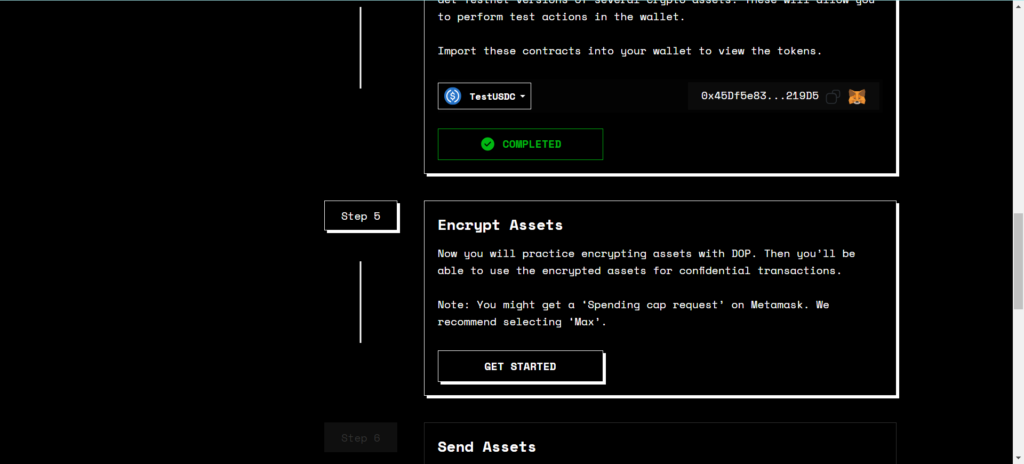
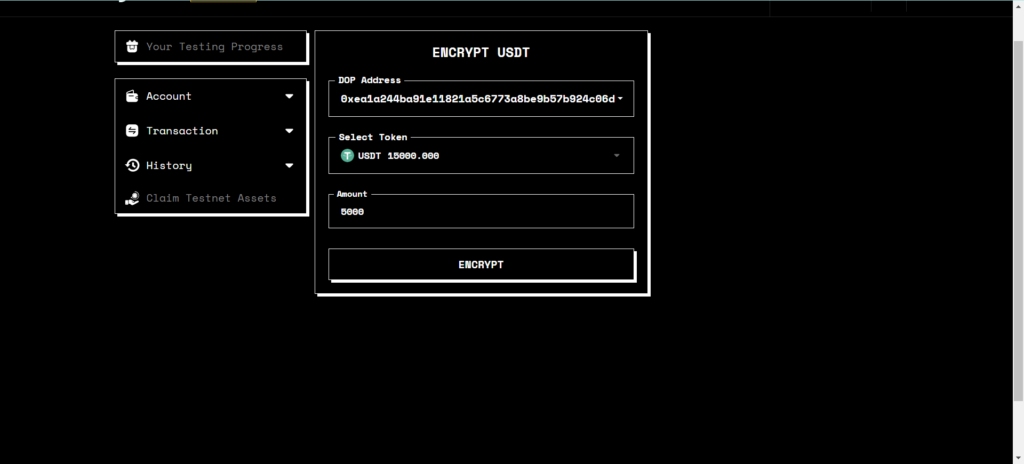
Step 5 Encrypt Assets
This is where DOP becomes interesting. We start the encrypting process. You can select a token, we picked 5,000 USDT. Hit the encrypt button.
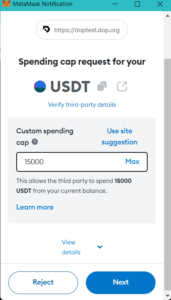
You may have to approve the USDT tokens. So, now you can click on ‘Max’.
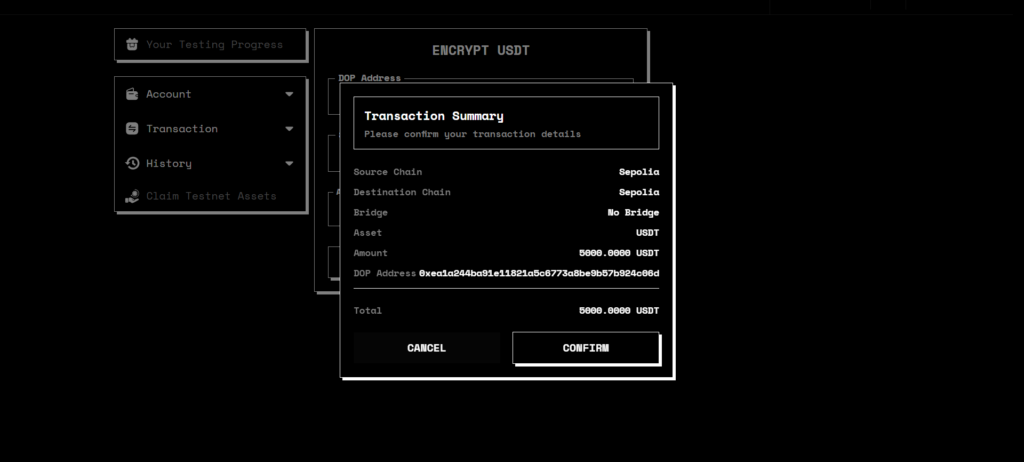
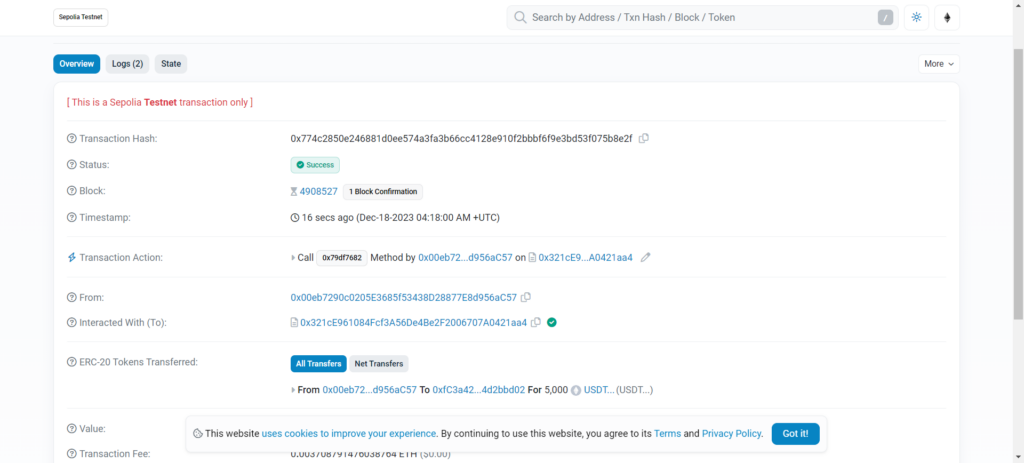
Now, you will see a screen that says, ‘Encryption in progress’. Confirm the transaction in your wallet. This is where their selective transparency comes in as you’ve decided in the testnet to encrypt all your USDT to shield it from public view.
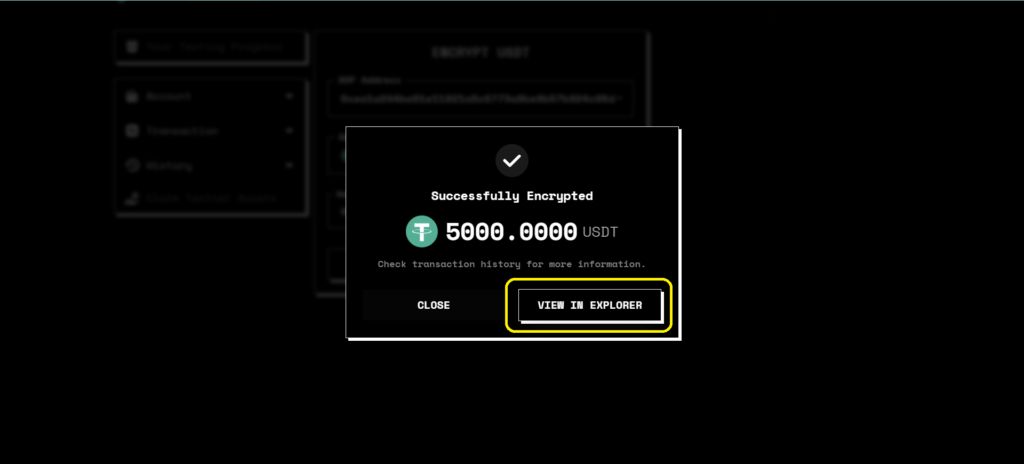
You can view the transaction in the Sepolia testnet explorer if you hit that button. To complete the task, you can close the tab.
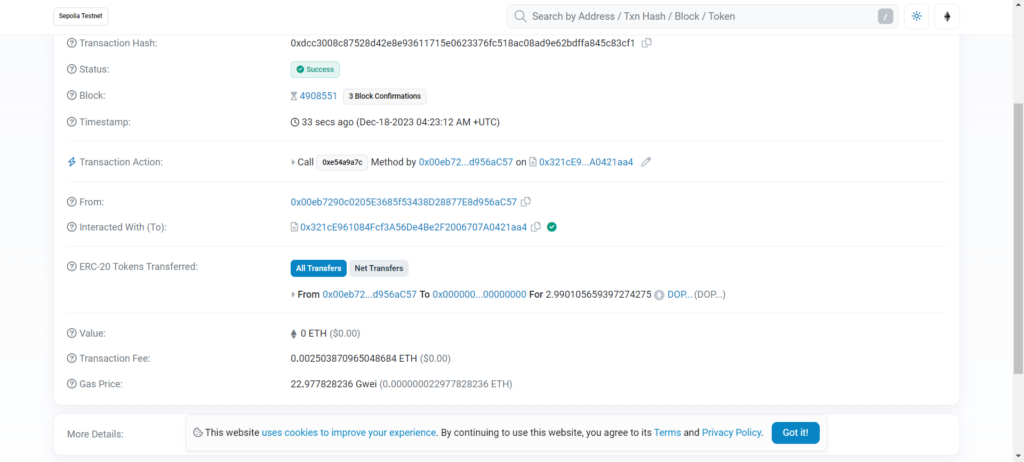
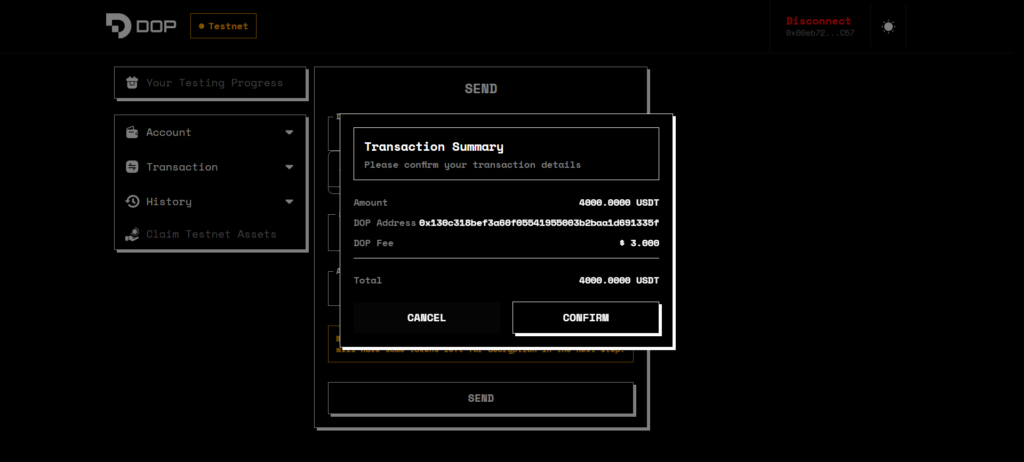
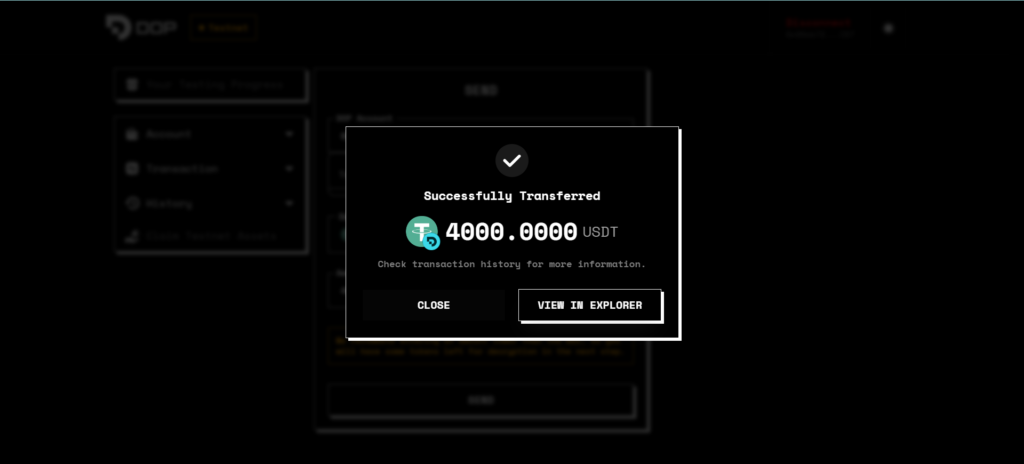
Step 6 Send Assets
In this step, we send encrypted assets. If you view this transaction in the explorer, you won’t see the amount of the sent tokens. This is the end result of DOP’s selective transparency here. Don’t send the full amount but leave $50 for transaction fees. For this task, DOP charges a $3 fee in testnet tokens. Instead of the initial 5,000 USDT, we only sent 4,000 USDT.
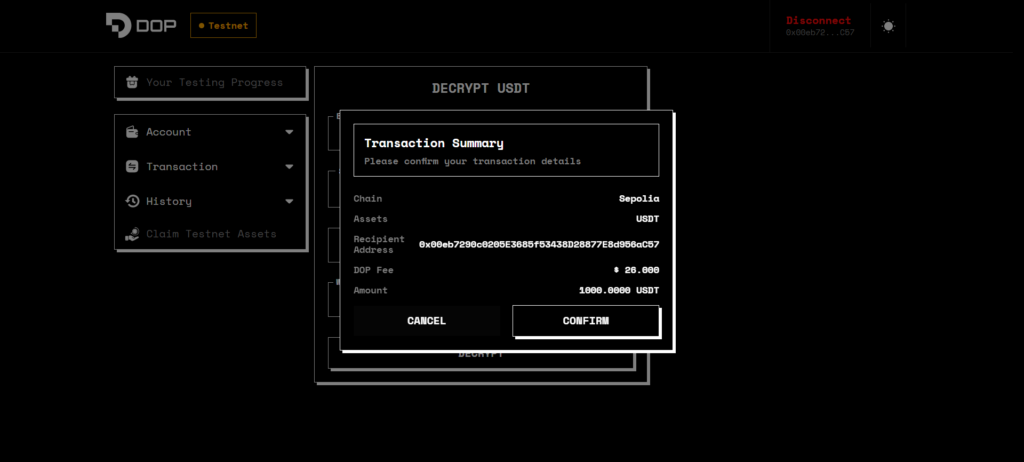
Step 7 Decrypt Assets
With the encrypted transaction, nobody knows if or how many tokens you moved around. Now we bring these encrypted tokens back and decrypt them. So, they become regular tokens again, that everyone can see. You will need your password to sign in to decrypt the tokens.
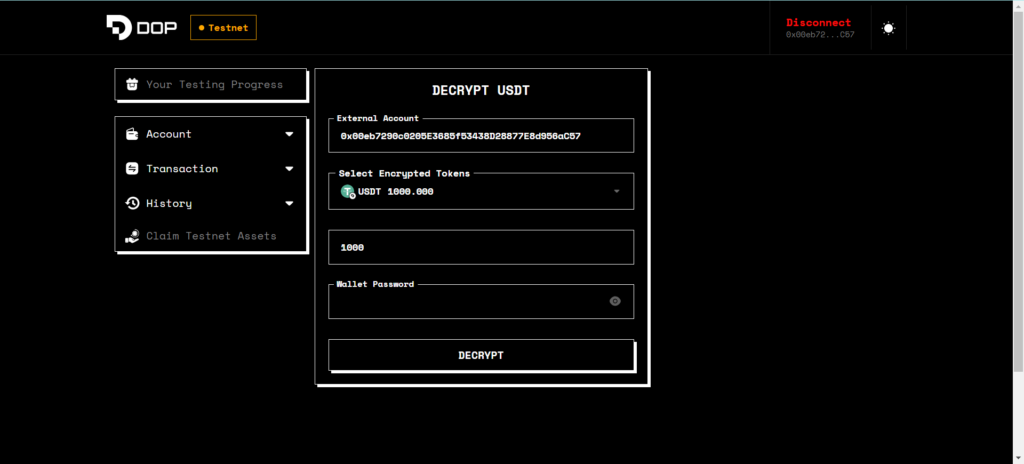
This time there’s a $26 fee for DOP. Sign the transaction in your wallet.
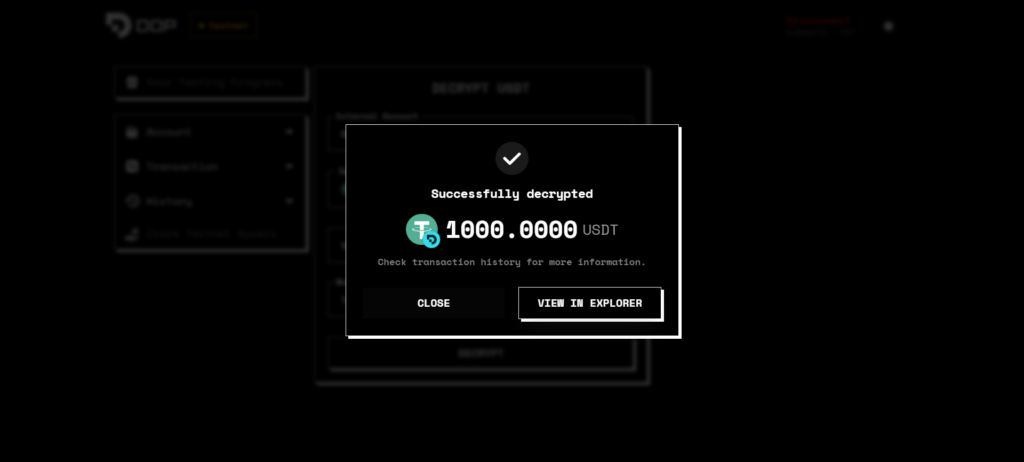
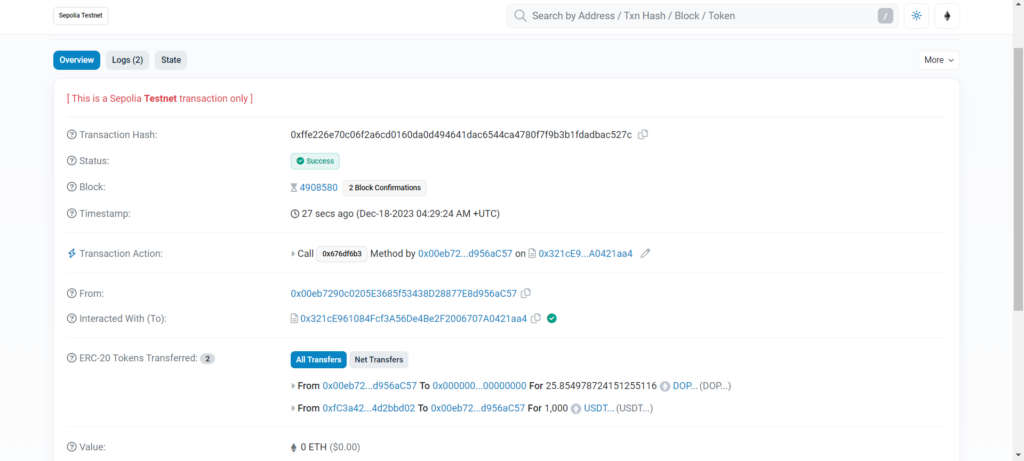
View it on the explorer.
Now you’re done. Congratulations.
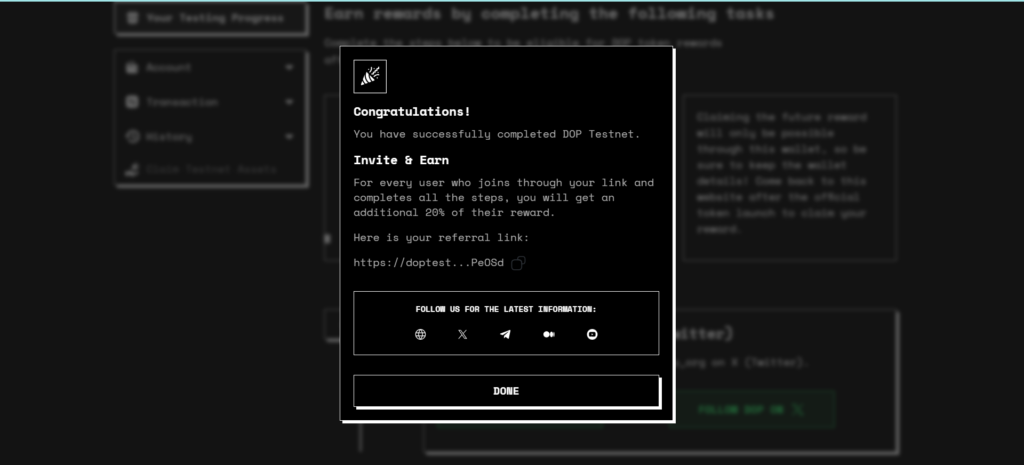
Don’t forget to send your feedback to DOP. Good or bad experiences, they want to hear it all. Use this email address [email protected].
Conclusion
We took an in-depth look at how to use the DOP testnet. Furthermore, completing all seven tasks makes you eligible for their airdrop. This will not take more than 20 to 30 minutes, from start to end. Once you complete the tasks, let DOP know about your experience.

Disclaimer
The information discussed by Altcoin Buzz is not financial advice. This is for educational, entertainment and informational purposes only. Any information or strategies are thoughts and opinions relevant to accepted levels of risk tolerance of the writer/reviewers, and their risk tolerance may be different from yours.
We are not responsible for any losses that you may incur as a result of any investments directly or indirectly related to the information provided. Bitcoin and other cryptocurrencies are high-risk investments, so please do your due diligence. This article has been sponsored by DOP.
Copyright Altcoin Buzz Pte Ltd.


