The rapid growth of the crypto industry means the emergence of many different blockchain networks. Each network focuses to overcome the pain points of Ethereum i.e high gas cost, speed, and scalability to a certain extent. With so many networks, interoperability has become the primary feature that any network should support. Bridges like the Optics Bridge are a big help towards that goal.
Bridge solutions support blockchain interoperability. These bridges allow users who hold assets on one network to transfer to some other network with ease. There is no doubt that both the projects as well as users have gained benefits from the development of bridges. The primary reason behind the invention of bridges is to take advantage of other existing networks.
With this view, we are writing a series of articles on different bridge solutions that allow users to transfer their assets from Ethereum to other networks. So, in continuation, we are going to cover another bridge application that will help you to migrate your tokens from Ethereum to the Celo network.
Table of Contents
Usage Guide
Users can use the Optics bridge solution to move between chains. The bridge is currently in the beta phase. So, we recommend our users take utmost care while connecting their wallets.
Optics Bridge
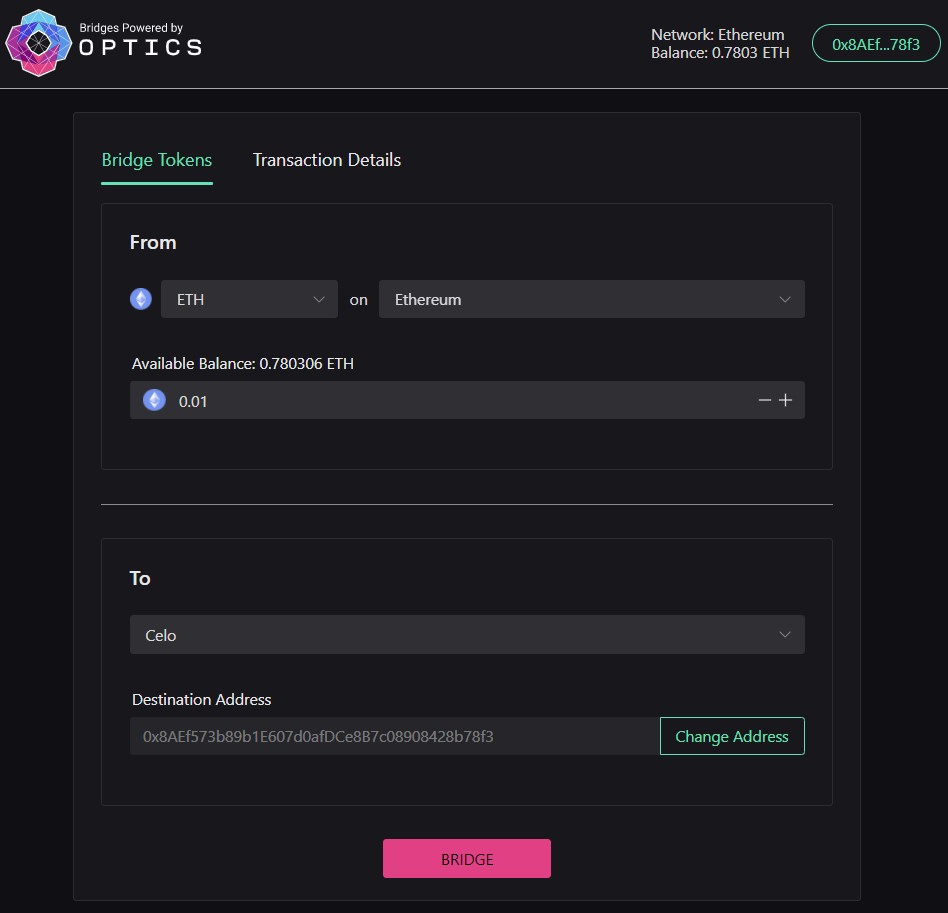
To use the bridge, visit the link. And connect your Metamask wallet (Ethereum network).
The bridge currently supports tokens CELO, WETH, ETH, DAI, SUSHI, USDC, USDT, and a few more. Users can use the same bridge to transfer tokens from Ethereum to the Polygon network.
In the From section, select the token and enter the amount that you wish to transfer.
In the To section, the destination address will automatically be filled as we have already connected our wallet earlier. You can choose the destination network here as Celo, or Polygon (if you wish to transfer to Polygon).
Once you have finalized the above details, click on the Bridge button.
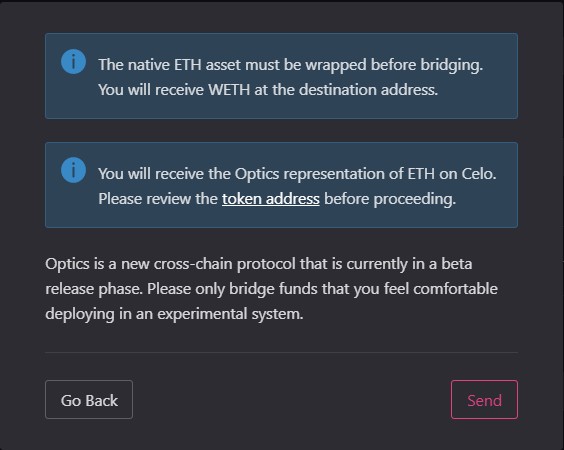
You will receive the following pop-up message.
The first message implies that they will wrap the selected ETH token and you will see WETH in the destination network with the given address instead of the ETH that you have transferred.
Also since you have used the Optics bridge solution, you will receive the Optics compatible address of the token in the Celo network.
You can click on the hyperlinked token address field (see above screenshot) to get the exact contract address of the resultant WETH token.
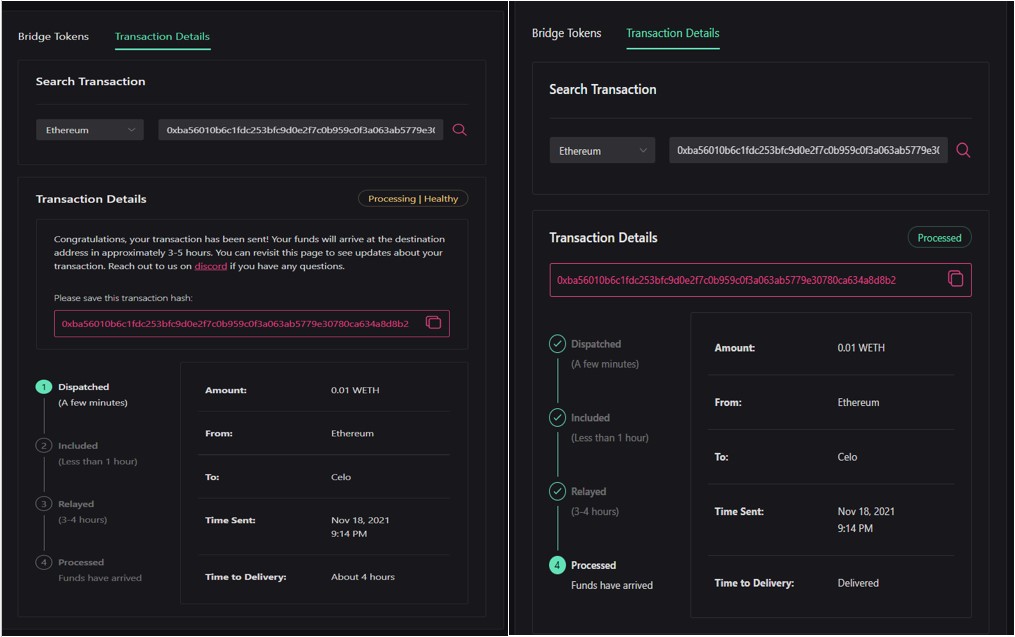
The entire transaction takes approx 4 hr to process which makes it slow as compared to other bridges. This disadvantage will bar users who immediately want to transfer their assets to Celo or Polygon.
Users can check the processing details from the Transaction tab.
Add Celo Network To Metamask
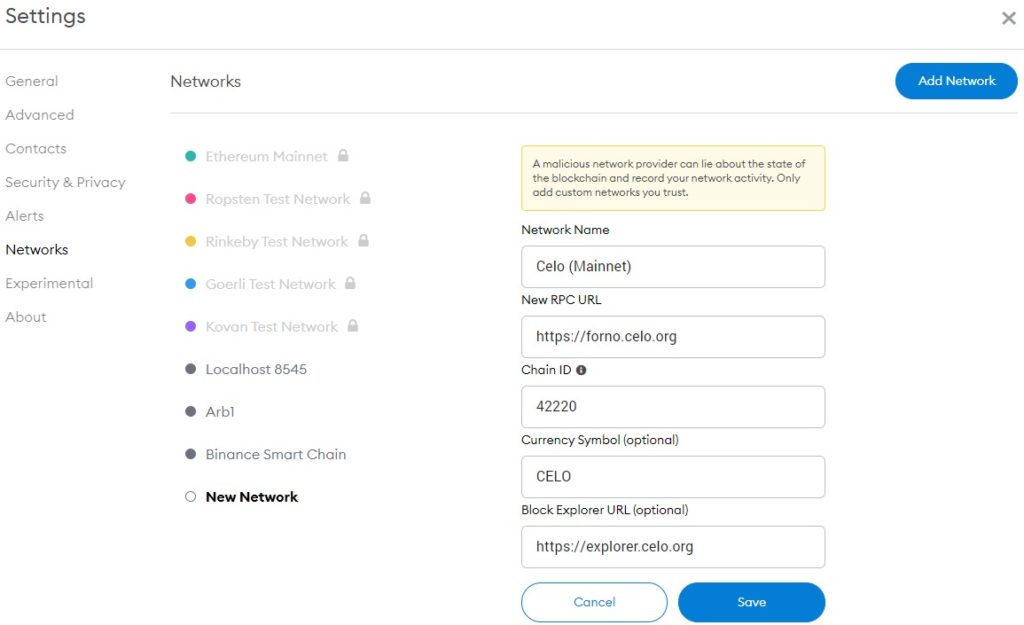
Use the below network details to manually add the Celo network to your Metamask wallet.
To add a network in Metamask, go to Setting-> Network. Then click on Add Network and fill in the following details there.
- Network Name- Celo (Mainnet)
- New RPC URL- https://forno.celo.org
- Chain ID- 42220
- Currency Symbol (Optional)- CELO
- Block Explorer URL (Optional)- https://explorer.celo.org
Finally, click on the Save button to save the network details.
Add Tokens In Metamask
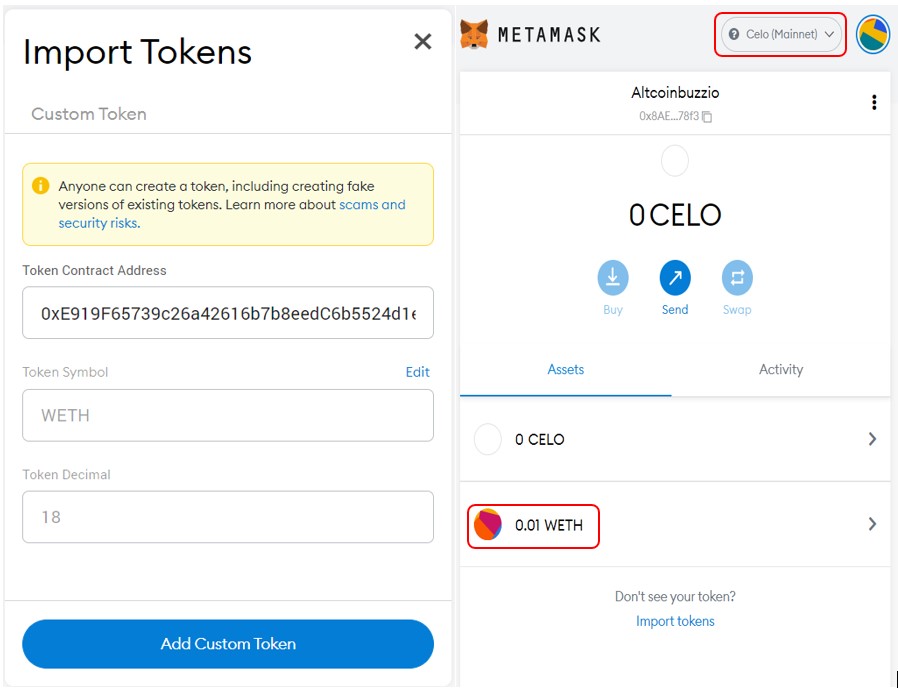
If you are not able to see the desired token in your Metamask wallet, then you have to add the token contract address manually.
To add the token, click on the Import Token option in Metamask and then enter the token contract address (see below screenshot).
Your tokens will now be visible in your wallet.
Finally, you can also see the following guides:
- How To Transfer ERC-20 Tokens To Solana Via Wormhole Bridge
- How To Transfer Tokens From Ethereum To NEAR Using Rainbow Bridge
Join us on Telegram to receive free trading signals.
For more cryptocurrency news, check out the Altcoin Buzz YouTube channel.


