


")


 Tokens Playing This P2E Game")
 Beta Testing and Review")
The Safe Haven team has announced the atomic swap feature (SafeSwap) of their native SHA token across multiple blockchains. The platform has requested their community members to thoroughly test and review the feature. The project is only allowing whitelisted members to participate in the testing process.
Users can perform the swap activity among the Ethereum, Binance Smart Chain (BSC), and VeChain networks. SafeSwap also allows you to perform the activity using multiple wallets like Venly, MetaMask, and Comet.
The project team has helped us with email whitelisting, testing SHA token, and an instruction manual that contains the important steps to test the feature.
So, in this article, we will explain in detail where you can get the test tokens for the different blockchains and how to perform atomic swaps on the supported networks.
Table of Contents
Prerequisite
Since we will work with three different blockchains, we are required to hold the platforms’ native tokens in the wallets to pay for the gas fees. For example, ETH for Ethereum, Binance Coin (BNB) for Binance Smart Chain, and VTHOR for Vechain network.
- Users can get the test ETH token from the faucet https://faucets.chain.link/rinkeby
- To get the test VTOR token, visit the Vechain faucet at https://faucet.vecha.in
- You can get the test Binance Coin from the link https://testnet.binance.org/faucet-smart
Safe Haven SafeSwap Beta Test
To begin the test, visit this link. We need to enter our email addresses. We have already said that the project team has helped us with the email whitelisting process.
Now click on the Send me a code button. A verification code will be sent to your email address. Enter the code on the login page to verify your identity.
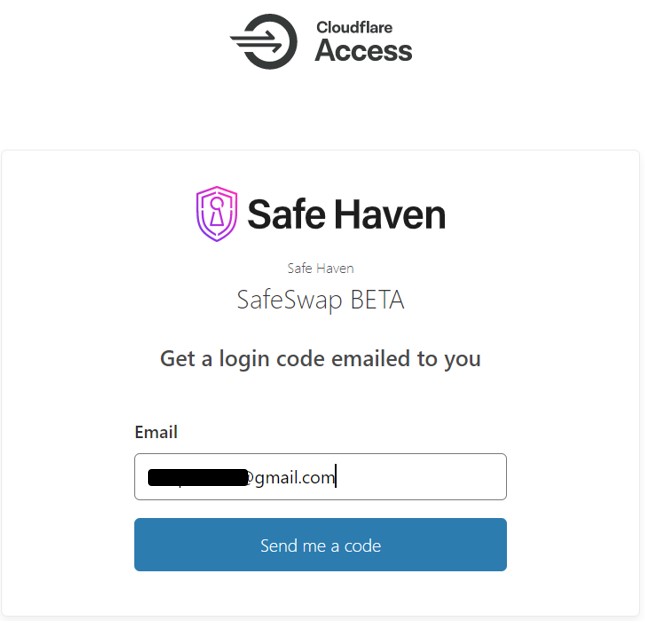
Once you have entered the correct code, you will see the below screen.
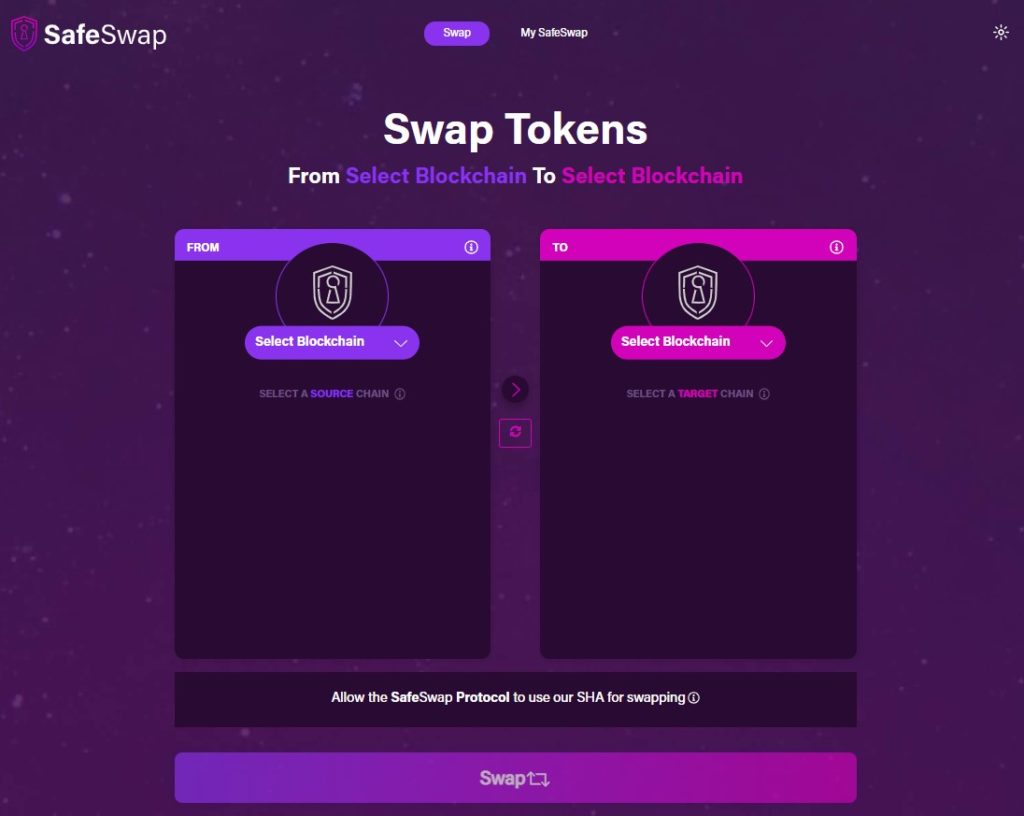
As you can see from the above screenshot, the landing page is divided into two sections, i.e., To and From. Users need to first select the source and destination network. Then they need to select the wallet with which they want to run the test.
Note that the connected wallet must contain a sufficient amount of native tokens to pay for the gas fees and the test SHA token.
Steps to Select Network and Connect Wallet
Below are the steps by which you can select the network (VeChain, BSC, and Ethereum) and connect your wallet.
We will run a series of tests for all possible combinations of networks and wallets to analyze the working of the swap feature. Each test will require you to choose your networks and wallets in the same manner.
For example, if you wish to run the test from the VeChain network to the Ethereum network using the Venly wallet, we will follow the below steps.
Select VeChain from the dropdown in the From section. Next click on the Connect wallet button. For VeChain, users can connect with Venly, MetaMask, Comet, and Binance Smart Chain wallets. We have selected the Venly wallet.
Check our guide on how to set up a Venly wallet here.
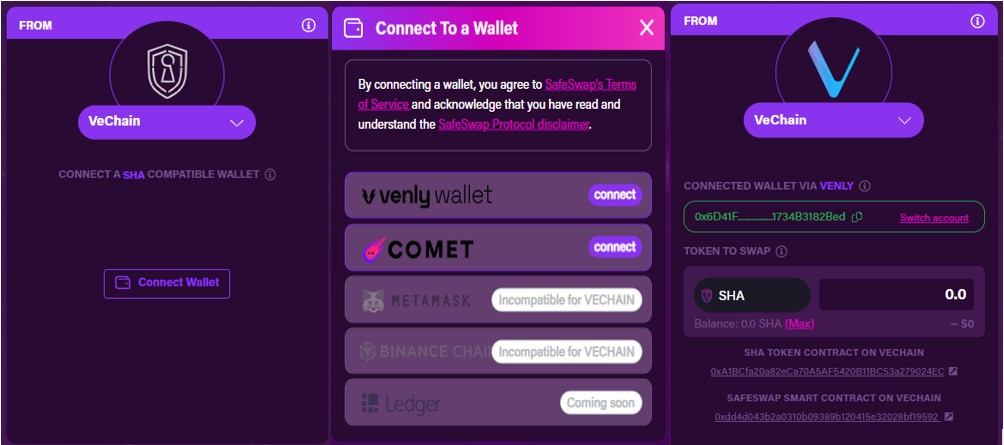
As you can see from the above screenshot, we have created and connected with a wallet account.
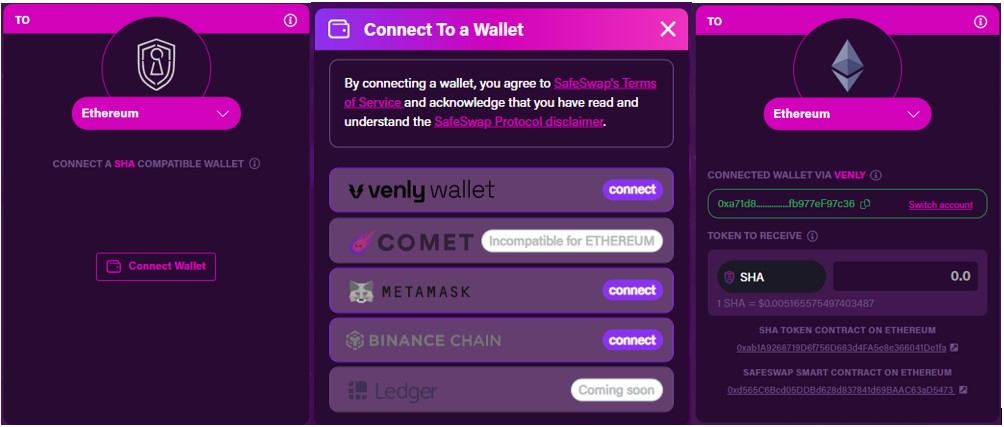
Next, select Ethereum from the dropdown in the To section. Click on Connect wallet and select the Venly wallet option. The Ethereum Venly wallet is created and connected.
Test 1: Vechain Venly Wallet to Ethereum MetaMask Wallet
Once you have selected the desired networks and wallet, enter the amount of SHA token that you wish to transfer to the destination network.
Now click on the Swap button.

Proceed with the steps. Once your swap is ready, you will get the below screen and need to click on the Create Swap button.
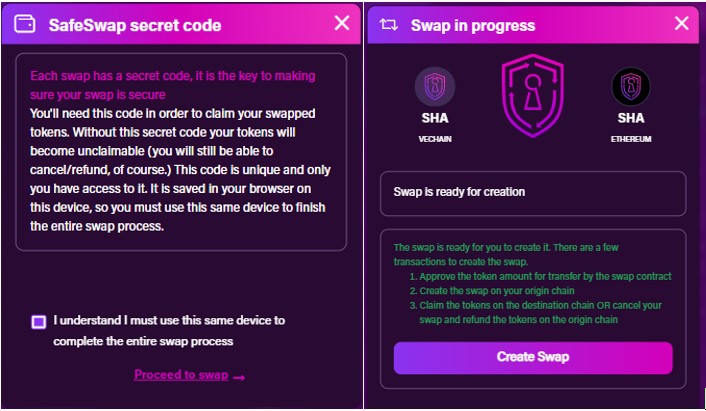
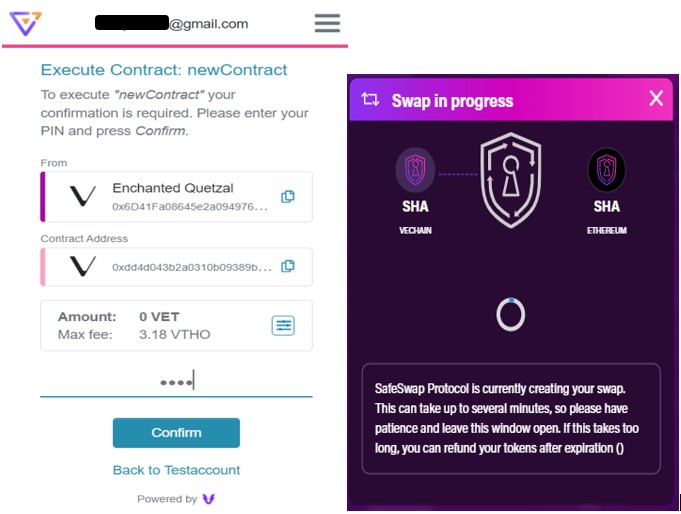
A transaction will be generated, and you need to confirm it by providing your wallet’s master pin.
After confirming the transaction, you will see that the swap activity is in process.
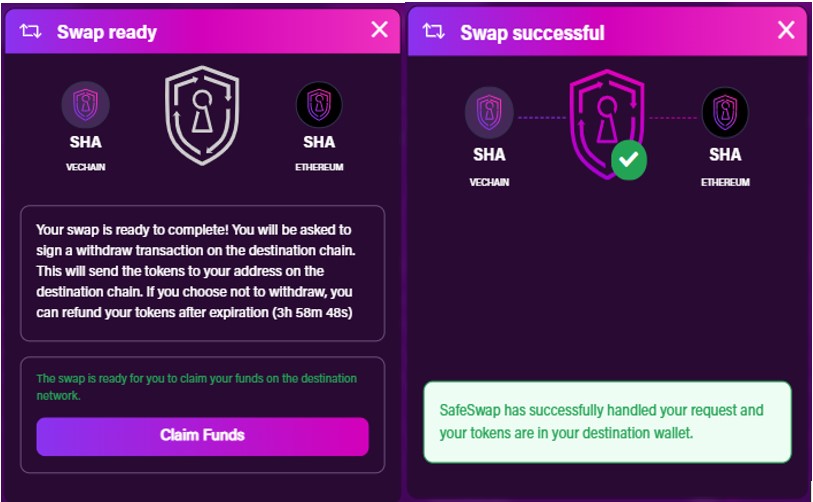
Once the swap is ready, you can withdraw your funds. To withdraw, click on the Claim Funds button.
If the claim is successful, you will get the below message on your screen.
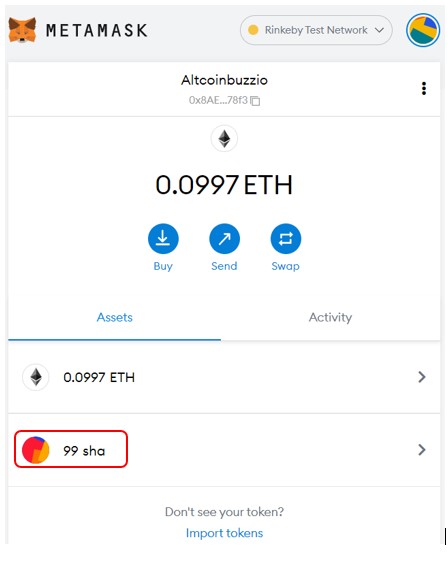
You can check the desired SHA token in the destination address.
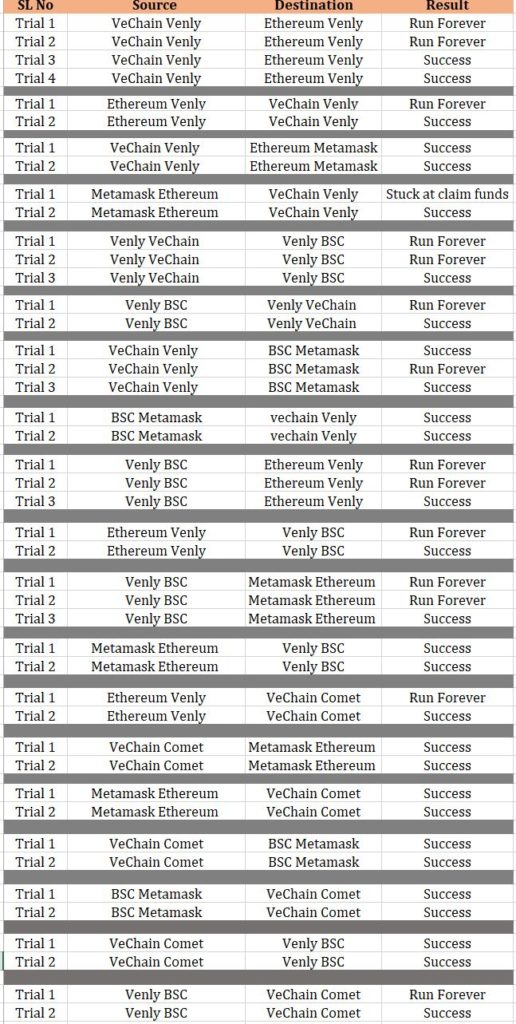
We will follow the same steps to test the swap activity with other network and wallet combinations.
Here are the test results for the different test scenarios.
Closing Thoughts
We have done extensive testing and have captured the results. We have found the use case is pretty impressive. However, there is still a lot of improvement that needs to be done. We have figured out that the swap activities between different networks with Venly wallet (source and destination wallet as Venly) weren’t going through well and were getting stuck at the swap protocol. The transfer between Venly, MetaMask, and Comet wallets with different networks was almost smooth. Once these small issues are rectified, the project can make big in the future.
Resources: Safe Haven Blog
Read More: How to Use the QuickSwap Platform


