


")


 Tokens Playing This P2E Game")

AtomicHub allows the users to create unique original NFTs. Using the AtomicHub’s NFT Creator feature, you can mint your atomic assets standard NFT. Users don’t need any coding knowledge. The process is pretty simple and can be done by following a few steps.
So, in this article, we will explain how you can start your journey with AtomicHub by creating NFTs.
You can also read our previous guide on how to use the AtomicHub, and WAX cloud Wallet.
Table of Contents
NFT Creator
To create an NFT, head towards the NFT Creator section. You can see the below page.
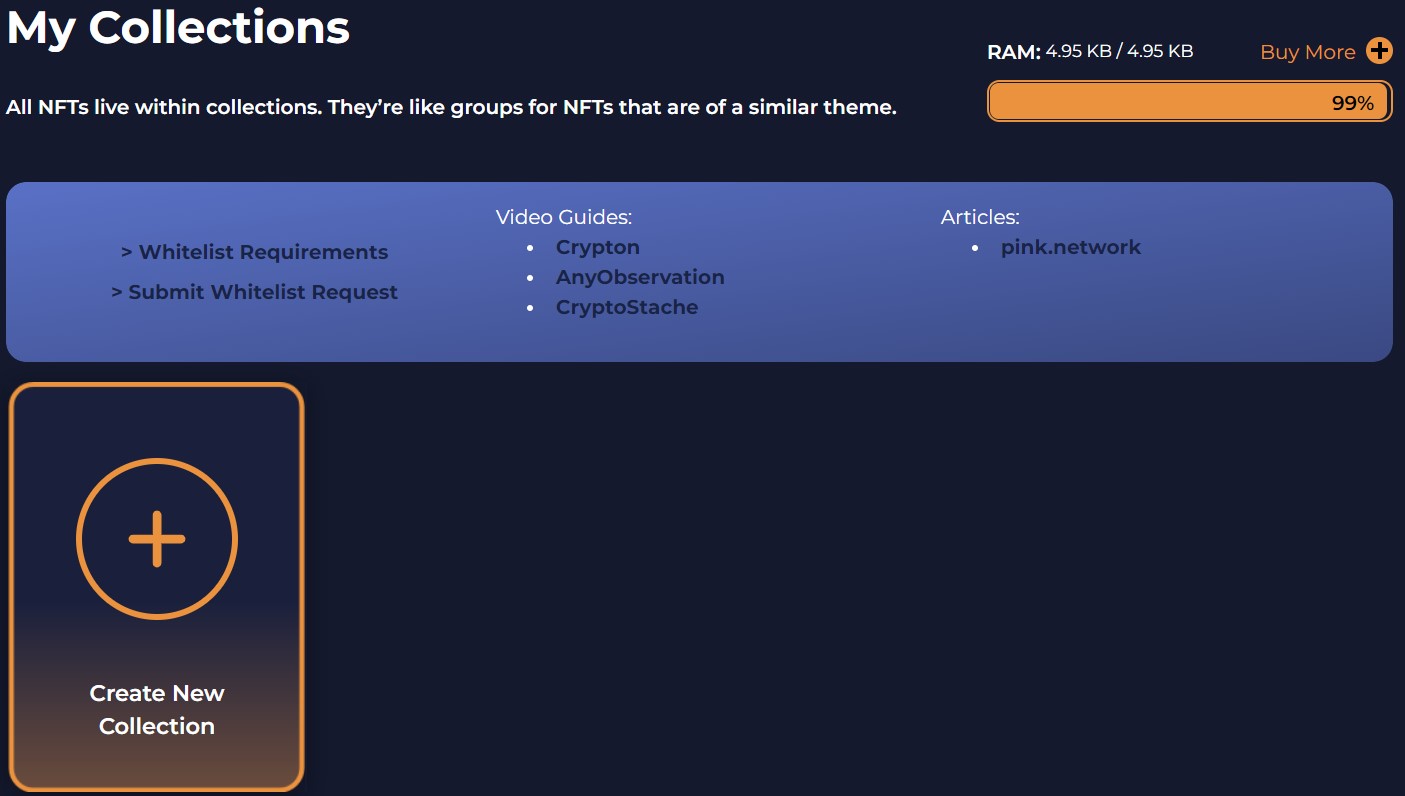
As you can see from the above screenshot, we have consumed almost 100% of our RAM resources.
We will buy some resources by giving some WAXP tokens.
Buy RAM
To Buy RAM, click on the Buy More link, and enter the amount of WAX token that you wish to spend on buying resources.
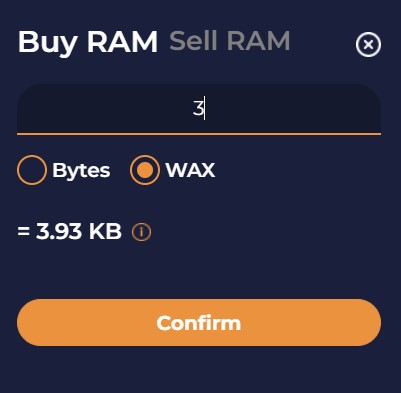
Confirm the process, and you will receive resources.
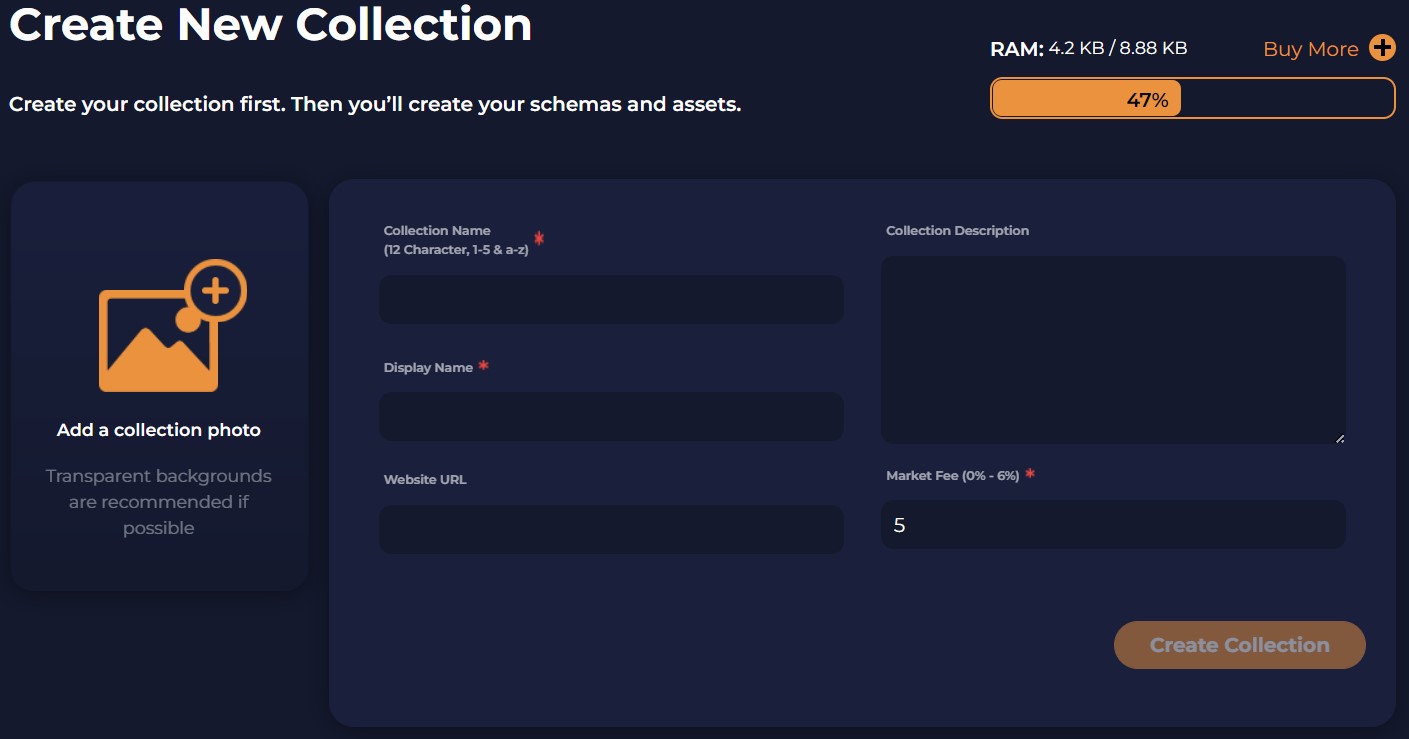
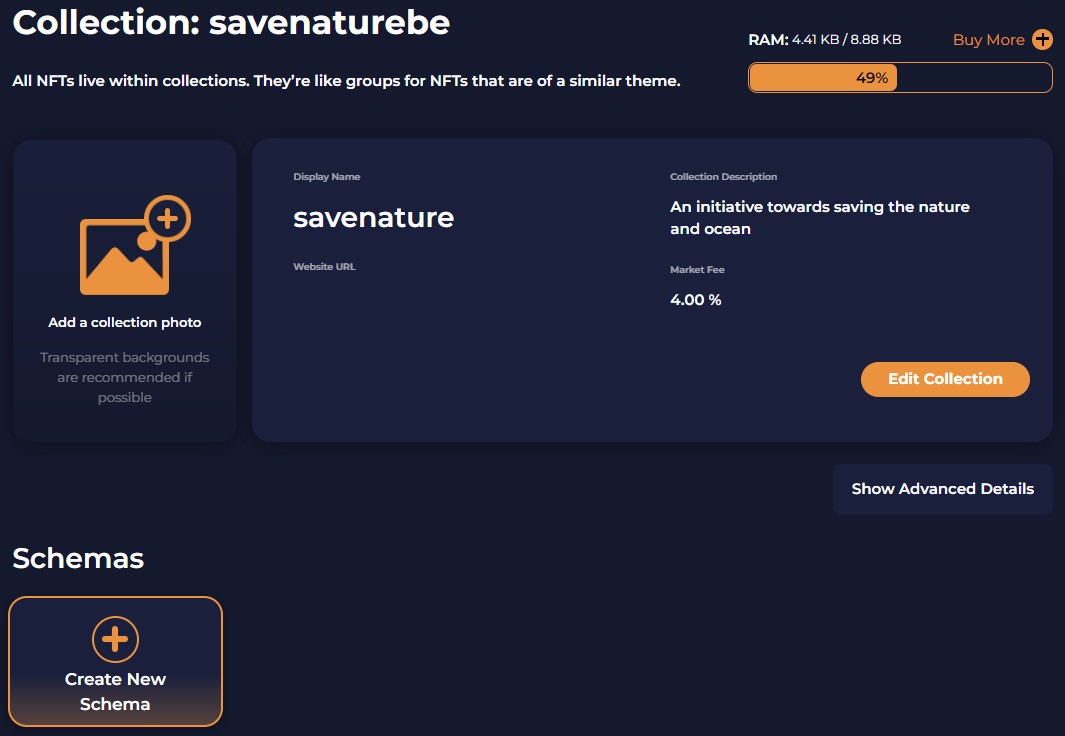
Step 1: Create Collection
Now that we have enough resources, we will start the process of creating an NFT. And the first step is to Create a New Collection.
You can think of a collection as a big box that can hold multiple things inside it.
To create a new collection, click on it. A page will appear where you need to enter the following details:
- Collection Name- Exactly 12 character long, 1-5 & a-z (no uppercase)
- Display Name
- Market Fee (0-6%)
- Website URL
- Collection Description
Note that the first three are mandatory fields. You can skip the rest if you want.
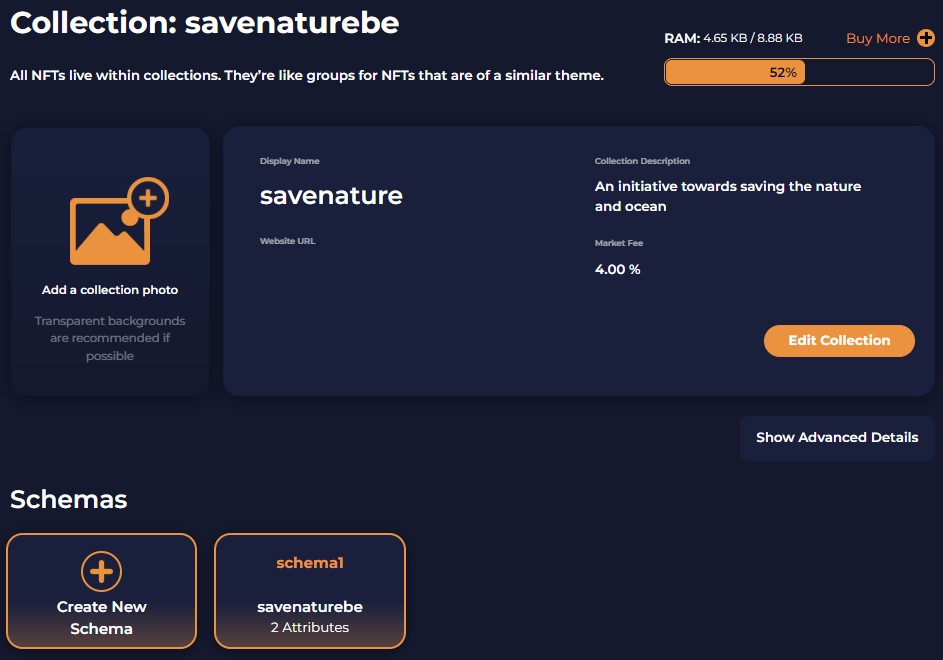
We have filled in the above details and confirmed the process. Once done, the collection will look like this.
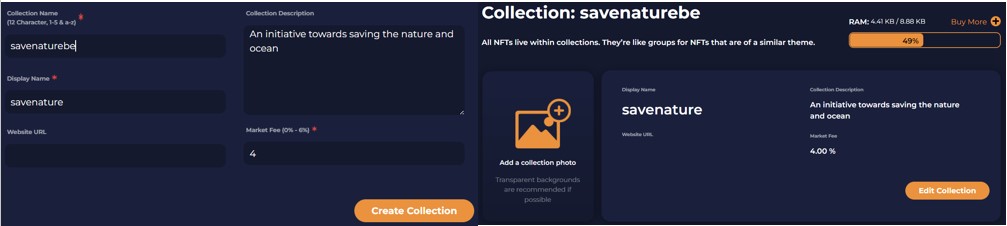
Note that you can always change the collection parameters in the future by going to the Edit Collection option.
Step 2: Create Schema
Open your collection, and you will find the Create Schema option at the bottom of the page.
Schemas define the attributes of an asset. Schemas are linked to a certain collection, and a collection may have more than one schemas.
Here you need to fill in the following details:
- Schema Name- Length can be less than 12, allowed characters (only a-z,1–5)
- Attribute Name and type
You will find two predefined Attributes with header names and images. Users can add more (now/ or in the future) attributes if they want by clicking on the Add New Attribute button.
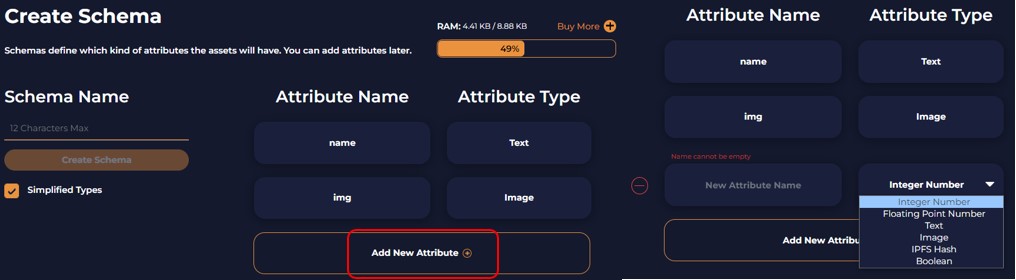
Confirm the process once you finalize the above fields. A transaction is triggered, and once done you can see the schema name under your collection.
Note that you can add attributes later if you want but you cannot remove any attribute that you have set at the time of creating the schema.
Step 3: Create A Template
Go inside your schema, you will find Mint New NFT and Create A Template option.
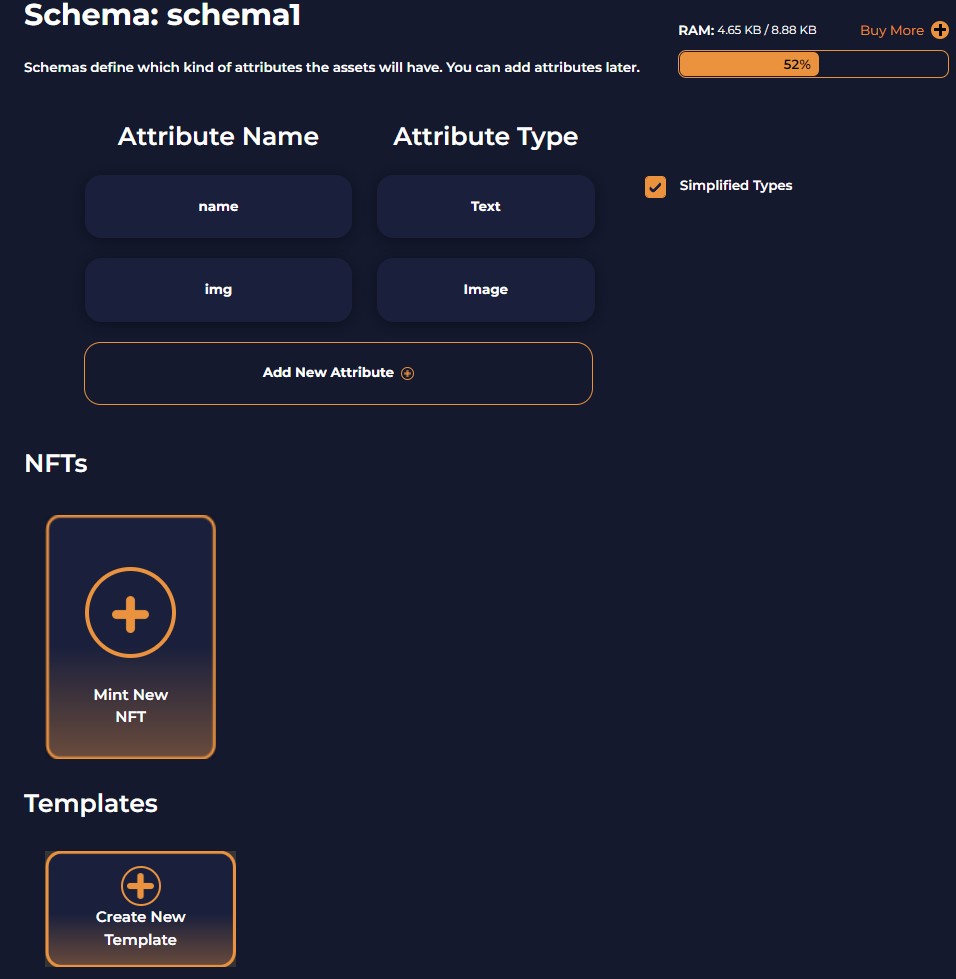
Templates belong to a particular schema, and a schema may have more than one template.
Templates help in saving your time and energy. You can define a few common parameters in the template. And while minting your NFT you can select a template and the underlying parameters will be applied automatically. So, it reduces your repetitive work.
However, it is not mandatory to create a template if you want to just create one NFT. You can perform this step if you are willing to create multiple NFTs. Else, skip this step.
We will anyway show this step in our guide. Click on the Create New Template option. At this step users need to fill in the following details:
- Add the image
- Set the Max Supply.
- Enable/disable the option for the assets to transfer
- Enable/disable the option for the assets to burn
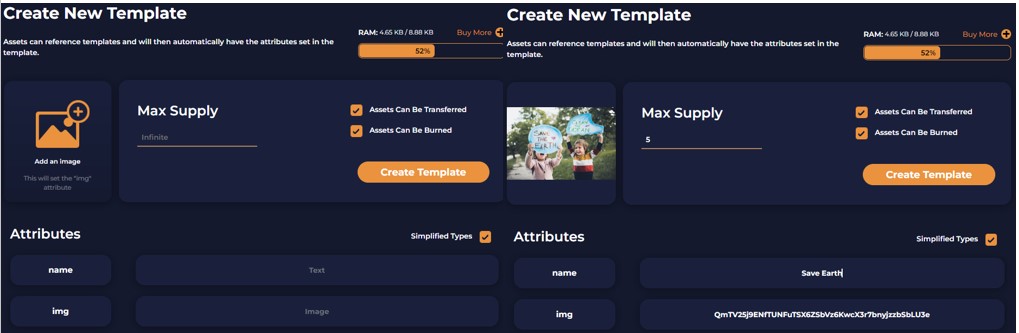
Confirm the process by clicking on the Create Template button. Once the process is done, you can see your template in the template section.
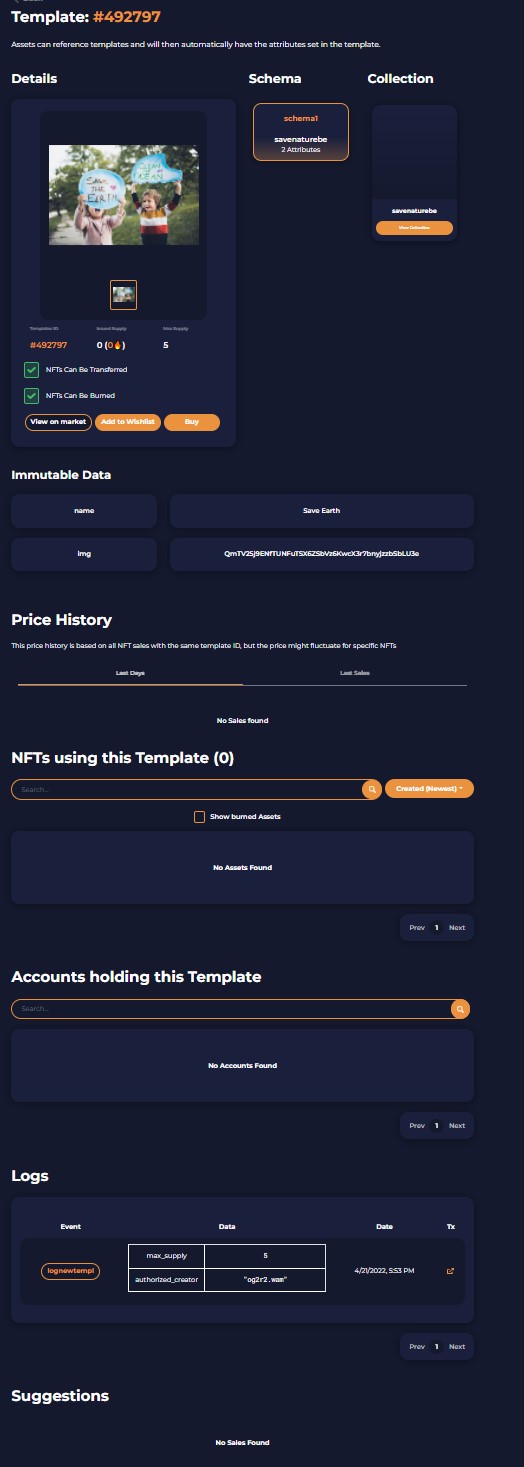
You can open your template to get more information about it like template ID, the underlying schema and collection, immutable attributes, logs, etc.
Step4: Mint NFT
To mint an NFT, go to the Schema page (as Mint NFT is under Schema and not under template)
You need to fill in the following details:
- NFT Owner (mandatory) – Automatically filled
- Number Of Copies (mandatory) – any number between 1-10. If you want to select a template, then your number of copies should be less than the max supply mentioned in the template
- Template (optional) – You can select your existing template from the dropdown
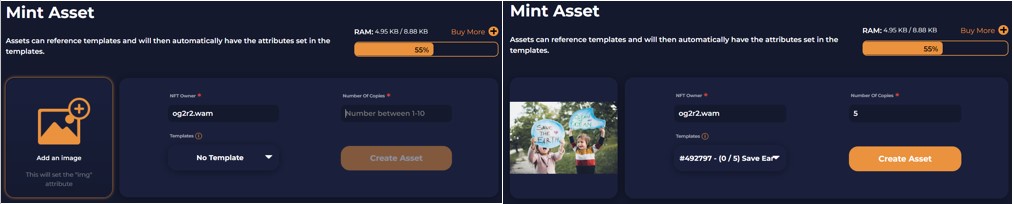
Once you have filled in the above details, click on Create Asset.
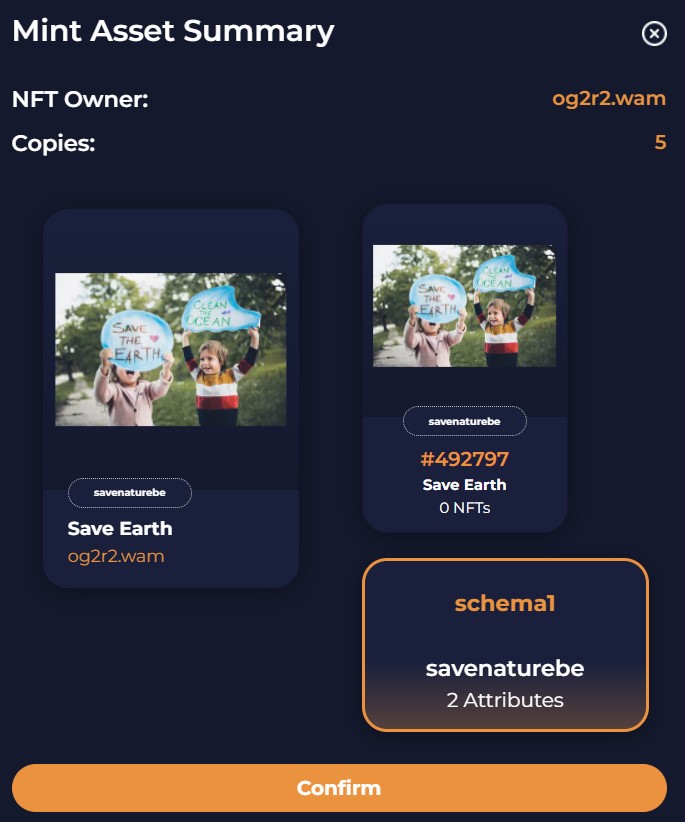
Verify the Mint summary and confirm the process.
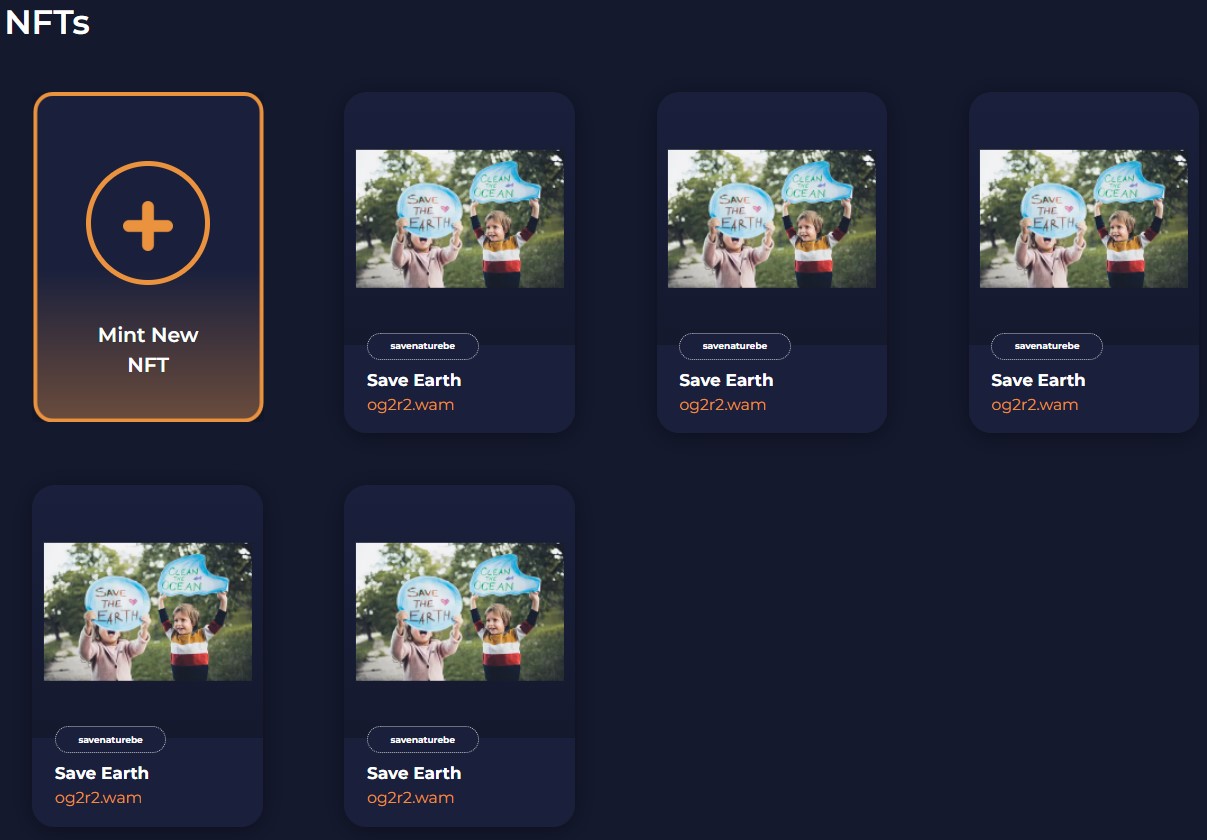
Once the transaction is done, you can find 5 copies (parameter set by us) of NFTs in the NFT section.
Note: To cover the process, we have copied the image from internet. But we recommend our users to use original image while creating an NFT. This will help in whitelisting and verifying your NFT.
Get $125 for SIGNING UP with MEXC Exchange (FREE $25 in your MEXC wallet + 1-month ALTCOIN BUZZ ACCESS PRO membership (worth $99). MEXC supports U.S. Traders in all trading pairs and services.
(To get your ALTCOIN BUZZ ACCESS PRO membership, DM us with your “newly signed up MEXC UID” and “Telegram ID” on our Twitter @altcoinbuzzio)
Moreover, find the most undervalued gems, up-to-date research, and NFT buys with Altcoin Buzz Access.
Above all, for more cryptocurrency news, check out the Altcoin Buzz YouTube channel.


