


")


 Tokens Playing This P2E Game")

Trust Wallet is a mobile wallet application that allows users to send/receive, swap, buy, exchange, and stake their crypto assets. Users can store their Ethereum (ERC721 and ERC1155) and BSC (BEP721 and BEP1155) collectibles in their wallets. It also offers a fully functioning Web3 browser, which users can use to interact with multiple decentralized applications (dApps). The wallet currently provides support to 65 blockchains and 4.5M+ assets. The application is available for both Android and Apple devices.
In this article, we will cover how you can install and use the Trust Wallet. In the next part, we will explain how you can stake a BNB coin from your Trust Wallet.
Table of Contents
Install Trust Wallet Application (Android Mobile)
To install the application, visit the Google Play store and search for the Trust Wallet application.
Note: While installing any application from the Google Play store, always check the app rating and the number of downloads it has. This will help in checking the authenticity of the application.
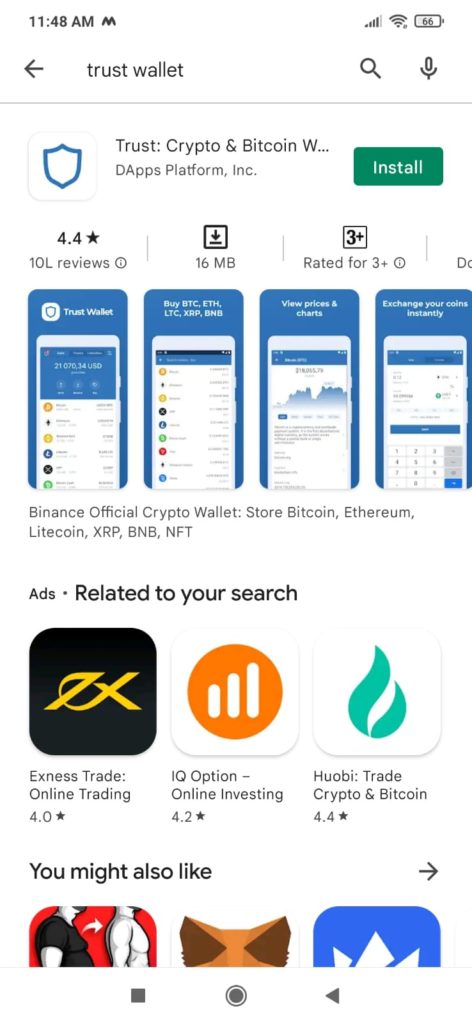
Click on Install, and the application will be downloaded to your mobile phone.
Set up Trust Wallet
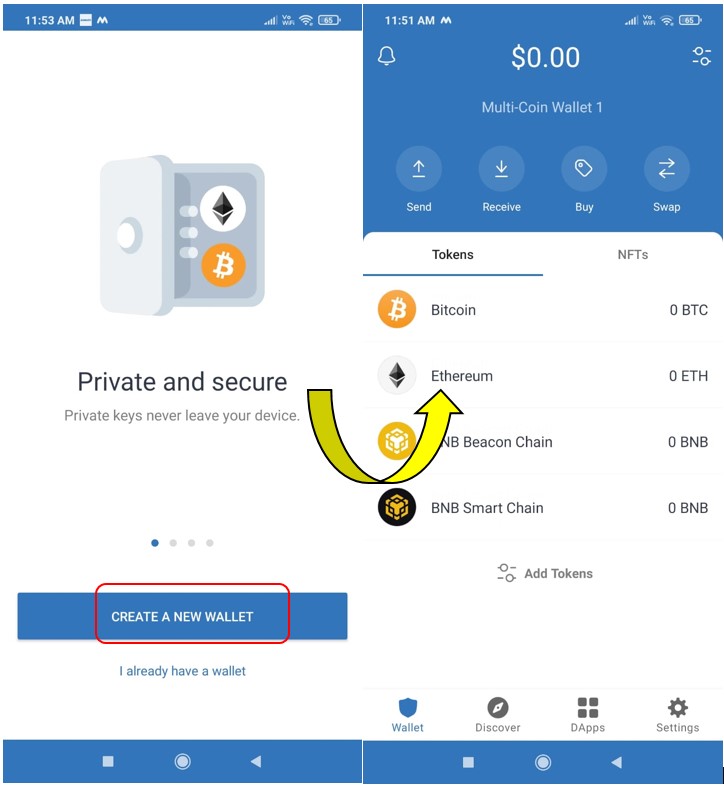
Launch the application to see the various setup options. The Trust Wallet offers the below options by which you can set up your account:
- Create a New Wallet
- I Already Have a Wallet
Use the first option if you are a new Trust Wallet user and want to create a brand new account.
The second option will let you import an existing account by giving the key phrase.
Create a New Wallet
New users can create a wallet by selecting this option. The application will ask to set up the wallet’s password. Once the password is set, it will show you the backup phrase and ask you to verify the key phrase.
Once verified correctly, your wallet will be created and you can see the landing page.
Note: Store your wallet’s key phrase (12-word or 24-word) safely. Your key phrase can help in recovering your assets if you lose your device. If you lose the key phrase, you won’t be able to recover your funds.
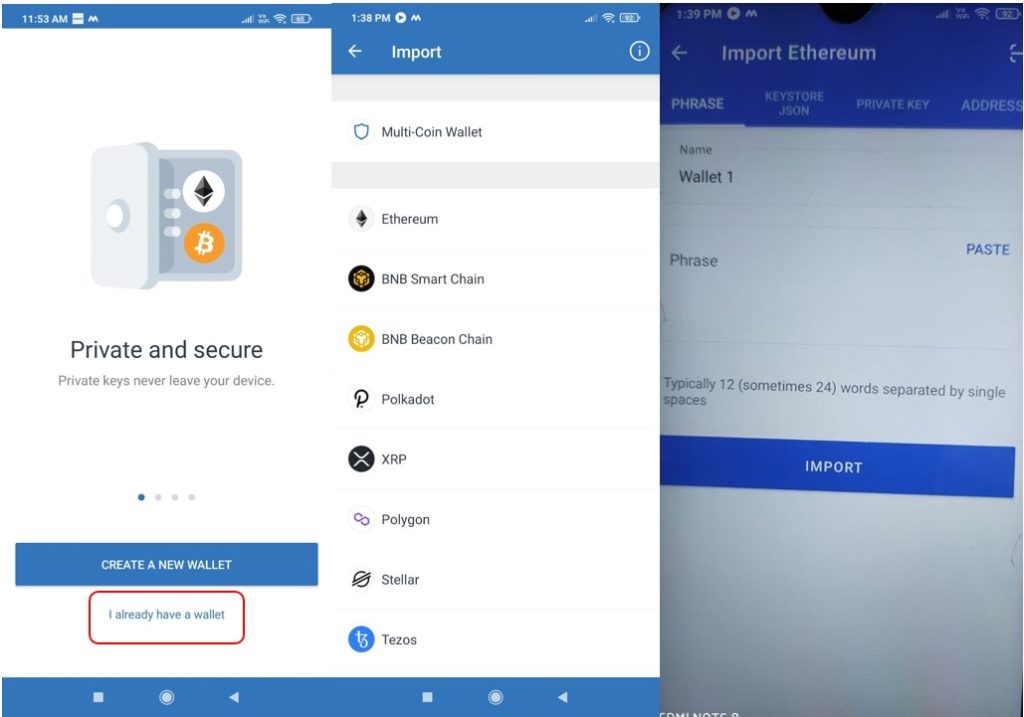
Restore Wallet
The restore wallet option can help you in setting up an existing account on some other device.
To restore, click on the I Already Have a Wallet option once you launch the application after installation.
Now, since the Trust Wallet is a multi-chain wallet, the application will ask you to select the network. Let’s suppose we have selected Ethereum as a network. You will now get the below different options by which you can import your account:
- Backup Phrase (12-word or 24-word)
- JSON File
- Private Key
- Address
Select your preferred option and enter the details correctly. Once done, you can see your existing assets.
Send
The send option allows the user to transfer assets to other addresses.
To send, first select the coin/token that you wish to transfer. Expand the details, and you will find the Send button. Click on it and fill in the following details:
- Recipient address
- Amount to transfer
- Memo (optional)
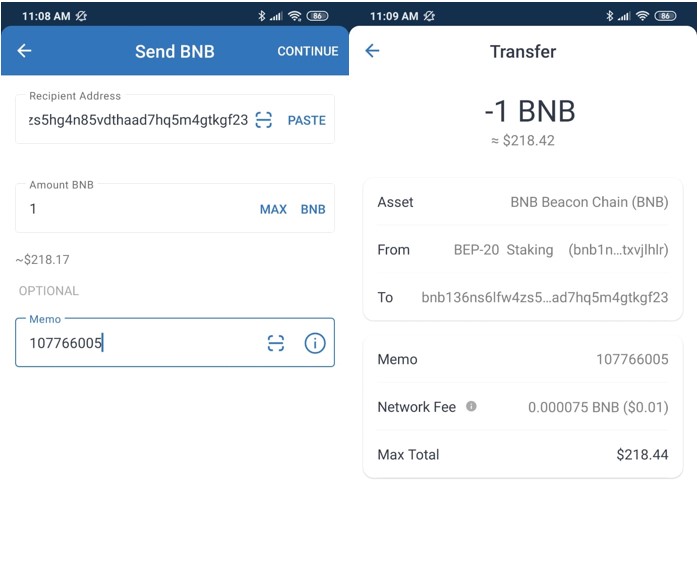
Once you have filled in all the above details, click on Continue to finally review and confirm the process.
Receive
To receive tokens in your wallet, you need the receiving/public address. Trust Wallet is a multi-chain, multi-asset wallet. To receive any token in your wallet, first select the token and open its detailed information. Here, you can find the Receive button. Click on this button to get the address or the QR code.
Note that the address is specific to the token and network. If you use this address to receive any other token, you may lose your funds.
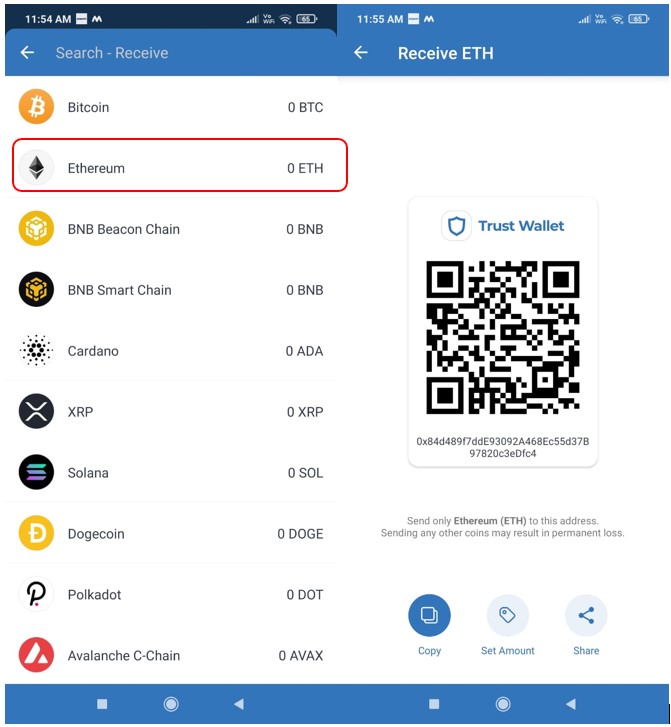
You can follow the same steps to get the receiving address of other tokens.
Buy
The Trust Wallet allows the users to buy assets from their wallet interface. The buying facility is supported by a third-party service provider (MoonPay, Simplex, Transak, Ramp, Binance Connect).
To buy, select the token first. Next, enter the amount that you wish to spend on buying assets. Here, you can check the rate of different service providers and select your preferred one.

Select the currency and confirm the process. You will now be redirected to the service provider’s portal where you need to go through a KYC process if you are using the portal for the first time.
Once your KYC is done, you can proceed with the final payment, and the token will be deposited in your account.
Swap
The swap option let you swap one asset with another. To swap, you need to select the source asset that you want to give in exchange for the asset that you need. Enter the amount for the source asset, and the application will show you the amount of the output token that you will receive in return.
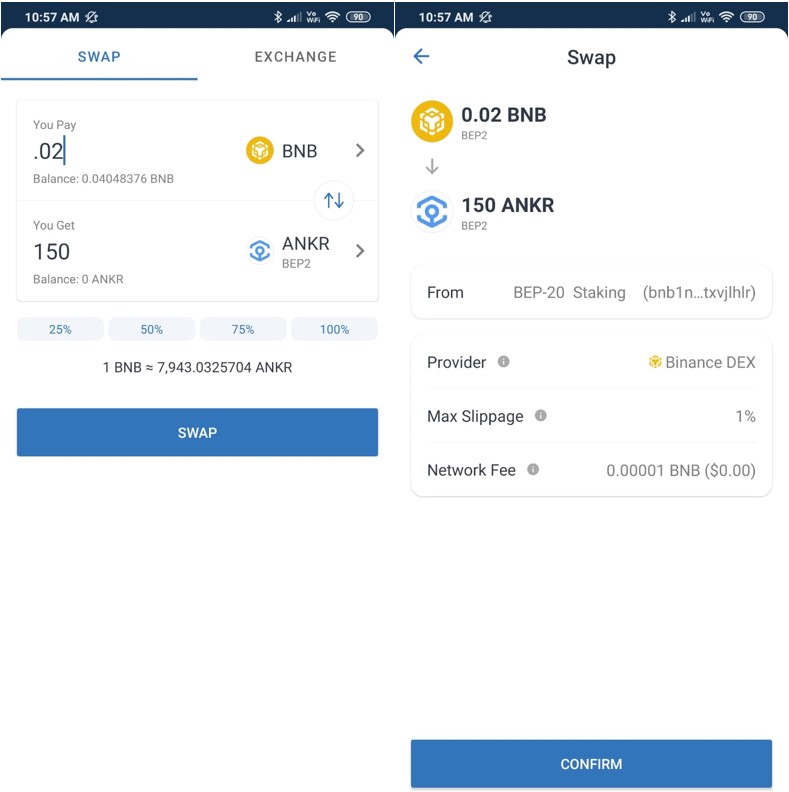
Confirm the process. You can see the desired output token in your wallet once the transaction is successful.
Exchange
The Trust Wallet’s exchange option allows you to connect with Binance DEX and let you place orders (buy/sell) like a traditional crypto exchange. Currently, the exchange feature is only available for BNB to BEP2 tokens trading. Therefore, when you check for the available markets, you will find only the BNB market is present.
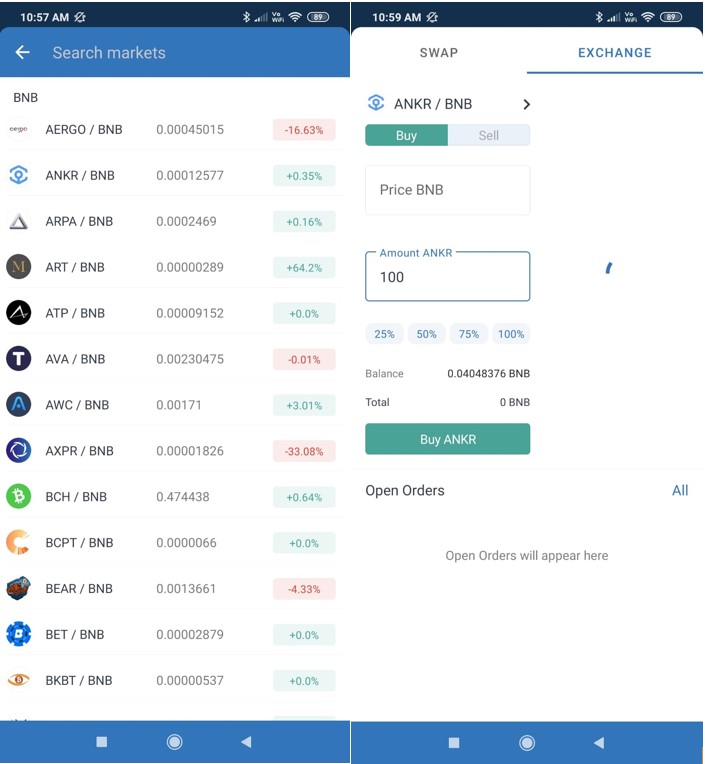
You can select the trading pair from the Market section and place a buy/sell order.
Add Token
By default, you can see a few coins/tokens on your Trust Wallet page. If you want to add more tokens, then go to the Add Token option and toggle the button against the desired token to see it on your landing page.
Follow the steps shown in the below screenshot to add the token.
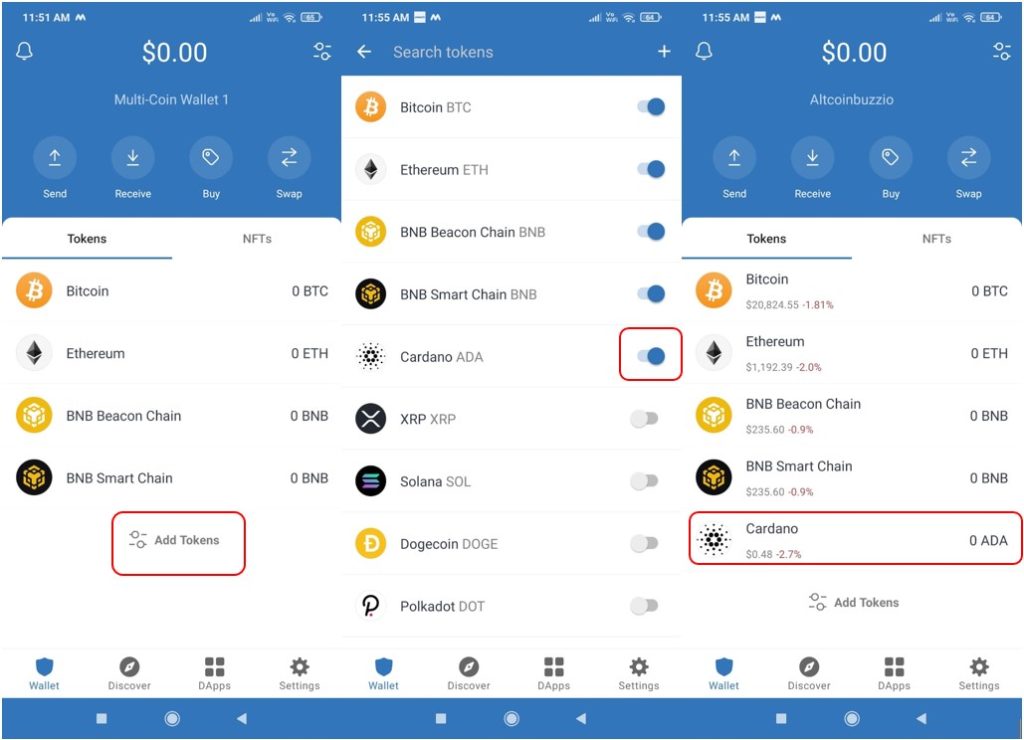
You can follow the same steps in reverse to disable a coin, and it will no longer be visible on your wallet’s landing page.
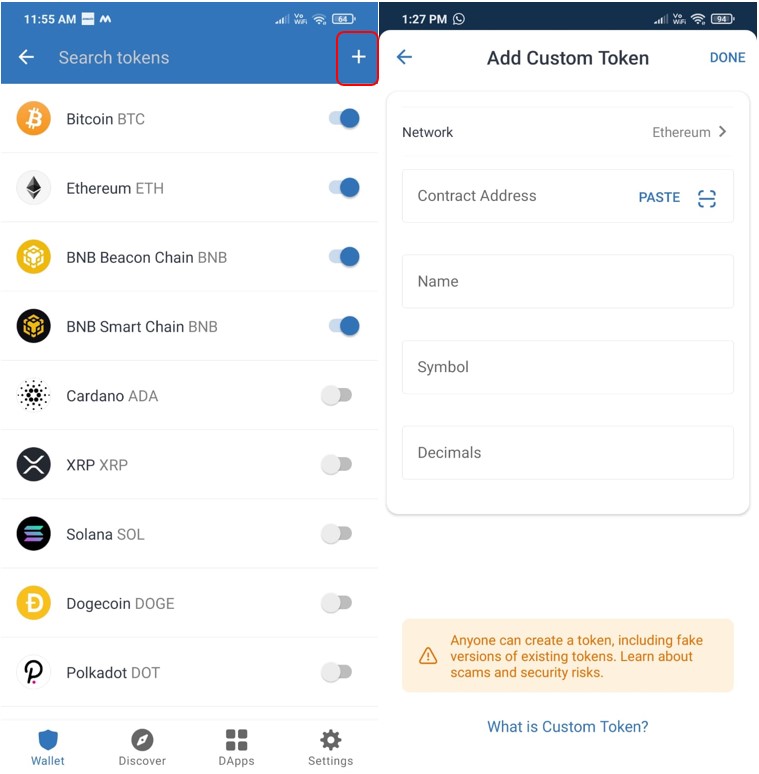
Add Custom Token
Sometimes it happens that you (or someone else) have transferred a token but it is not appearing on your account. In that situation, you can add it by going to the Add Custom Token section. To add a token manually, you need to provide the following details:
- Token Contract Address
- Name
- Symbol
- Decimal
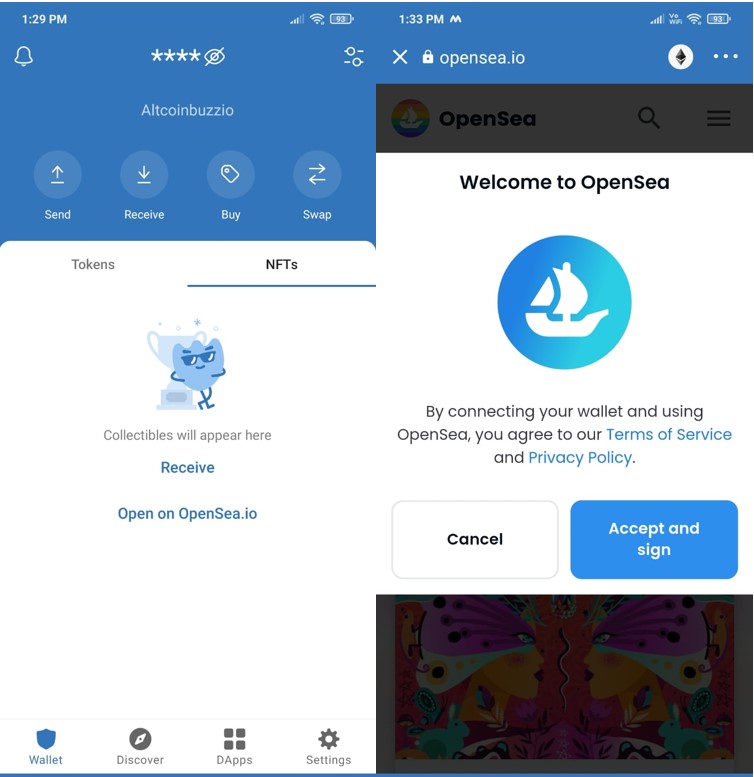
NFTs
Trust Wallet allows users to store their NFTs in their wallet accounts. Users can currently store their collectibles on the Ethereum (ERC721, ERC1155) and BSC (BEP721 and BEP1155) networks on their wallets.
To receive an NFT in your Trust Wallet account, click on the Receive button appearing on the wallet interface in the NFT section. This will display an address that you can use to transfer your collectibles. You can also access your OpenSea account from the wallet interface.
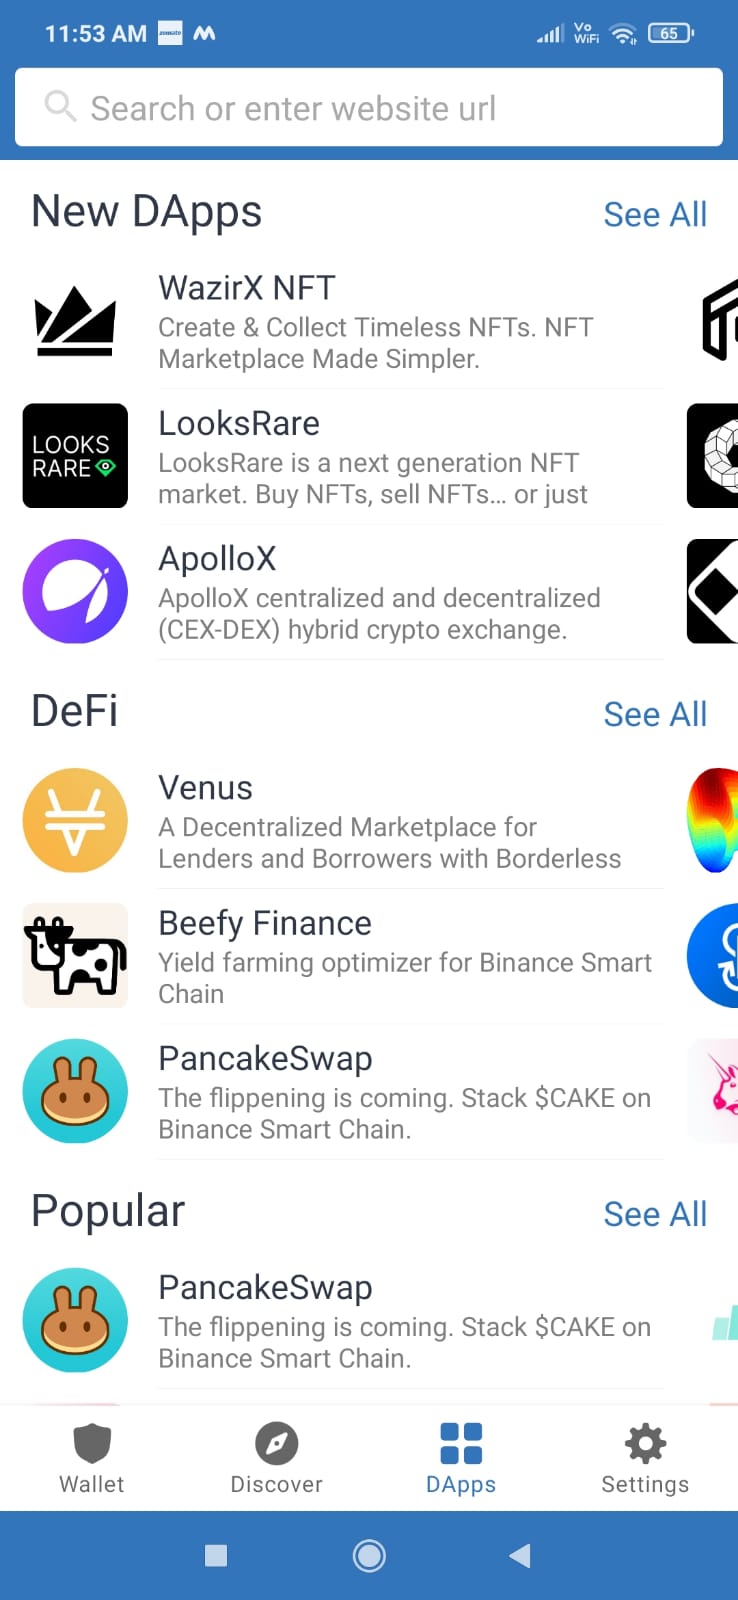
dApps
From this tab, you can check the list of all the dApps that you can connect to using your Trust Wallet. Applications are further categorized into various sections like DeFi, yield farming, games, exchanges, marketplaces, social, utility, staking, etc. for easy accessibility. You can select any dApps and connect your Trust Wallet account and use it.
Now, suppose if you wish to access PancakeSwap, select that dApp from the dApps tab. It will first ask your permission to connect the wallet with the PancakeSwap platform. Once you provide the approval, you will be redirected to the PancakeSwap platform with your Trust Wallet account connected.
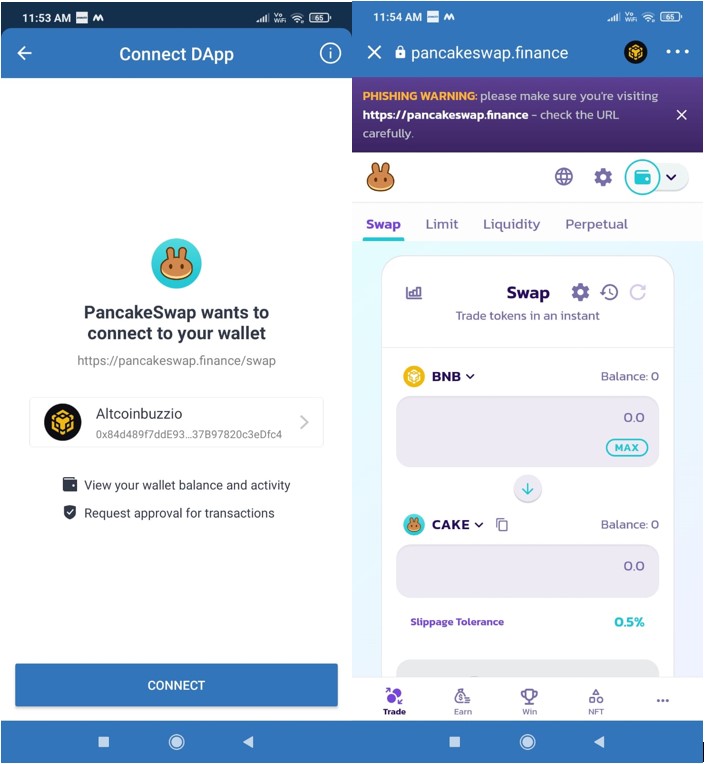
Users can now use the platform to swap, add/remove liquidity, etc.
In the next part of this article series, we will explain how you can stake your BNB coin from your Trust Wallet.
⬆️Also, for more cryptocurrency news, check out the Altcoin Buzz YouTube channel.
⬆️Above all, find the most undervalued gems, up-to-date research, and NFT buys with Altcoin Buzz Access. Join us for $99 per month now.


